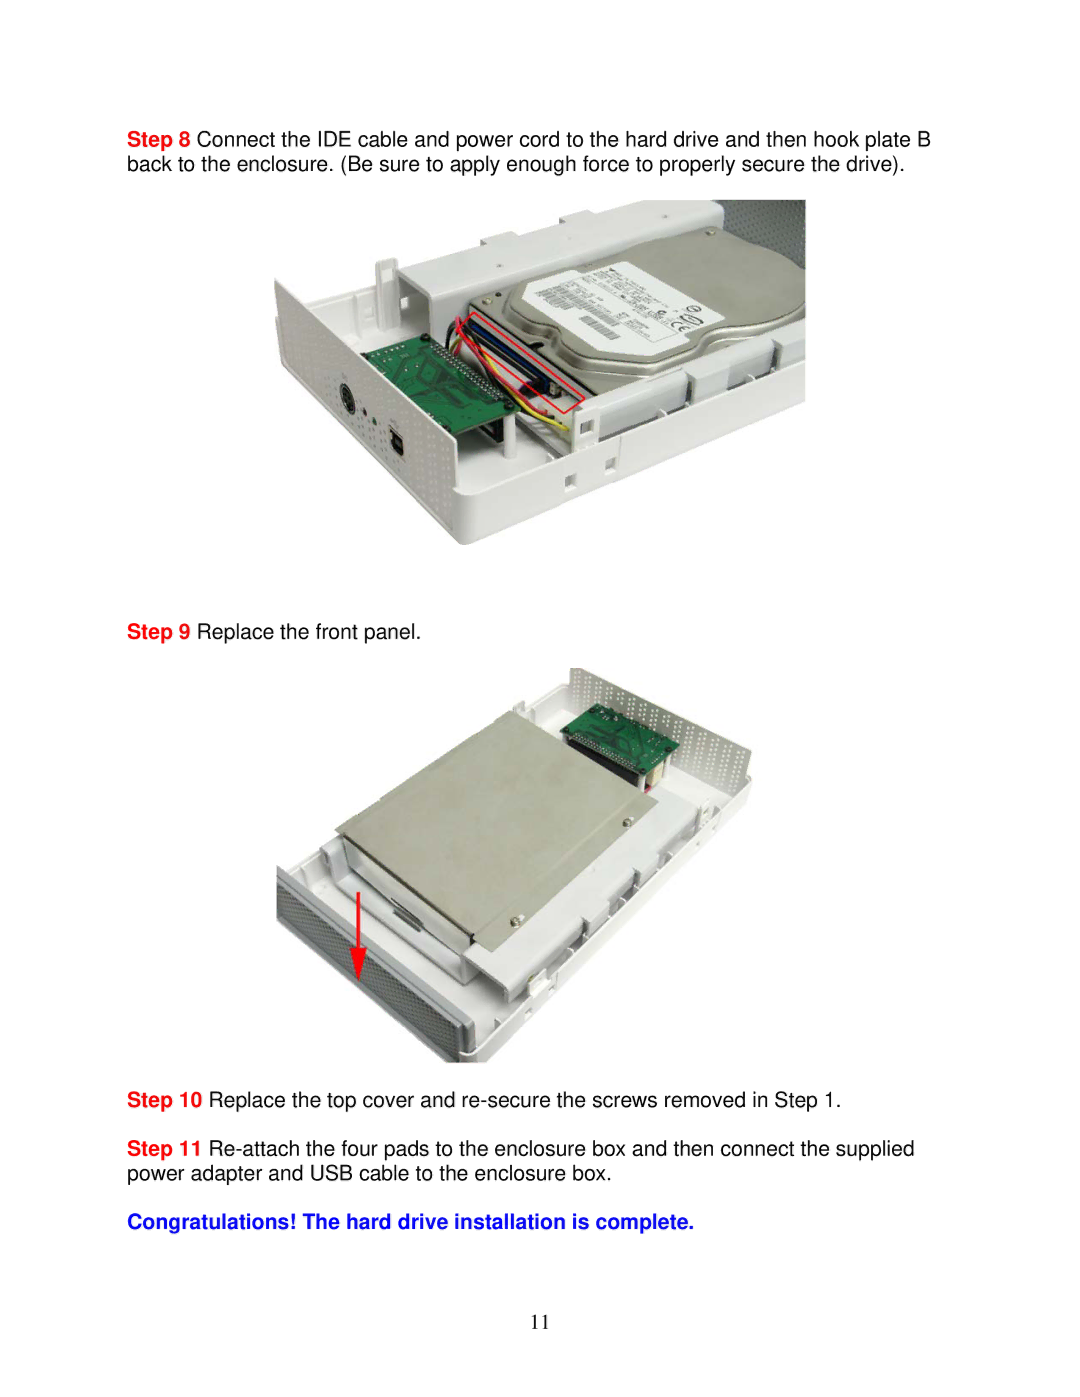
Step 8 Connect the IDE cable and power cord to the hard drive and then hook plate B back to the enclosure. (Be sure to apply enough force to properly secure the drive).
Step 9 Replace the front panel.
Step 10 Replace the top cover and
Step 11
Congratulations! The hard drive installation is complete.
11