Manuals
/
Airlink101
/
Computer Equipment
/
Network Card
Airlink101
AWLL6090
user manual
Configuring 802.1x authentication for corporate networks
Models:
AWLL6090
1
27
40
40
Download
40 pages
5.03 Kb
24
25
26
27
28
29
30
31
Install
Wireless 300N USB Adapter
Configuring the Adapter
Wi-Fi Protected Setup WPS
Profile Settings
Appendix a Features
Page 27
Image 27
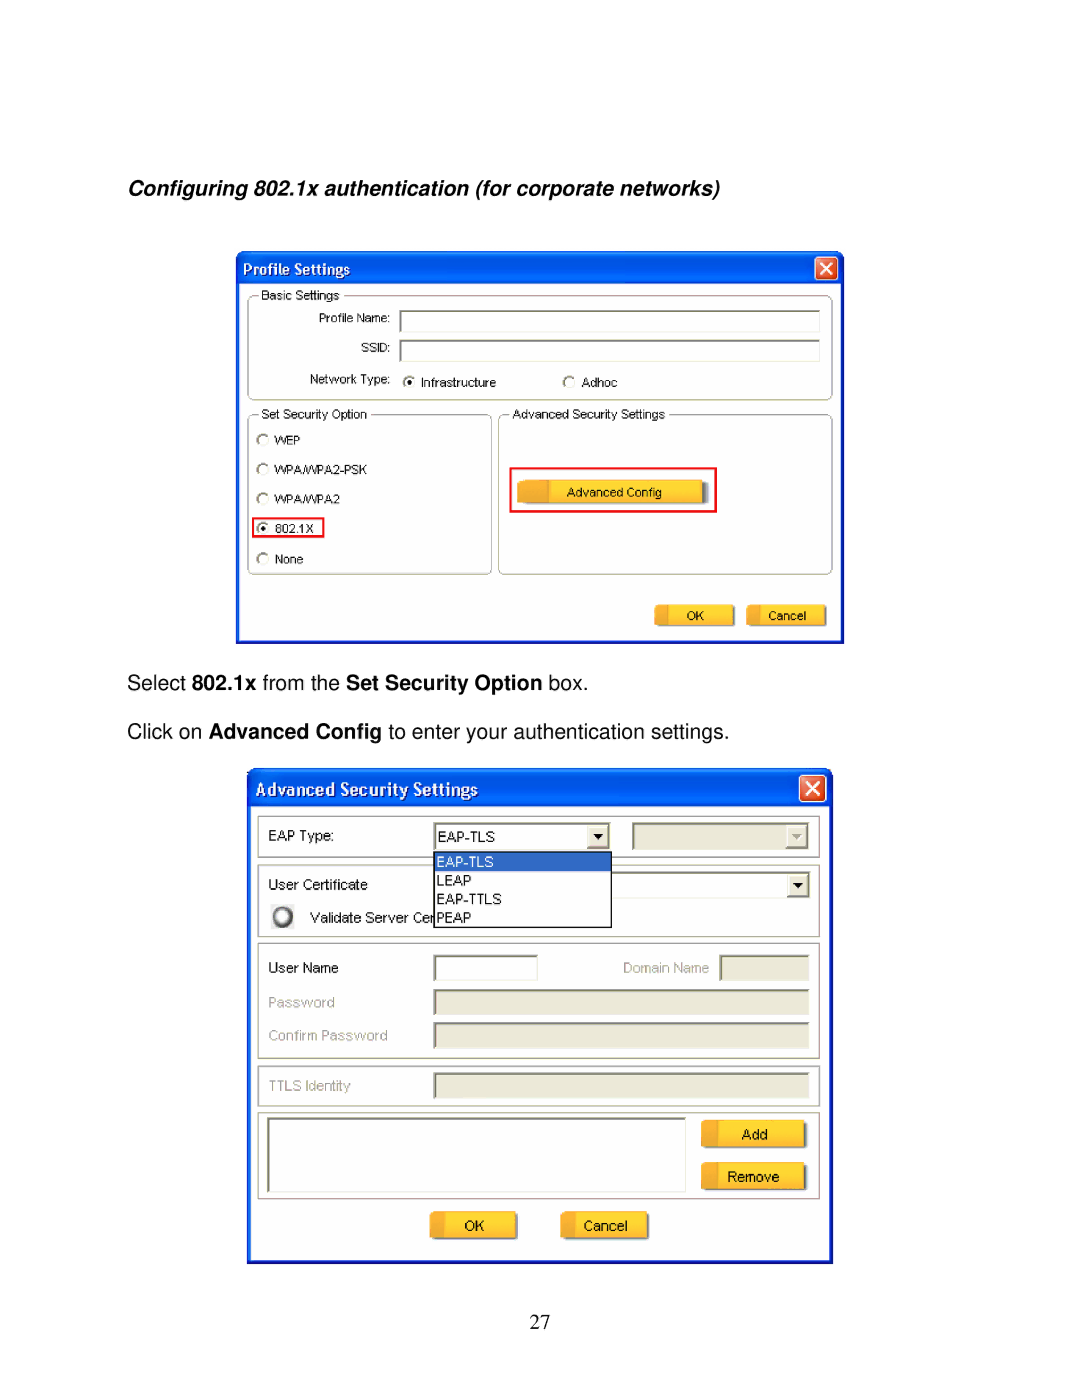
Configuring 802.1x authentication (for corporate networks)
Select
802.1x
from the
Set Security Option
box.
Click on
Advanced Config
to enter your authentication settings.
27
Page 26
Page 28
Page 27
Image 27
Page 26
Page 28
Contents
Wireless 300N USB Adapter
Table of Contents
Package Contents
Features
Introduction
Installation
Page
Page
Page
Page
Select Install the software automatically and click Next
Page
Click Finish
Configuring the Adapter
Page
Page
Page
Page
Page
Wireless Information
Wireless Monitor
AP List
Profile Settings
Page
Click on Profile Settings then New
Configuring Encryption
Page
Configuring WEP encryption
Select WPA/WPA2-PSK from the Set Security Option box
Configuring WPA/WPA2-PSK Encryption for home users
Select WPA/WPA2 from the Set Security Option box
Configuring WPA/WPA2 Encryption for corporate networks
Select 802.1x from the Set Security Option box
Configuring 802.1x authentication for corporate networks
Ad-hoc and Peer-to-Peer Wireless Networks
Open the Wireless Monitor
Page
Wi-Fi Protected Setup WPS
Page
Page
Page
Click Finish on the WPS Connection screen
About
Appendix a Features
Appendix B Information
Federal Communication Commission Interference Statement
FCC Radiation Exposure Statement
IC Radiation Exposure Statement
Industry Canada Statement
Mailsupport@airlink101.com
Technical Support
Top
Page
Image
Contents