REMOTE CONTROL BASICS

Before you can operate the remote control, you must first install the batteries (included). See “Changing the Batteries” on this page above for instructions. (For an illustration, please see page 6.)

Press the POWER button to turn the television on or off.

Make sure the TV/CATV switch is set to TV. Move the switch to

CATV only if you need to operate a cable box.

Slide the VCR/DVD selector switch to VCR to control a VCR, slide to DVD to control a DVD player. Please see pages 8 to 10 for instructions on programming your remote control to operate a Cable box, VCR or DVD player.

Press the CH + and CH – buttons to scan through the channels. Tap the CH + or CH – button to move through the channels one channel at a time.

Press VOL + or VOL – to raise or lower the volume. An indicator bar will appear onscreen to show you the television volume level.

The CH +/– and VOL +/– buttons are also used to navigate JVC’s onscreen menu system.

You can directly access specific channels using the 10-key pad.

This remote includes illuminated buttons for key features like CH +/– buttons, and VOL +/– buttons. Press the LIGHT button to turn the illumination on.

BATTERY PRECAUTIONS

The precautions below should be followed when using batteries in this device:

1.Use only the size and type of batteries specified.

2.Be sure to follow the correct polarity when installing the batteries as indicated in the battery compartment. Reversed batteries may cause damage to the device. To avoid a potential short circuit, insert the “–” end first.

3.Do not mix different types of batteries together (e.g. Alkaline and Carbon-zinc) or old batteries with fresh ones.

4.If the device is not to be used for a long period of time, remove the batteries to prevent damage or injury from possible battery leakage.

5.Do not try to recharge batteries not intended to be recharged; they can overheat and rupture. (Follow battery manufacturer’s directions.)

6.When you change the batteries, try to complete the task within three minutes. If you take longer than three minutes, the remote control codes for your Cable Box may have to be reset (see page 8).

EFFECTIVE DISTANCE OF THE REMOTE CONTROL TRANSMITTER

CHANGING THE BATTERIES

Push down on the remote’s back cover and slide towards the bottom to remove it.

Insert two AA batteries (supplied), carefully noting the “+” and “–” markings on the batteries and on the remote control. To avoid a potential short circuit, insert the “–” end first.

Be sure to use only size AA batteries.

When batteries are installed, slide the cover back into place (until it clicks into position).

If the remote control acts erratically, replace the batteries. Typical battery life is six months to one year. We recommend using alkaline batteries for longer battery life.

When you change the batteries, try to complete the task within three minutes. If you take longer than three minutes, the remote control codes for your VCR, DVD, and/or Cable Box may have to be reset (pages 8-10).

15 FEET

30˚

30˚

NOTES: • When there is an obstacle between the TV and the transmitter, the transmitter may not operate.

When direct sunlight, an incandescent lamp, fluorescent lamp or any other strong light shines on the Remote sensor of the TV, the remote operation may be unstable.

7

Page 7
Image 7
Aiwa AV-14F703 manual Remote Control Basics, Battery Precautions, Changing the Batteries, Feet

AV-14F703 specifications

The Aiwa AV-14F703 is a remarkable addition to the realm of audio and visual technology, showcasing a blend of advanced features and user-friendly design. Known for its impressive sound quality and innovative attributes, the AV-14F703 has garnered attention from both audiophiles and casual listeners alike.

One of the standout features of the Aiwa AV-14F703 is its powerful audio performance, characterized by a robust output that delivers crystal-clear sound across various genres. The device comes equipped with advanced sound processing technology, enabling it to handle complex audio signals with ease. Whether you’re listening to music, watching movies, or playing video games, the sound remains balanced and immersive.

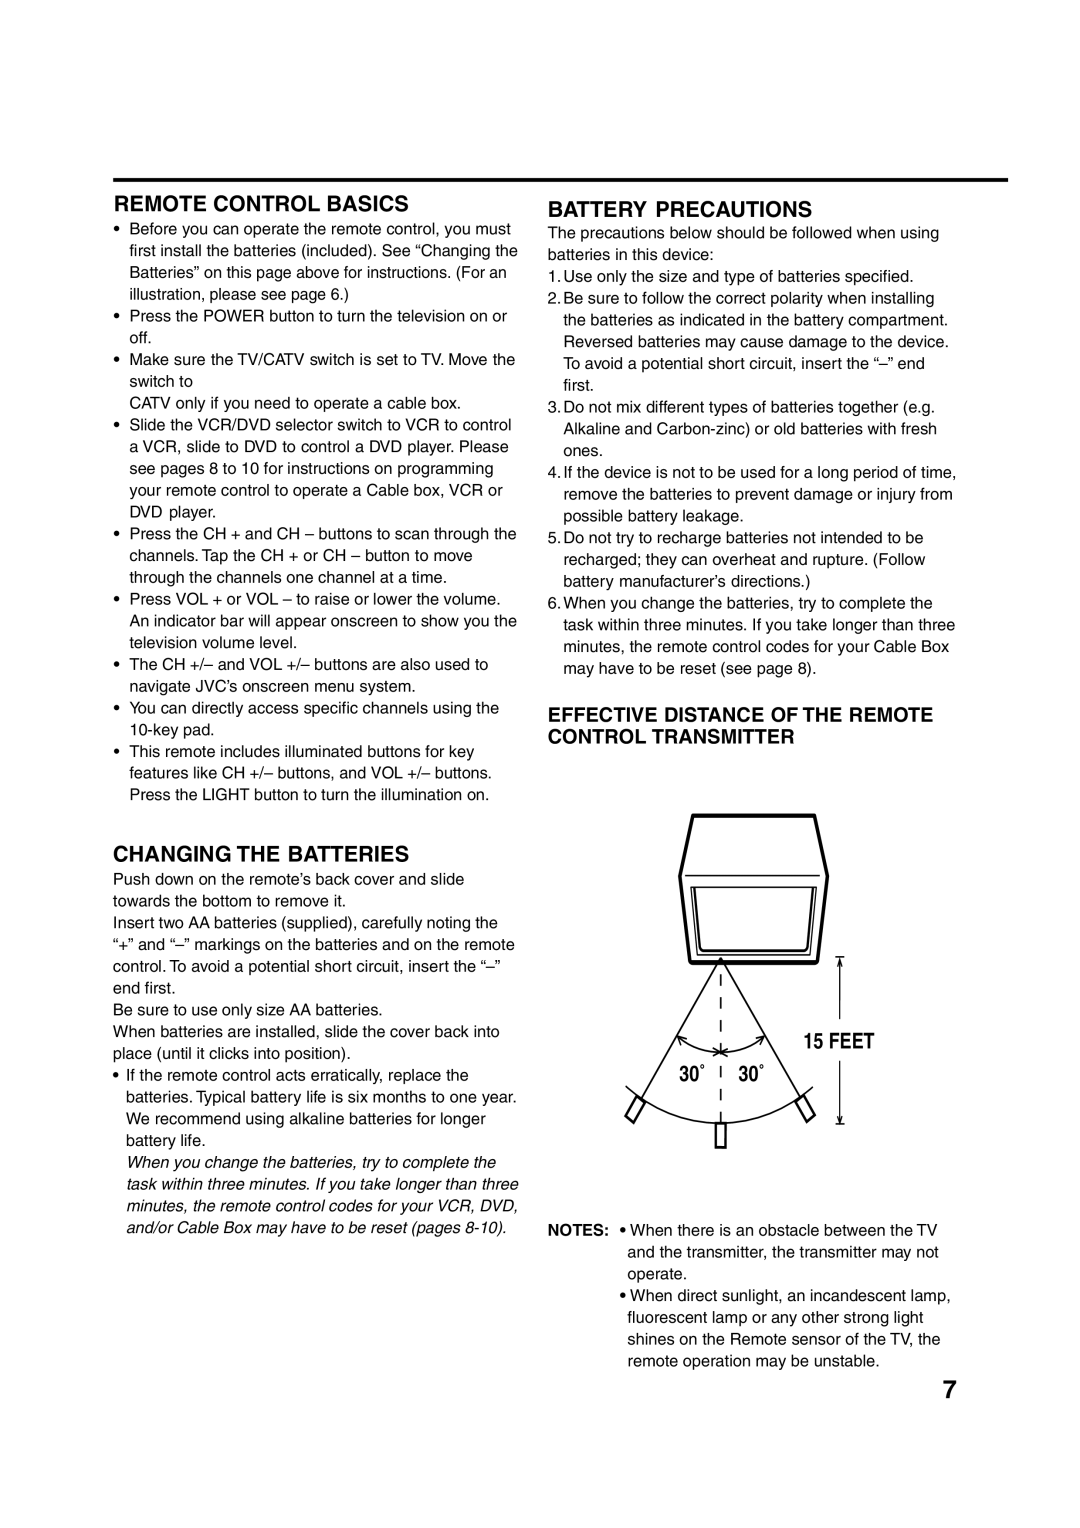
To enhance user experience, the AV-14F703 boasts a sleek and modern design, allowing it to seamlessly integrate into any home entertainment setup. The intuitive interface makes navigating through menus and settings simple, ensuring that users of all technical abilities can operate the system without hassle. The remote control further adds to the convenience, providing easy access to functions from a distance.

Connectivity options on the Aiwa AV-14F703 are extensive. With multiple input and output ports, it supports a wide range of devices, including DVDs, gaming consoles, and streaming boxes. Bluetooth connectivity is another impressive feature, allowing users to stream music wirelessly from their smartphones or tablets. This versatility makes the AV-14F703 an outstanding choice for those who enjoy a variety of media sources.

Additionally, the AV-14F703 is designed with energy efficiency in mind. It utilizes cutting-edge technology to minimize power consumption without compromising performance. This feature not only benefits the environment but also helps users save on electricity bills, making it a smart choice for budget-conscious consumers.

In terms of durability, Aiwa has constructed the AV-14F703 using high-quality materials, ensuring that it can withstand the rigors of everyday use. The device is built to last, an important consideration for those investing in long-term audio and visual solutions.

Overall, the Aiwa AV-14F703 stands out as a versatile and high-performance audio-visual device, offering exceptional sound quality, modern design, robust connectivity options, and energy efficiency. This makes it an ideal choice for anyone looking to enhance their entertainment experience at home.