TABLE OF CONTENTS |
|
THEFT PROTECTION | 2 |
BASIC OPERATION, AUDIO AND CLOCK |
|
ADJUSTMENT | 3 |
RADIO OPERATION | 4 |
CD PLAYER OPERATION | 5 |
AUXILIARY EQUIPMENT | 6 |
OTHER FUNCTIONS | 6 |
TROUBLESHOOTING | 7 |
MAINTENANCE | 7 |
SPECIFICATIONS | 7 |
Note
Some buttons are assigned two or more functions. For detailed descriptions, refer to the related pages.
CD Notes
•Playing a defective or dusty CD can cause dropouts in sound.
• Hold CDs as illustrated.
• Do NOT touch the unlabeled side.
•Do NOT attach any seal, label or data protection sheet to either side of CD.
•Do NOT expose a CD to direct sunlight or excessive heat.
•Wipe a dirty CD from the center outward with a cleaning cloth.
Never use solvents such as benzine or alcohol.
•This unit cannot play
•NEVER insert a
The unit may not be able to eject it, resulting in a malfunction.
DEMO (Demonstration) mode
The unit has an extra display (DEMO) mode which demonstrates the illumination modes of the unit. The unit switches to DEMO mode automatically if you turn the unit on and leave it as it is for 5 seconds after all the connections have been completed.
To cancel DEMO mode
1During DEMO mode, press and hold SRC until “ILL” appears on the display.
2Press i or k to select “DE”.
3Turn AUDIO CONTROL to select “DE 0.”
To resume DEMO mode, select “DE 1” in step 3.
THEFT PROTECTION
Take the front panel with you when leaving the car, and keep it in the supplied carrying case.
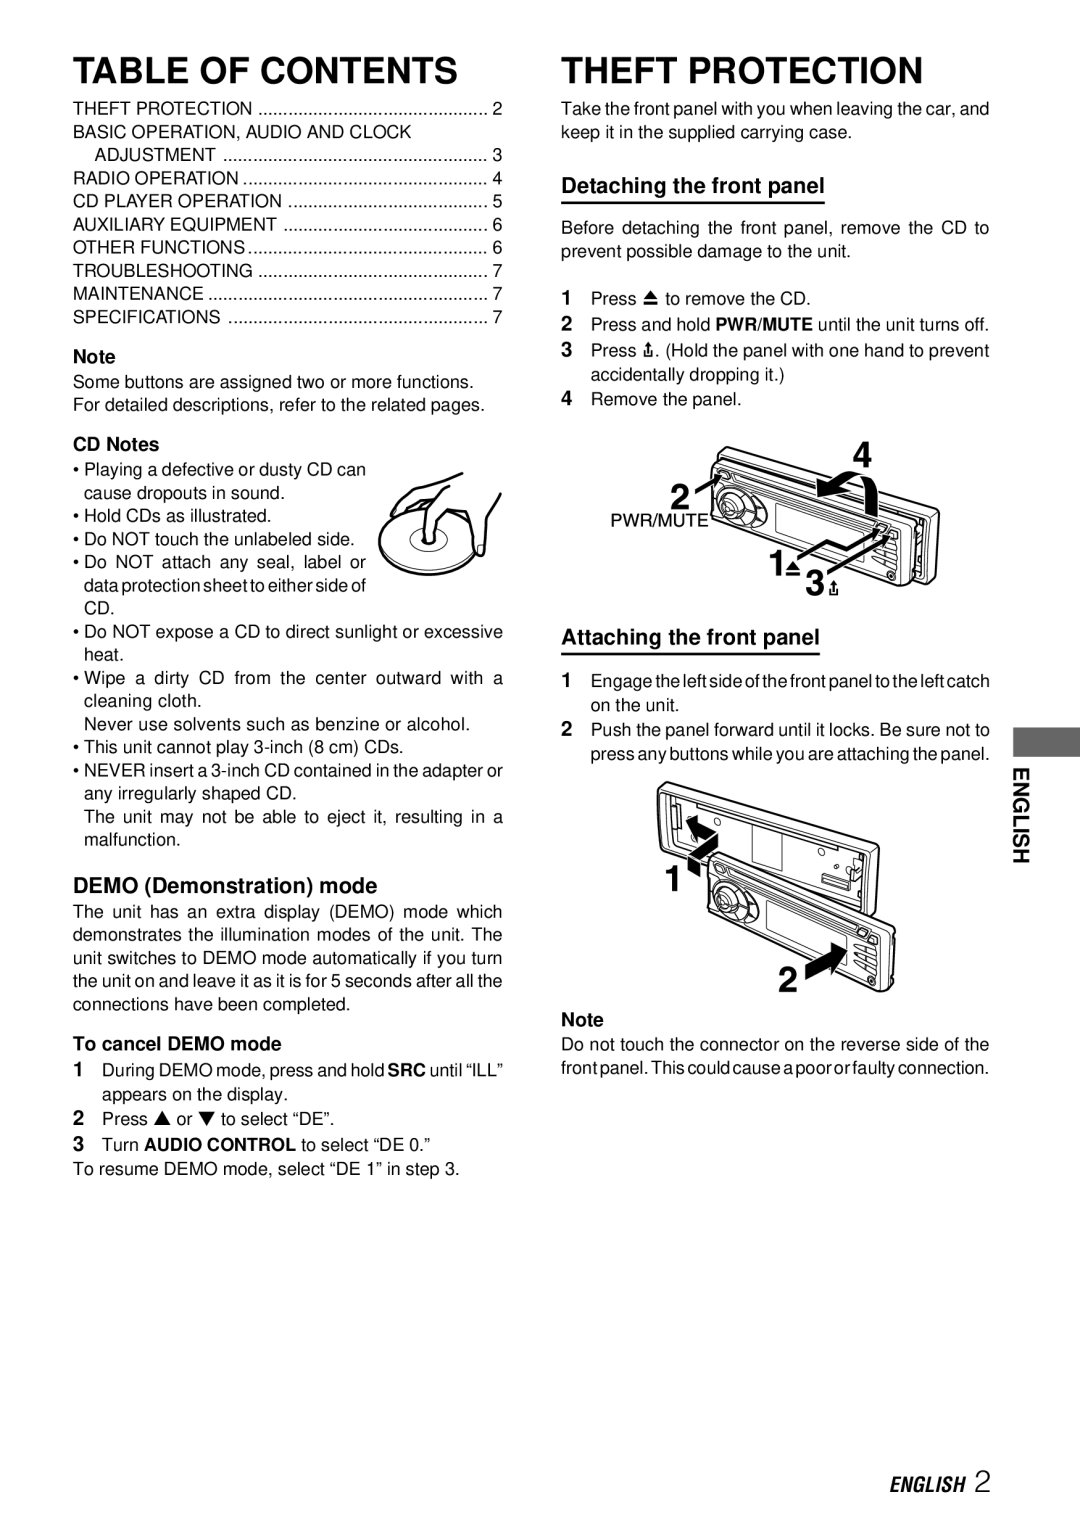
Detaching the front panel
Before detaching the front panel, remove the CD to prevent possible damage to the unit.
1Press z to remove the CD.
2Press and hold PWR/MUTE until the unit turns off.
3Press %. (Hold the panel with one hand to prevent accidentally dropping it.)
4Remove the panel.
Attaching the front panel
1Engage the left side of the front panel to the left catch on the unit.
2Push the panel forward until it locks. Be sure not to press any buttons while you are attaching the panel.
ENGLISH
Note
Do not touch the connector on the reverse side of the front panel. This could cause a poor or faulty connection.
ENGLISH 2