4A Tour of the GRIP
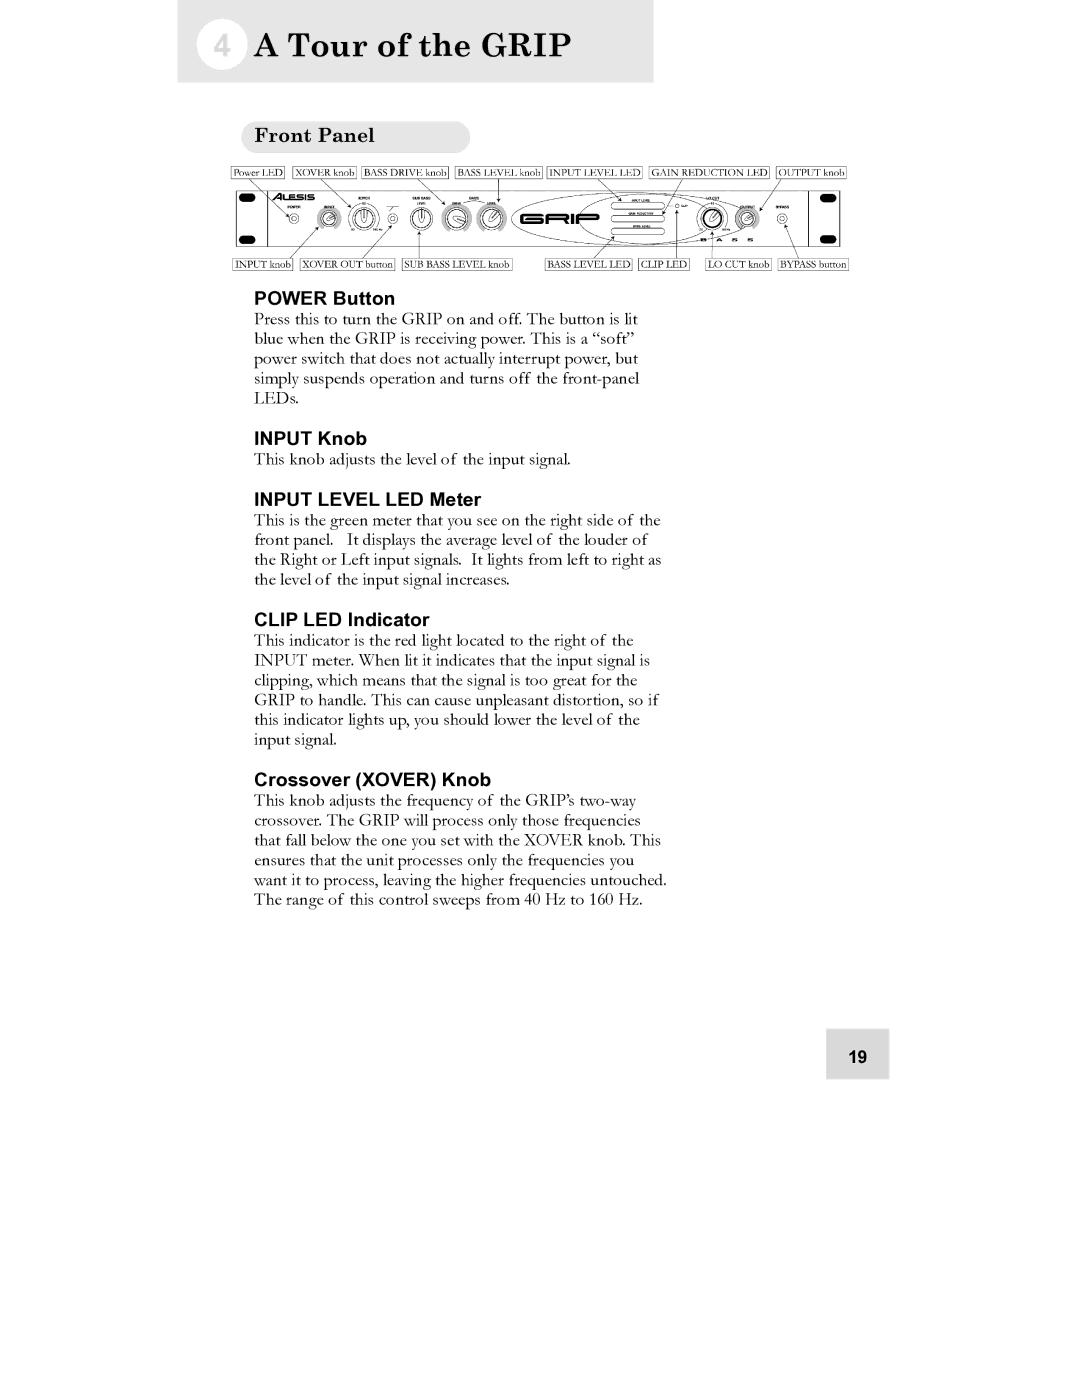
Front Panel
POWER Button
Press this to turn the GRIP on and off. The button is lit blue when the GRIP is receiving power. This is a “soft” power switch that does not actually interrupt power, but simply suspends operation and turns off the
INPUT Knob
This knob adjusts the level of the input signal.
INPUT LEVEL LED Meter
This is the green meter that you see on the right side of the front panel. It displays the average level of the louder of the Right or Left input signals. It lights from left to right as the level of the input signal increases.
CLIP LED Indicator
This indicator is the red light located to the right of the INPUT meter. When lit it indicates that the input signal is clipping, which means that the signal is too great for the GRIP to handle. This can cause unpleasant distortion, so if this indicator lights up, you should lower the level of the input signal.
Crossover (XOVER) Knob
This knob adjusts the frequency of the GRIP’s
19