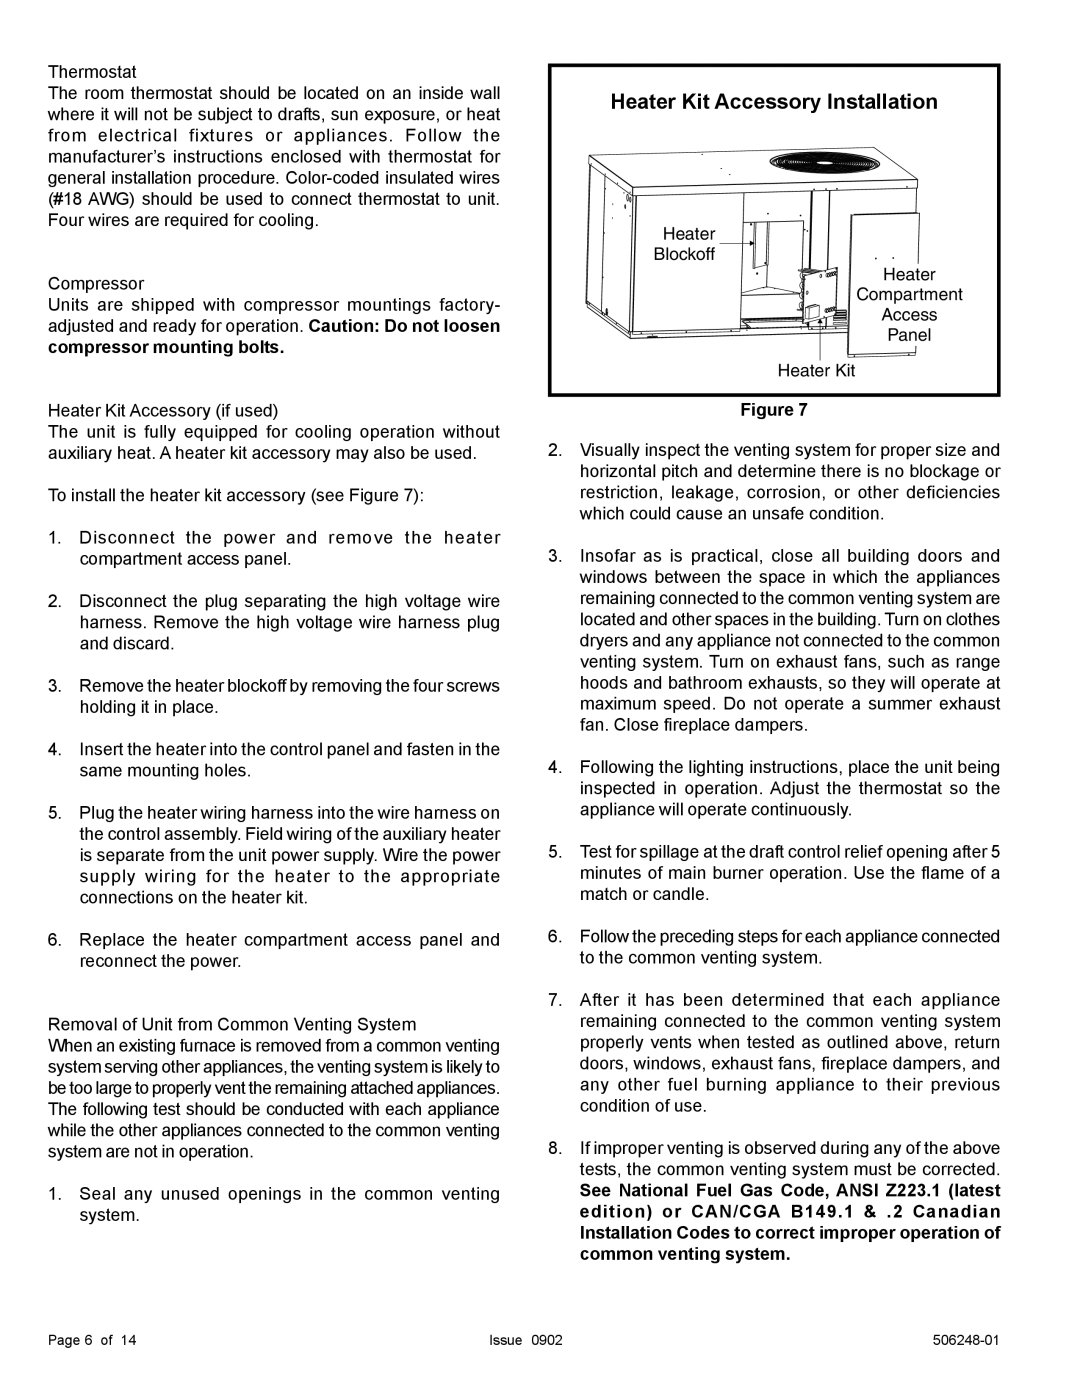
15), (2, 4)PHP(13 specifications
Allied Air Enterprises, a prominent name in the heating, ventilation, and air conditioning (HVAC) industry, specializes in manufacturing high-quality residential and commercial HVAC systems. With a strong commitment to innovation and efficiency, they have established themselves as a vital player in the market, driven by their dedication to delivering advanced climate control solutions.One of the standout features of Allied Air Enterprises is their extensive product range, which includes air conditioners, heat pumps, gas furnaces, and indoor air quality solutions. This variety allows consumers to find tailored HVAC solutions that meet their specific needs, whether for a home environment or a larger commercial setting. The company emphasizes energy efficiency, ensuring their products are designed to minimize energy consumption while maximizing comfort.
Technologically, Allied Air Enterprises integrates cutting-edge innovations into their products. Many of their systems come equipped with advanced diagnostics and communication capabilities that allow for remote monitoring and control. This not only enhances user convenience but also streamlines maintenance, making it easier for technicians to identify and rectify issues before they become major problems.
Another key characteristic of Allied Air's offerings is their commitment to sustainable practices. Many of their products are built to comply with stringent environmental standards, utilizing refrigerants with lower global warming potential and employing manufacturing processes that reduce waste. This focus on sustainability resonates with environmentally-conscious consumers looking to reduce their carbon footprint.
Allied Air Enterprises also invests heavily in research and development to keep pace with the rapidly evolving HVAC landscape. Their ongoing efforts to innovate include exploring smart home integration and advancements in variable-speed technology, providing users with even greater levels of comfort and efficiency.
Customer support is another pillar of their business model. Allied Air prides itself on providing exceptional service, offering robust warranties and easy access to repairs and replacement parts, ensuring that their clients receive the best possible experience throughout the lifespan of their products.
In summary, Allied Air Enterprises stands out in the HVAC market through its commitment to innovation, energy efficiency, and customer satisfaction. With a diverse product lineup that integrates cutting-edge technology and sustainable practices, they are positioned to meet the evolving demands of both residential and commercial clients, making them a trusted choice in climate control solutions.