Manuals
/
Alpine
/
Car Audio and Video
/
Car Stereo System
Alpine
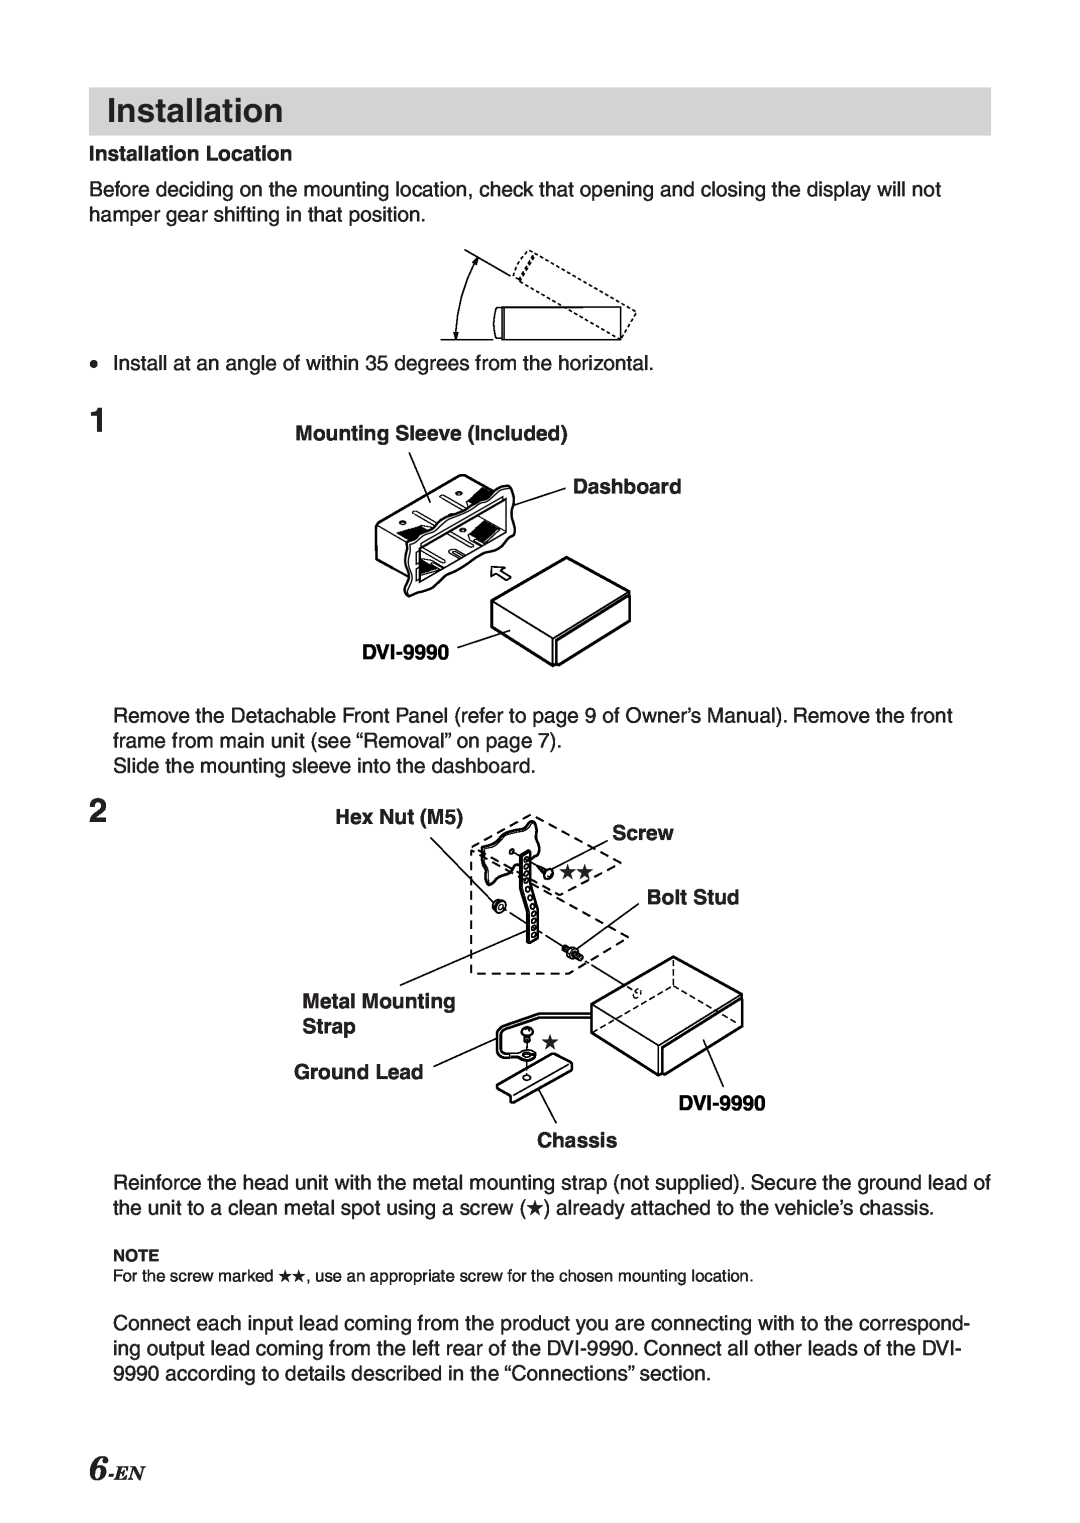
Installation Location, Mounting Sleeve Included, Dashboard DVI-9990, Hex Nut M5
Models:
DVI-9990
1
7
12
12
Download
12 pages
50.86 Kb
4
5
6
7
8
9
10
11
Install
Parts for remote control
Precautions
Page 7
Image 7
Page 6
Page 8
Page 7
Image 7
Page 6
Page 8
Contents
Español
DVD-Audio/Video Tuner
English
Français
ALPINE ELECTRONICS GmbH
ALPINE ELECTRONICS MARKETING, INC
ALPINE ELECTRONICS OF AMERICA, INC
ALPINE ELECTRONICS OF CANADA, INC
GUIDE FOR INSTALLATION AND CONNECTIONS
PRECAUTIONS
Points to Observe for Safe Usage
3-EN
Precautions
Connections
Contents
Accessories
Installation
Parts for remote control
Hex Nut M5
Installation Location
Mounting Sleeve Included
Dashboard DVI-9990
Ground Lead
Lock Pin Removal
JAPANESE CAR Front Frame
DVI-9990
8-EN
Mounting the remote control holder
Reinforcement Screws Remote Control Remote Control Holder
Protective paper Console Box etc
9-EN
Basic Connection
Multimedia Manager or DAC unit
System Connection Example
IONBUS compatible monitor
TMI-M990
PXI-H990 or DAI-C990 IONBUS incompatible TV monitor
Multimedia Manager or DAC unit External TV monitor
11-EN
Top
Page
Image
Contents