|
| DISTRIBUTION AMPLIFIERS |
| |||
|
|
|
|
|
|
|
|
|
|
|
|
|
|
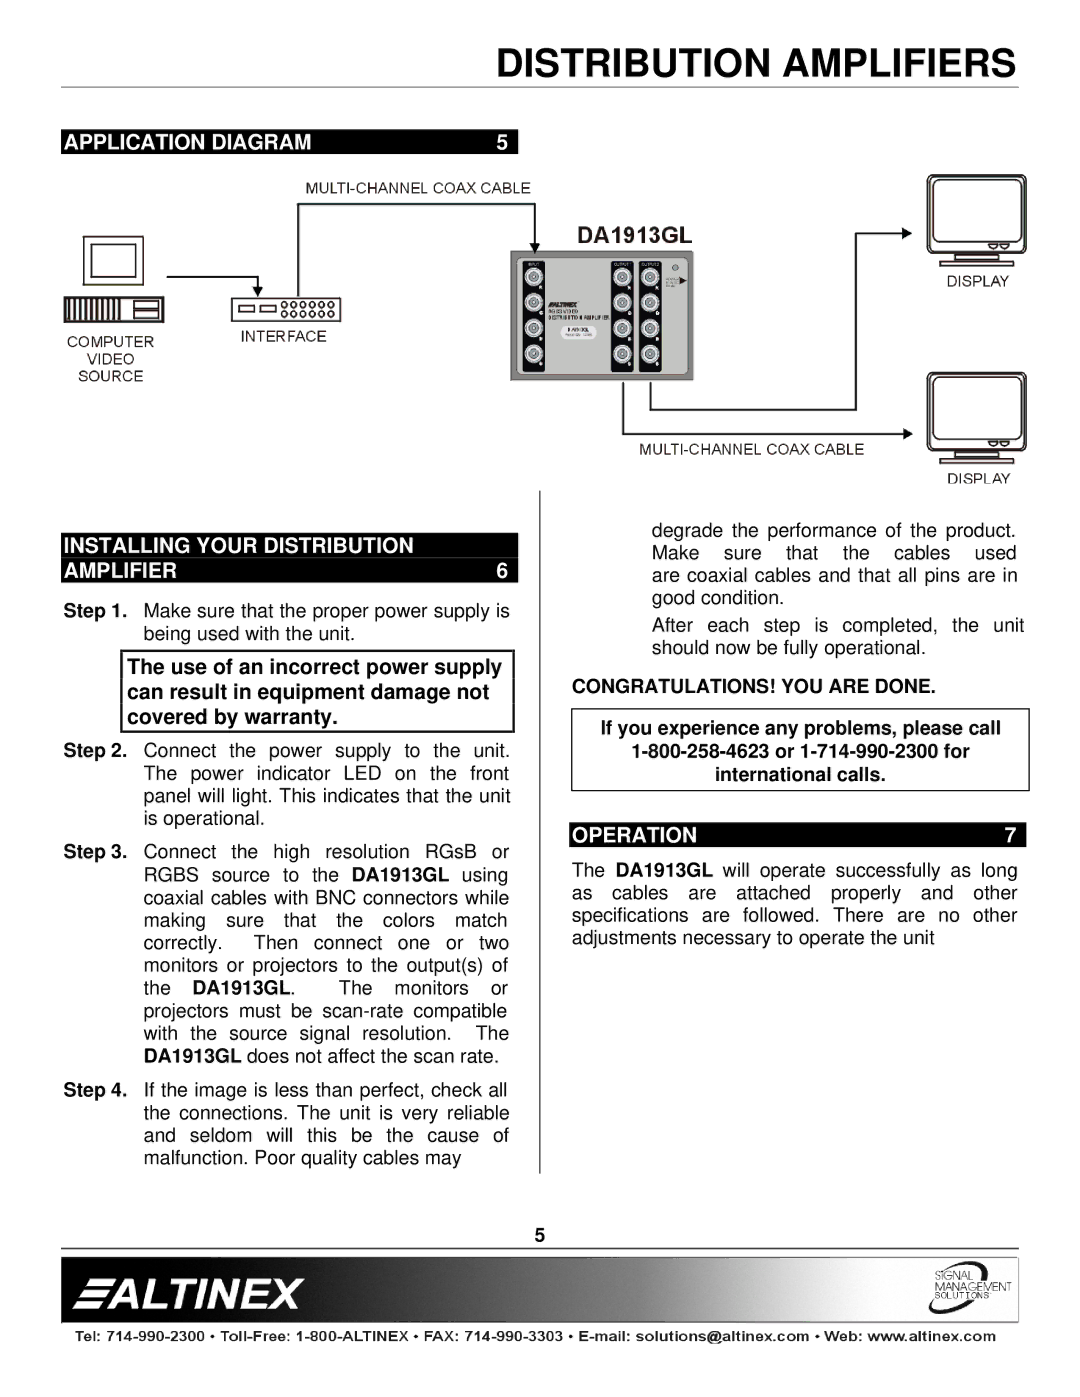
| APPLICATION DIAGRAM | 5 |
|
|
|
|
|
|
|
|
|
|
|
|
|
|
|
|
|
|
INSTALLING YOUR DISTRIBUTION
AMPLIFIER | 6 |
Step 1. Make sure that the proper power supply is being used with the unit.
The use of an incorrect power supply can result in equipment damage not covered by warranty.
Step 2. Connect the power supply to the unit. The power indicator LED on the front panel will light. This indicates that the unit is operational.
Step 3. Connect the high resolution RGsB or RGBS source to the DA1913GL using coaxial cables with BNC connectors while making sure that the colors match correctly. Then connect one or two monitors or projectors to the output(s) of
the DA1913GL. The monitors or projectors must be
Step 4. If the image is less than perfect, check all the connections. The unit is very reliable and seldom will this be the cause of malfunction. Poor quality cables may
degrade the performance of the product. Make sure that the cables used are coaxial cables and that all pins are in good condition.
After each step is completed, the unit should now be fully operational.
CONGRATULATIONS! YOU ARE DONE.
If you experience any problems, please call
international calls.
OPERATION | 7 |
The DA1913GL will operate successfully as long as cables are attached properly and other specifications are followed. There are no other adjustments necessary to operate the unit
5