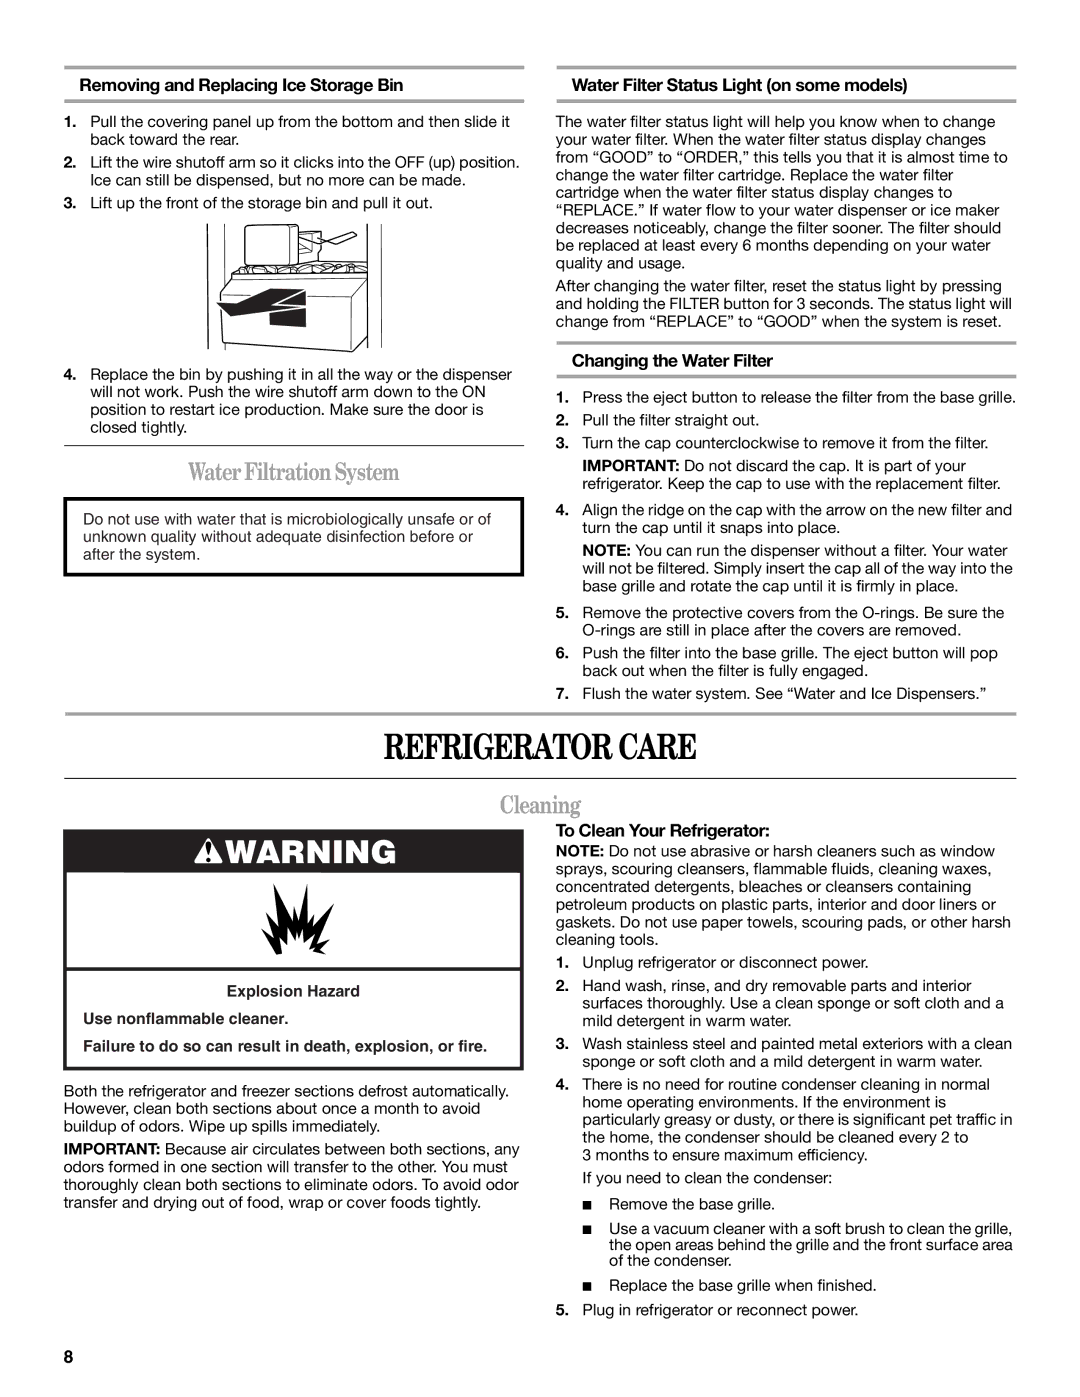
Removing and Replacing Ice Storage Bin

1.Pull the covering panel up from the bottom and then slide it back toward the rear.

2.Lift the wire shutoff arm so it clicks into the OFF (up) position. Ice can still be dispensed, but no more can be made.

3.Lift up the front of the storage bin and pull it out.

4.Replace the bin by pushing it in all the way or the dispenser will not work. Push the wire shutoff arm down to the ON position to restart ice production. Make sure the door is closed tightly.

Water Filtration System

Do not use with water that is microbiologically unsafe or of unknown quality without adequate disinfection before or after the system.

Water Filter Status Light (on some models)

The water filter status light will help you know when to change your water filter. When the water filter status display changes from “GOOD” to “ORDER,” this tells you that it is almost time to change the water filter cartridge. Replace the water filter cartridge when the water filter status display changes to “REPLACE.” If water flow to your water dispenser or ice maker decreases noticeably, change the filter sooner. The filter should be replaced at least every 6 months depending on your water quality and usage.

After changing the water filter, reset the status light by pressing and holding the FILTER button for 3 seconds. The status light will change from “REPLACE” to “GOOD” when the system is reset.

Changing the Water Filter

1.Press the eject button to release the filter from the base grille.

2.Pull the filter straight out.

3.Turn the cap counterclockwise to remove it from the filter.

IMPORTANT: Do not discard the cap. It is part of your refrigerator. Keep the cap to use with the replacement filter.

4.Align the ridge on the cap with the arrow on the new filter and turn the cap until it snaps into place.

NOTE: You can run the dispenser without a filter. Your water will not be filtered. Simply insert the cap all of the way into the base grille and rotate the cap until it is firmly in place.

5.Remove the protective covers from the O-rings. Be sure the O-rings are still in place after the covers are removed.

6.Push the filter into the base grille. The eject button will pop back out when the filter is fully engaged.

7.Flush the water system. See “Water and Ice Dispensers.”

REFRIGERATOR CARE

Cleaning

WARNING

Explosion Hazard

Use nonflammable cleaner.

Failure to do so can result in death, explosion, or fire.

Both the refrigerator and freezer sections defrost automatically. However, clean both sections about once a month to avoid buildup of odors. Wipe up spills immediately.

IMPORTANT: Because air circulates between both sections, any odors formed in one section will transfer to the other. You must thoroughly clean both sections to eliminate odors. To avoid odor transfer and drying out of food, wrap or cover foods tightly.

To Clean Your Refrigerator:

NOTE: Do not use abrasive or harsh cleaners such as window sprays, scouring cleansers, flammable fluids, cleaning waxes, concentrated detergents, bleaches or cleansers containing petroleum products on plastic parts, interior and door liners or gaskets. Do not use paper towels, scouring pads, or other harsh cleaning tools.

1.Unplug refrigerator or disconnect power.

2.Hand wash, rinse, and dry removable parts and interior surfaces thoroughly. Use a clean sponge or soft cloth and a mild detergent in warm water.

3.Wash stainless steel and painted metal exteriors with a clean sponge or soft cloth and a mild detergent in warm water.

4.There is no need for routine condenser cleaning in normal home operating environments. If the environment is particularly greasy or dusty, or there is significant pet traffic in the home, the condenser should be cleaned every 2 to

3 months to ensure maximum efficiency. If you need to clean the condenser:

Remove the base grille.

Use a vacuum cleaner with a soft brush to clean the grille, the open areas behind the grille and the front surface area of the condenser.

Replace the base grille when finished.

5.Plug in refrigerator or reconnect power.

8

Page 8
Image 8
Amana T1WG2L, T2RFWG2 installation instructions Refrigerator Care, Water Filtration System, Cleaning

T2RFWG2, T1WG2L specifications

The Amana T1WG2L and T2RFWG2 are part of Amana's line of high-efficiency washing machines and dryers, designed to meet the needs of modern households while delivering exceptional performance and convenience. With a suite of advanced features, these appliances are built to make laundry chores simpler and more efficient.

Starting with the Amana T1WG2L washer, this front-loading machine is engineered with a robust set of features tailored to enhance the washing experience. One of its standout characteristics is its high-efficiency design that reduces water and energy consumption, resulting in lower utility bills. The washer is equipped with a variety of wash cycles and options, including delicate, heavy-duty, and quick wash settings, allowing users to customize each load based on fabric type and soil level.

The T1WG2L also incorporates a stainless steel drum, which is designed for durability and performance. This material resists chipping and is less likely to retain odors. Combined with the unit's efficient suspension system, it ensures that clothes come out clean while minimizing wear and tear. Additionally, the washer features an advanced load sensing technology that adjusts water levels according to the size of the load, further enhancing efficiency.

Moving on to the Amana T2RFWG2 dryer, it perfectly complements the T1WG2L with its smart drying capabilities. The dryer is equipped with multiple drying cycles to cater to various fabric types such as towels, delicates, and heavy items. One of the key features is the moisture sensing technology, which intelligently detects moisture levels in the drum and automatically adjusts drying time to prevent over-drying. This not only saves energy but also helps to keep clothes looking their best.

Another significant feature of the T2RFWG2 is its wrinkle-prevent option, which tumbles clothes intermittently after the drying cycle is finished, helping to reduce wrinkles and ironing time. The dryer is also designed with a large capacity, allowing users to dry larger loads at once, making laundry days less tedious.

Both the T1WG2L and T2RFWG2 are designed with user-friendly controls, making them easy to operate even for those unfamiliar with modern washing and drying technology. Their sleek design ensures they fit seamlessly into any laundry room, while their advanced features promote efficiency and convenience.

In summary, the Amana T1WG2L and T2RFWG2 washing machine and dryer combination showcases advanced technology and thoughtful design, making them reliable companions for laundry day. With their focus on efficiency, durability, and ease of use, these appliances are a smart investment for any household looking to simplify its laundry process.