LocationRequirements

WARNING

Explosion Hazard

Keep flammable materials and vapors, such as gasoline, away from refrigerator.

Failure to do so can result in death, explosion, or fire.

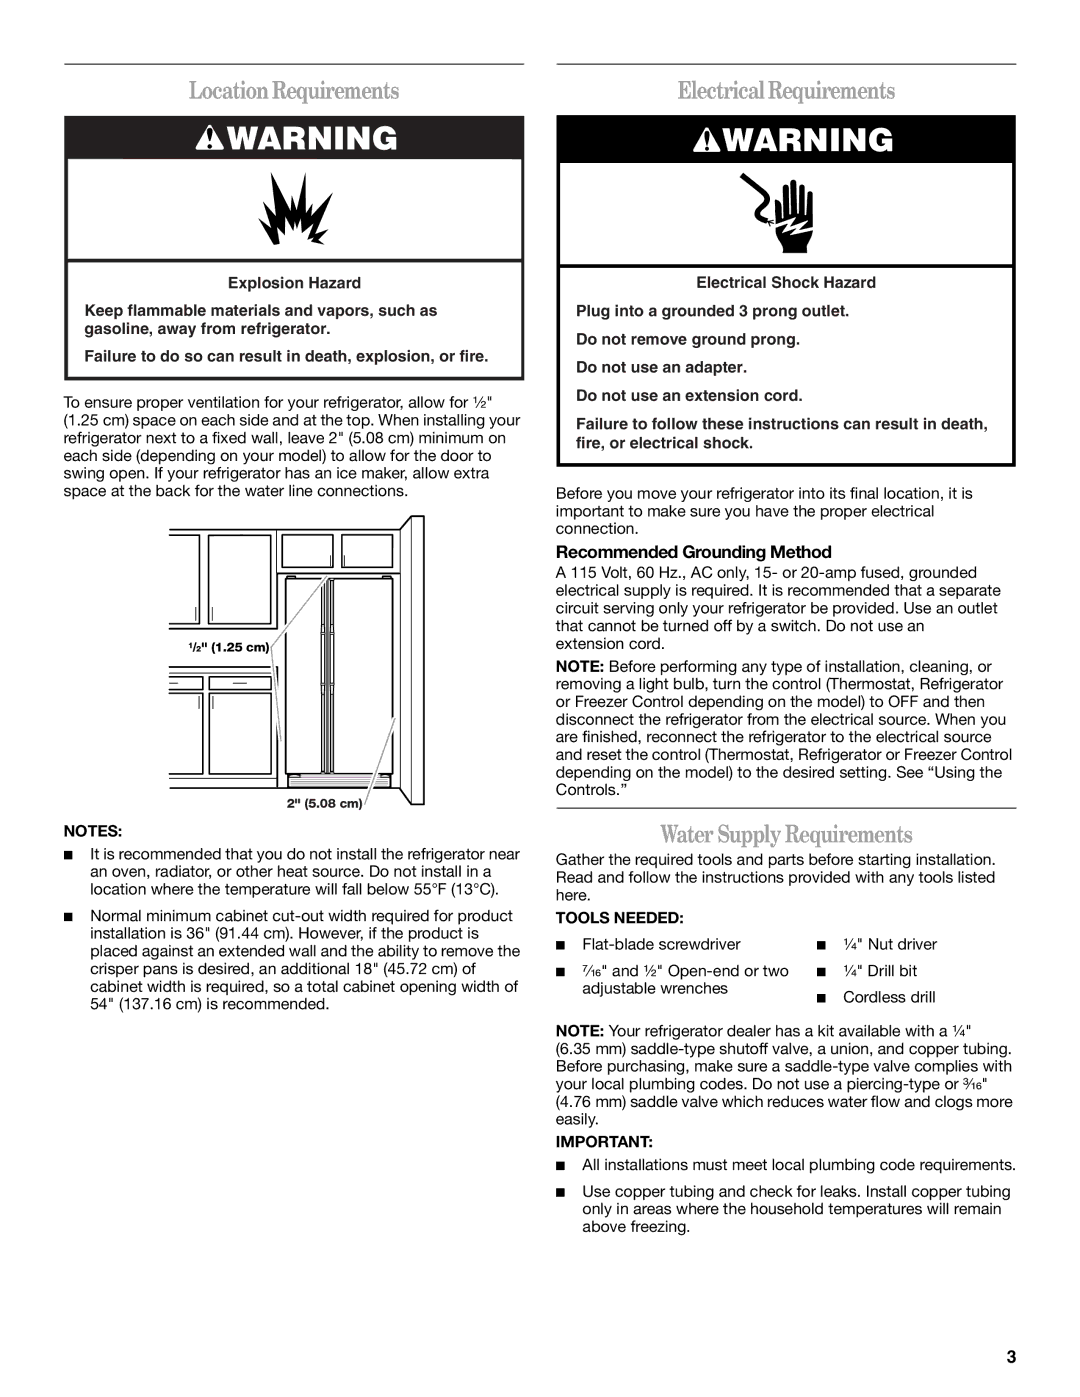
To ensure proper ventilation for your refrigerator, allow for ¹⁄₂" (1.25 cm) space on each side and at the top. When installing your refrigerator next to a fixed wall, leave 2" (5.08 cm) minimum on each side (depending on your model) to allow for the door to swing open. If your refrigerator has an ice maker, allow extra space at the back for the water line connections.

1/2" (1.25 cm)

2" (5.08 cm)

NOTES:

It is recommended that you do not install the refrigerator near an oven, radiator, or other heat source. Do not install in a location where the temperature will fall below 55°F (13°C).

Normal minimum cabinet cut-out width required for product installation is 36" (91.44 cm). However, if the product is placed against an extended wall and the ability to remove the crisper pans is desired, an additional 18" (45.72 cm) of cabinet width is required, so a total cabinet opening width of 54" (137.16 cm) is recommended.

Electrical Requirements

WARNING

Electrical Shock Hazard

Plug into a grounded 3 prong outlet.

Do not remove ground prong.

Do not use an adapter.

Do not use an extension cord.

Failure to follow these instructions can result in death, fire, or electrical shock.

Before you move your refrigerator into its final location, it is important to make sure you have the proper electrical connection.

Recommended Grounding Method

A 115 Volt, 60 Hz., AC only, 15- or 20-amp fused, grounded electrical supply is required. It is recommended that a separate circuit serving only your refrigerator be provided. Use an outlet that cannot be turned off by a switch. Do not use an extension cord.

NOTE: Before performing any type of installation, cleaning, or removing a light bulb, turn the control (Thermostat, Refrigerator or Freezer Control depending on the model) to OFF and then disconnect the refrigerator from the electrical source. When you are finished, reconnect the refrigerator to the electrical source and reset the control (Thermostat, Refrigerator or Freezer Control depending on the model) to the desired setting. See “Using the Controls.”

Water Supply Requirements

Gather the required tools and parts before starting installation. Read and follow the instructions provided with any tools listed here.

TOOLS NEEDED:

Flat-blade screwdriver

¹⁄₄" Nut driver

⁷⁄₁₆" and ¹⁄₂" Open-end or two

¹⁄₄" Drill bit


adjustable wrenches

Cordless drill


NOTE: Your refrigerator dealer has a kit available with a ¹⁄₄"

(6.35 mm) saddle-type shutoff valve, a union, and copper tubing. Before purchasing, make sure a saddle-type valve complies with your local plumbing codes. Do not use a piercing-type or ³⁄₁₆"

(4.76 mm) saddle valve which reduces water flow and clogs more easily.

IMPORTANT:

All installations must meet local plumbing code requirements.

Use copper tubing and check for leaks. Install copper tubing only in areas where the household temperatures will remain above freezing.

3

Page 3
Image 3
Amana T2RFWG2 LocationRequirements, Electrical Requirements, Water Supply Requirements, Recommended Grounding Method

T2RFWG2, T1WG2L specifications

The Amana T1WG2L and T2RFWG2 are part of Amana's line of high-efficiency washing machines and dryers, designed to meet the needs of modern households while delivering exceptional performance and convenience. With a suite of advanced features, these appliances are built to make laundry chores simpler and more efficient.

Starting with the Amana T1WG2L washer, this front-loading machine is engineered with a robust set of features tailored to enhance the washing experience. One of its standout characteristics is its high-efficiency design that reduces water and energy consumption, resulting in lower utility bills. The washer is equipped with a variety of wash cycles and options, including delicate, heavy-duty, and quick wash settings, allowing users to customize each load based on fabric type and soil level.

The T1WG2L also incorporates a stainless steel drum, which is designed for durability and performance. This material resists chipping and is less likely to retain odors. Combined with the unit's efficient suspension system, it ensures that clothes come out clean while minimizing wear and tear. Additionally, the washer features an advanced load sensing technology that adjusts water levels according to the size of the load, further enhancing efficiency.

Moving on to the Amana T2RFWG2 dryer, it perfectly complements the T1WG2L with its smart drying capabilities. The dryer is equipped with multiple drying cycles to cater to various fabric types such as towels, delicates, and heavy items. One of the key features is the moisture sensing technology, which intelligently detects moisture levels in the drum and automatically adjusts drying time to prevent over-drying. This not only saves energy but also helps to keep clothes looking their best.

Another significant feature of the T2RFWG2 is its wrinkle-prevent option, which tumbles clothes intermittently after the drying cycle is finished, helping to reduce wrinkles and ironing time. The dryer is also designed with a large capacity, allowing users to dry larger loads at once, making laundry days less tedious.

Both the T1WG2L and T2RFWG2 are designed with user-friendly controls, making them easy to operate even for those unfamiliar with modern washing and drying technology. Their sleek design ensures they fit seamlessly into any laundry room, while their advanced features promote efficiency and convenience.

In summary, the Amana T1WG2L and T2RFWG2 washing machine and dryer combination showcases advanced technology and thoughtful design, making them reliable companions for laundry day. With their focus on efficiency, durability, and ease of use, these appliances are a smart investment for any household looking to simplify its laundry process.