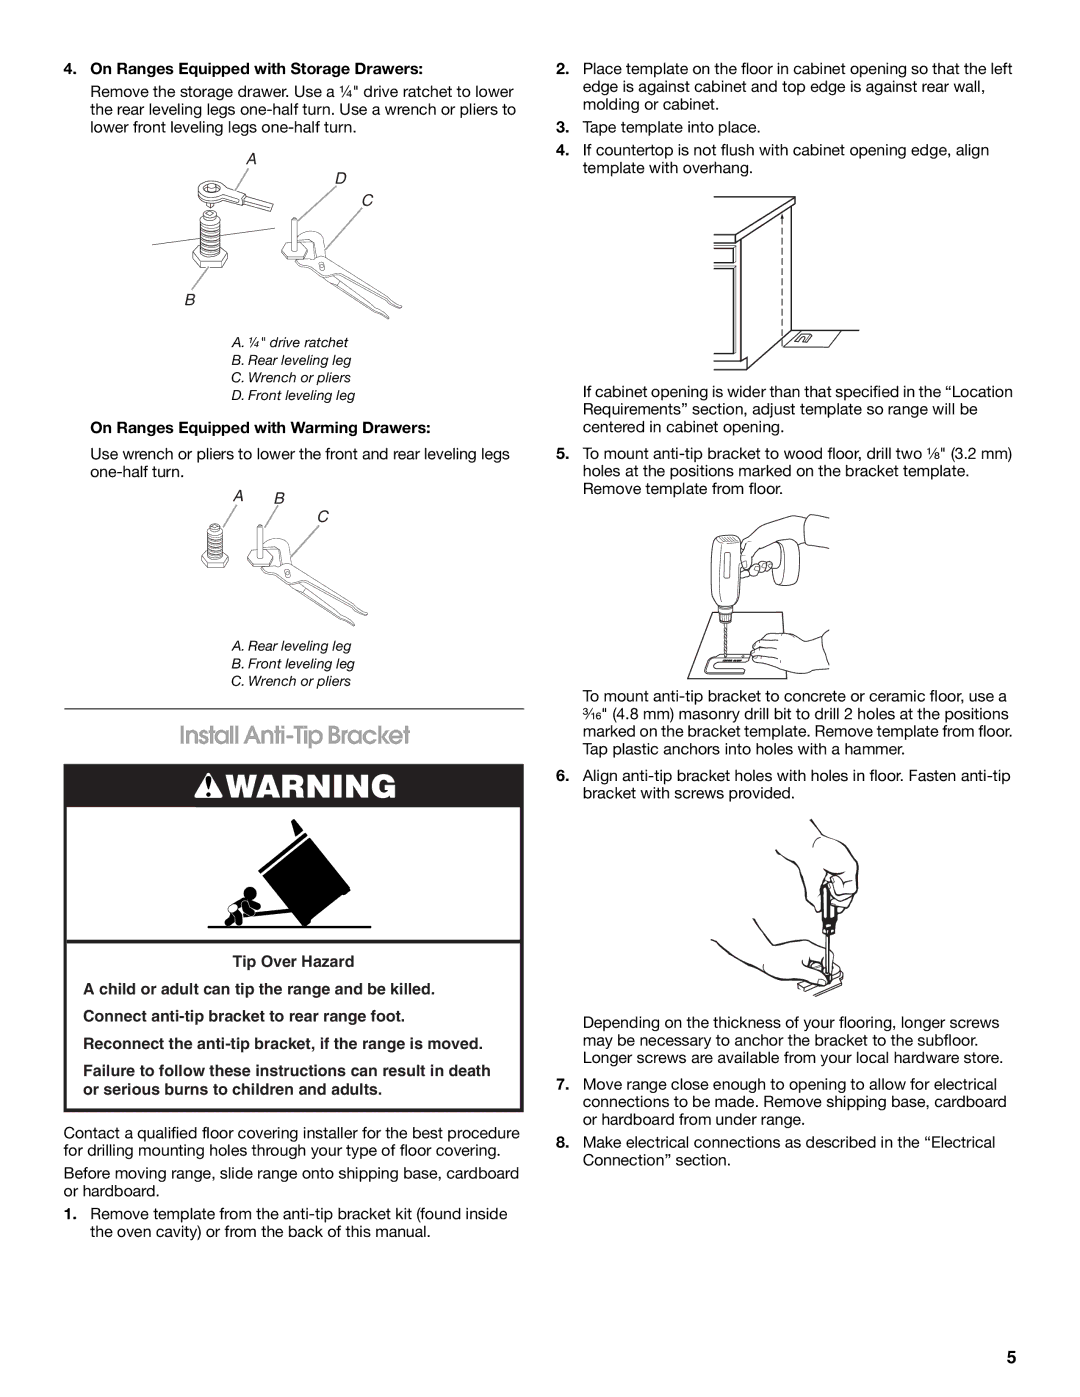
4.On Ranges Equipped with Storage Drawers:

Remove the storage drawer. Use a ¼" drive ratchet to lower the rear leveling legs one-half turn. Use a wrench or pliers to lower front leveling legs one-half turn.

A

D

C

B

A. ¼" drive ratchet

B. Rear leveling leg

C. Wrench or pliers

D. Front leveling leg

On Ranges Equipped with Warming Drawers:

Use wrench or pliers to lower the front and rear leveling legs one-half turn.

A B

C

A. Rear leveling leg

B. Front leveling leg

C. Wrench or pliers

Install Anti-Tip Bracket

WARNING

Tip Over Hazard

A child or adult can tip the range and be killed.

Connect anti-tip bracket to rear range foot.

Reconnect the anti-tip bracket, if the range is moved.

Failure to follow these instructions can result in death or serious burns to children and adults.

Contact a qualified floor covering installer for the best procedure for drilling mounting holes through your type of floor covering.

Before moving range, slide range onto shipping base, cardboard or hardboard.

1.Remove template from the anti-tip bracket kit (found inside the oven cavity) or from the back of this manual.

2.Place template on the floor in cabinet opening so that the left edge is against cabinet and top edge is against rear wall, molding or cabinet.

3.Tape template into place.

4.If countertop is not flush with cabinet opening edge, align template with overhang.

If cabinet opening is wider than that specified in the “Location Requirements” section, adjust template so range will be centered in cabinet opening.

5.To mount anti-tip bracket to wood floor, drill two ¹⁄₈" (3.2 mm) holes at the positions marked on the bracket template. Remove template from floor.

To mount anti-tip bracket to concrete or ceramic floor, use a ³⁄₁₆" (4.8 mm) masonry drill bit to drill 2 holes at the positions marked on the bracket template. Remove template from floor. Tap plastic anchors into holes with a hammer.

6.Align anti-tip bracket holes with holes in floor. Fasten anti-tip bracket with screws provided.

Depending on the thickness of your flooring, longer screws may be necessary to anchor the bracket to the subfloor. Longer screws are available from your local hardware store.

7.Move range close enough to opening to allow for electrical connections to be made. Remove shipping base, cardboard or hardboard from under range.

8.Make electrical connections as described in the “Electrical Connection” section.

5

Page 5
Image 5
Amana W10196158B installation instructions Install Anti-Tip Bracket, On Ranges Equipped with Storage Drawers

W10196158B specifications

The Amana W10196158B is a versatile and efficient replacement part designed for a variety of kitchen appliances, primarily focusing on improving the performance of Amana's washing machines. This component is notable for its high-quality construction and user-friendly features, making it a reliable choice for homeowners and DIY enthusiasts alike.

One of the main features of the Amana W10196158B is its compatibility with multiple washing machine models. This adaptability ensures that users can easily find a suitable match for their appliance without needing to invest in a completely new unit. The component fits seamlessly into the existing structure of Amana washers, enhancing operational efficiency without compromising the integrity of the machine.

Built with advanced technologies, the Amana W10196158B boasts durability that withstands regular wear and tear. It is engineered to handle varying loads effectively, showcasing its ability to manage different fabric types and washing cycles. This characteristic is essential for households that frequently deal with large laundry loads or diverse fabric requirements, such as delicate garments and heavy-duty items.

Additionally, this component features a user-friendly design, allowing for straightforward installation. Users can effortlessly replace the old parts without requiring professional help, saving both time and money. This ease of installation makes the Amana W10196158B an attractive choice for individuals who prefer to engage in DIY repair tasks.

Another significant characteristic is the energy-efficient performance it brings to washing machines. The Amana W10196158B supports the efficient use of water and electricity, contributing to lower utility costs over time. By optimizing water usage and reducing energy consumption, this component aligns with modern eco-friendly practices and helps minimize the environmental impact of household chores.

In summary, the Amana W10196158B is a high-quality replacement component that enhances the functionality and efficiency of Amana washing machines. With its compatibility, durability, ease of installation, and energy-efficient design, it serves as an ideal solution for consumers seeking reliable household appliances. Investing in this component not only improves washing performance but also supports sustainable living practices, making it a smart choice for eco-conscious individuals.