BASIC OPERATIONS CONT.

CUE POINT SETTING:

A.Playback starts from pause or skip to a new track during play or pause. The beginning play point will be set to the cue point.

B.Or, Press the IN BUTTON (5a) button during playback to set the new cue point.

8.AUTO CUE

When disk is loaded, the cue point is set to the first source of music. If track is changed before pressing play, the CUE POINT is changed to the new starting point. If you pause during playback this also sets the new CUE POINT.

9.FRAME SEARCH

This is done by first pausing then using the jog wheel to set the starting point. (When you use the jog wheel the monitor function allows you to hear what is playing. Once you have set starting point press PLAY then CUE to again mute output.)

10.SCANNING (FAST FORWARD / FAST REVERSE)

To do this rotate Shuttle wheel forward or reverse. You can scan or reverse in 6 different speeds depending on how much you rotate the wheel.

11.LOOP PLAY

You can create a loop between two points.

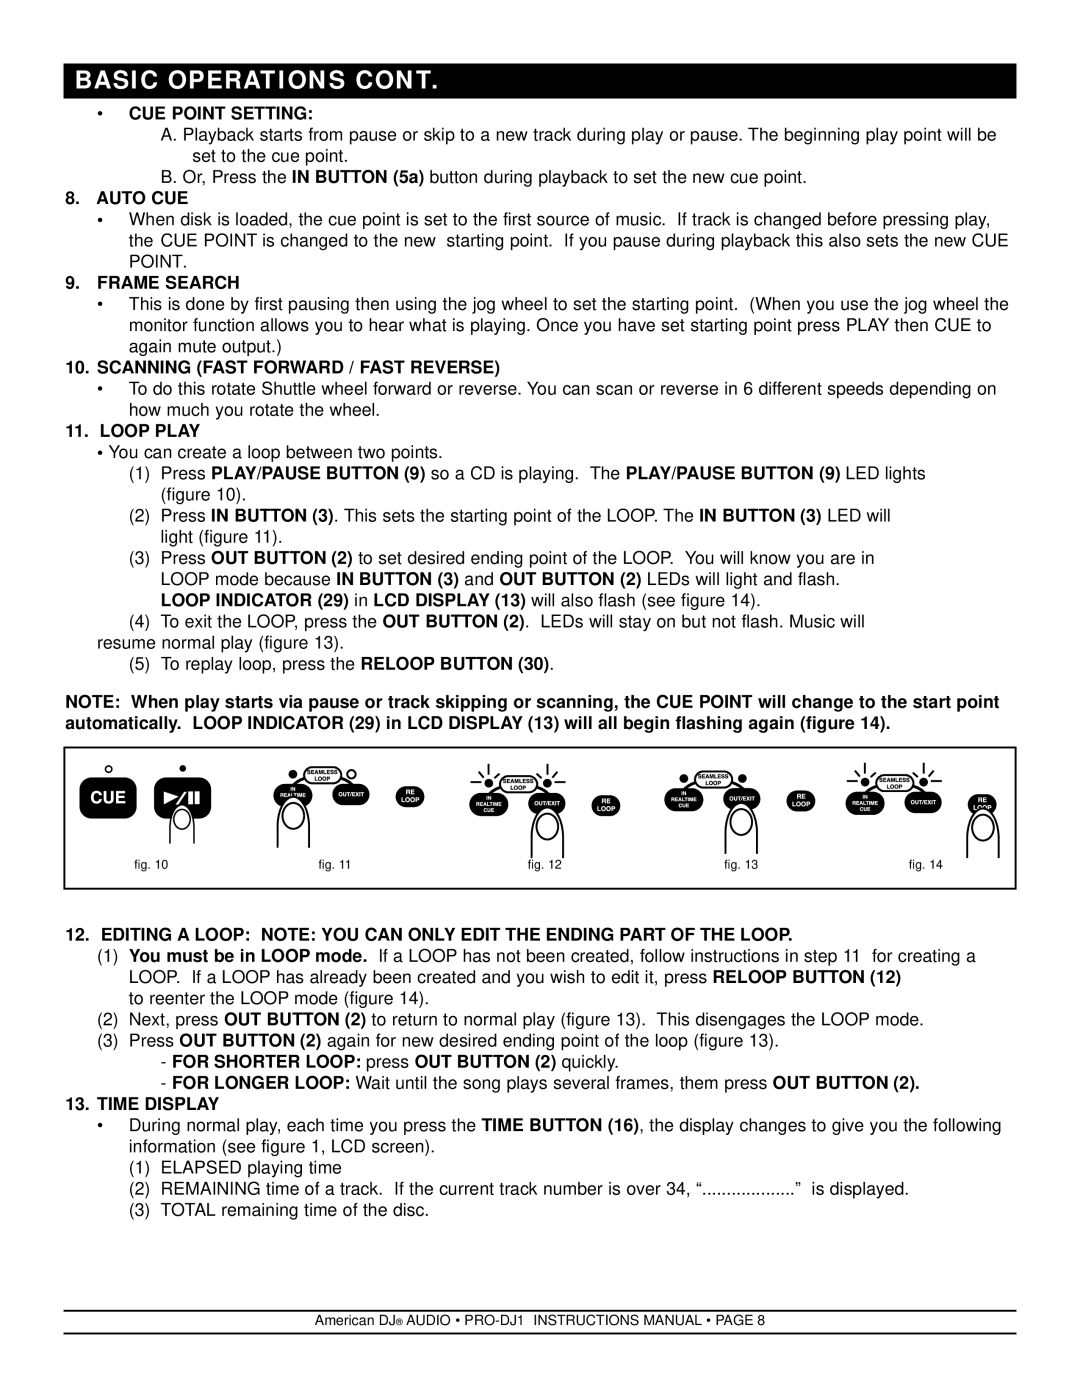
(1)Press PLAY/PAUSE BUTTON (9) so a CD is playing. The PLAY/PAUSE BUTTON (9) LED lights (figure 10).

(2)Press IN BUTTON (3). This sets the starting point of the LOOP. The IN BUTTON (3) LED will light (figure 11).

(3)Press OUT BUTTON (2) to set desired ending point of the LOOP. You will know you are in LOOP mode because IN BUTTON (3) and OUT BUTTON (2) LEDs will light and flash.

LOOP INDICATOR (29) in LCD DISPLAY (13) will also flash (see figure 14).

(4)To exit the LOOP, press the OUT BUTTON (2). LEDs will stay on but not flash. Music will

resume normal play (figure 13).

(5) To replay loop, press the RELOOP BUTTON (30).

NOTE: When play starts via pause or track skipping or scanning, the CUE POINT will change to the start point automatically. LOOP INDICATOR (29) in LCD DISPLAY (13) will all begin flashing again (figure 14).


fig. 10

fig. 11


fig. 12


fig. 13


fig. 14


12.EDITING A LOOP: NOTE: YOU CAN ONLY EDIT THE ENDING PART OF THE LOOP.

(1)You must be in LOOP mode. If a LOOP has not been created, follow instructions in step 11 for creating a LOOP. If a LOOP has already been created and you wish to edit it, press RELOOP BUTTON (12)

to reenter the LOOP mode (figure 14).

(2)Next, press OUT BUTTON (2) to return to normal play (figure 13). This disengages the LOOP mode.

(3)Press OUT BUTTON (2) again for new desired ending point of the loop (figure 13).

-FOR SHORTER LOOP: press OUT BUTTON (2) quickly.

-FOR LONGER LOOP: Wait until the song plays several frames, them press OUT BUTTON (2).

13.TIME DISPLAY

• During normal play, each time you press the TIME BUTTON (16), the display changes to give you the following information (see figure 1, LCD screen).

(1)ELAPSED playing time

(2)REMAINING time of a track. If the current track number is over 34, “...................” is displayed.

(3)TOTAL remaining time of the disc.

American DJ® AUDIO • PRO-DJ1 INSTRUCTIONS MANUAL • PAGE 8

Page 8
Image 8
American DJ PRO-DJ1 manual CUE Point Setting, Auto CUE, Frame Search, Scanning Fast Forward / Fast Reverse, Loop Play

PRO-DJ1 specifications

The American DJ PRO-DJ1 is a versatile and powerful DJ controller designed for both professional DJs and enthusiasts alike. It offers a comprehensive set of features that make it suitable for live performances, studio use, and mobile DJ setups. One of its standout characteristics is the intuitive layout that mirrors traditional DJ setups, making it easy for users to transition between different mixing styles.

One of the key features of the PRO-DJ1 is its dual-deck configuration, which allows DJs to control and manipulate two tracks simultaneously. Equipped with large jog wheels, the controller provides accurate track selection and precise pitch bending. The jog wheels are designed with responsive touch sensitivity, enabling smooth adjustments and seamless transitions during performances. The inclusion of performance pads allows for on-the-fly triggering of samples, loops, and hot cues, empowering DJs to enhance their mixes with live edits.

The PRO-DJ1 also comes with integrated audio interface technology, allowing high-quality sound output directly from the controller. This means DJs can connect to professional sound systems with minimal fuss. The controller supports multiple audio formats, ensuring compatibility with various digital audio workstations and DJ software.

Another notable characteristic is its wide range of connectivity options. The PRO-DJ1 features USB connectivity, enabling easy setup with laptops and computers. It also includes MIDI output, making it compatible with a variety of external instruments and software. The robust construction of the controller ensures durability, which is essential for the rigors of on-the-road performances.

Additionally, the American DJ PRO-DJ1 supports a wide array of digital DJ software, providing users the flexibility to choose their preferred platforms. Built-in effects and filters are easily accessible, allowing DJs to add their creative touch to any set.

Lastly, the controller's portability makes it an ideal choice for mobile DJs. Lightweight yet sturdy, the PRO-DJ1 can easily fit into any gear bag, making it convenient for transport. With its combination of features, advanced technologies, and user-friendly design, the American DJ PRO-DJ1 stands out as a reliable tool for any modern DJ looking to elevate their performance.