BELT REPLACEMENT:
Shut off electrical power to the dryer. Lockout and tag out supply voltages. Follow the steps to remove front middle panel. Next you will remove either the front bottom or front upper panel, depending on pocket you are working on. Remove the belt from the motor sheave. Next, remove the two screws fastening the lint coupe to the front panel. Remove the front panel screws, while holding up the basket. Tilt the top of the front panel forward. Take note of position of motor adjustment nut. Spin counterclockwise to loosen tension. The old belt can now be removed. Slide the new belt around basket and push belt to a position close the motor sheave.
PLACING THE BELT:
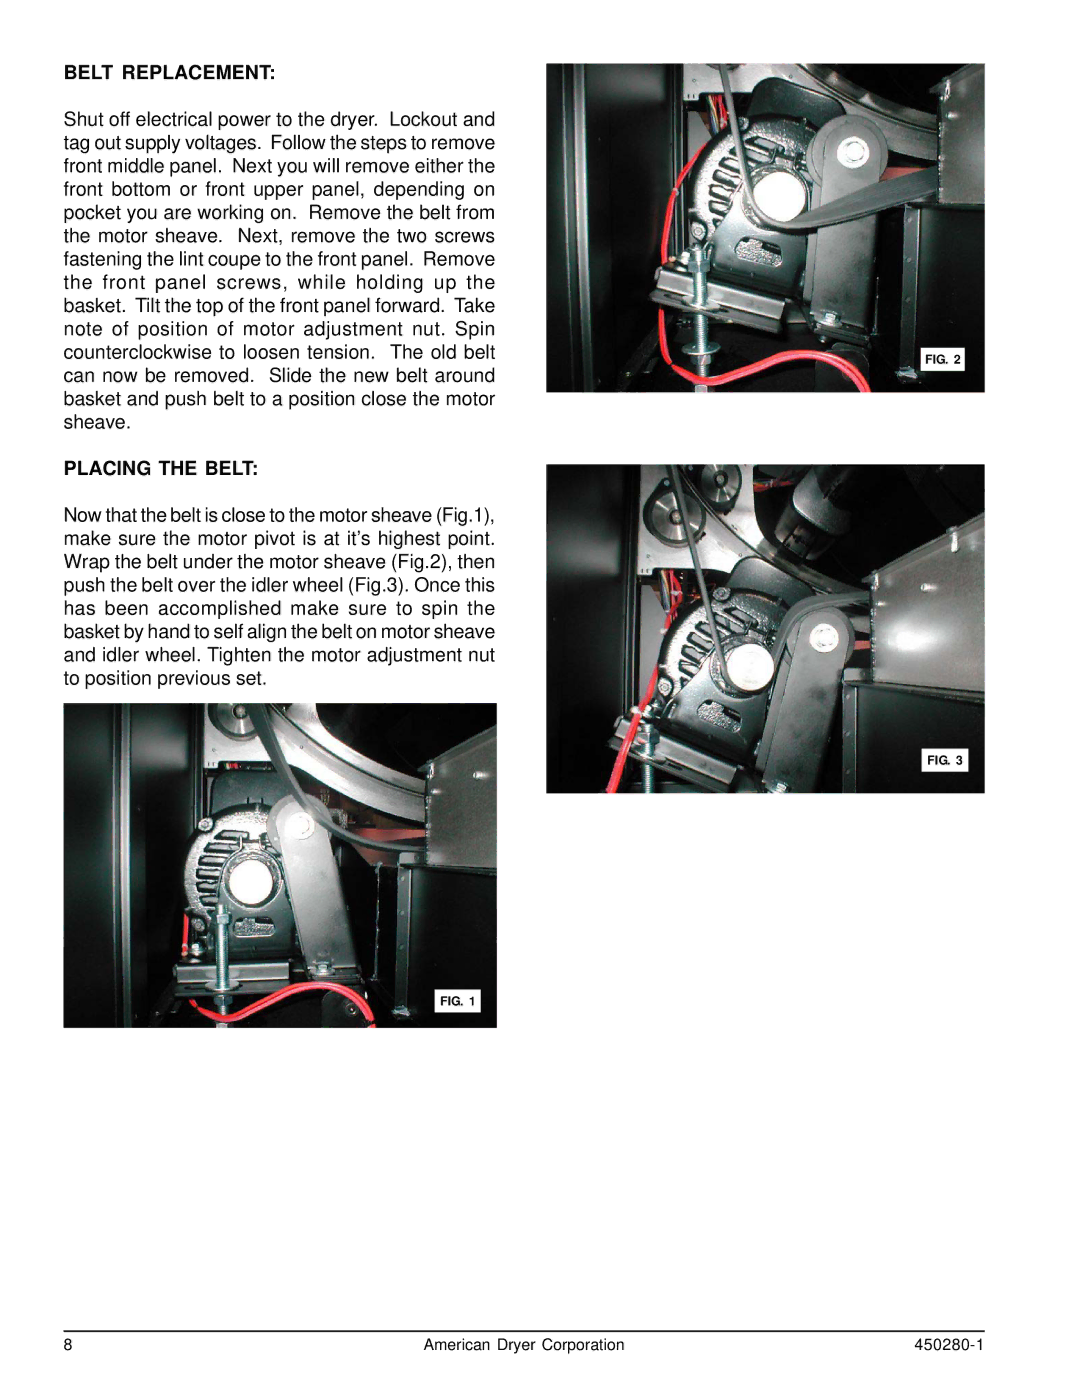
Now that the belt is close to the motor sheave (Fig.1), make sure the motor pivot is at it’s highest point. Wrap the belt under the motor sheave (Fig.2), then push the belt over the idler wheel (Fig.3). Once this has been accomplished make sure to spin the basket by hand to self align the belt on motor sheave and idler wheel. Tighten the motor adjustment nut to position previous set.
FIG. 1
FIG. 2
FIG. 3
8 | American Dryer Corporation |
