FLEXmount™ | Page 4 |
|
|
Desk Edge Clamp Mount
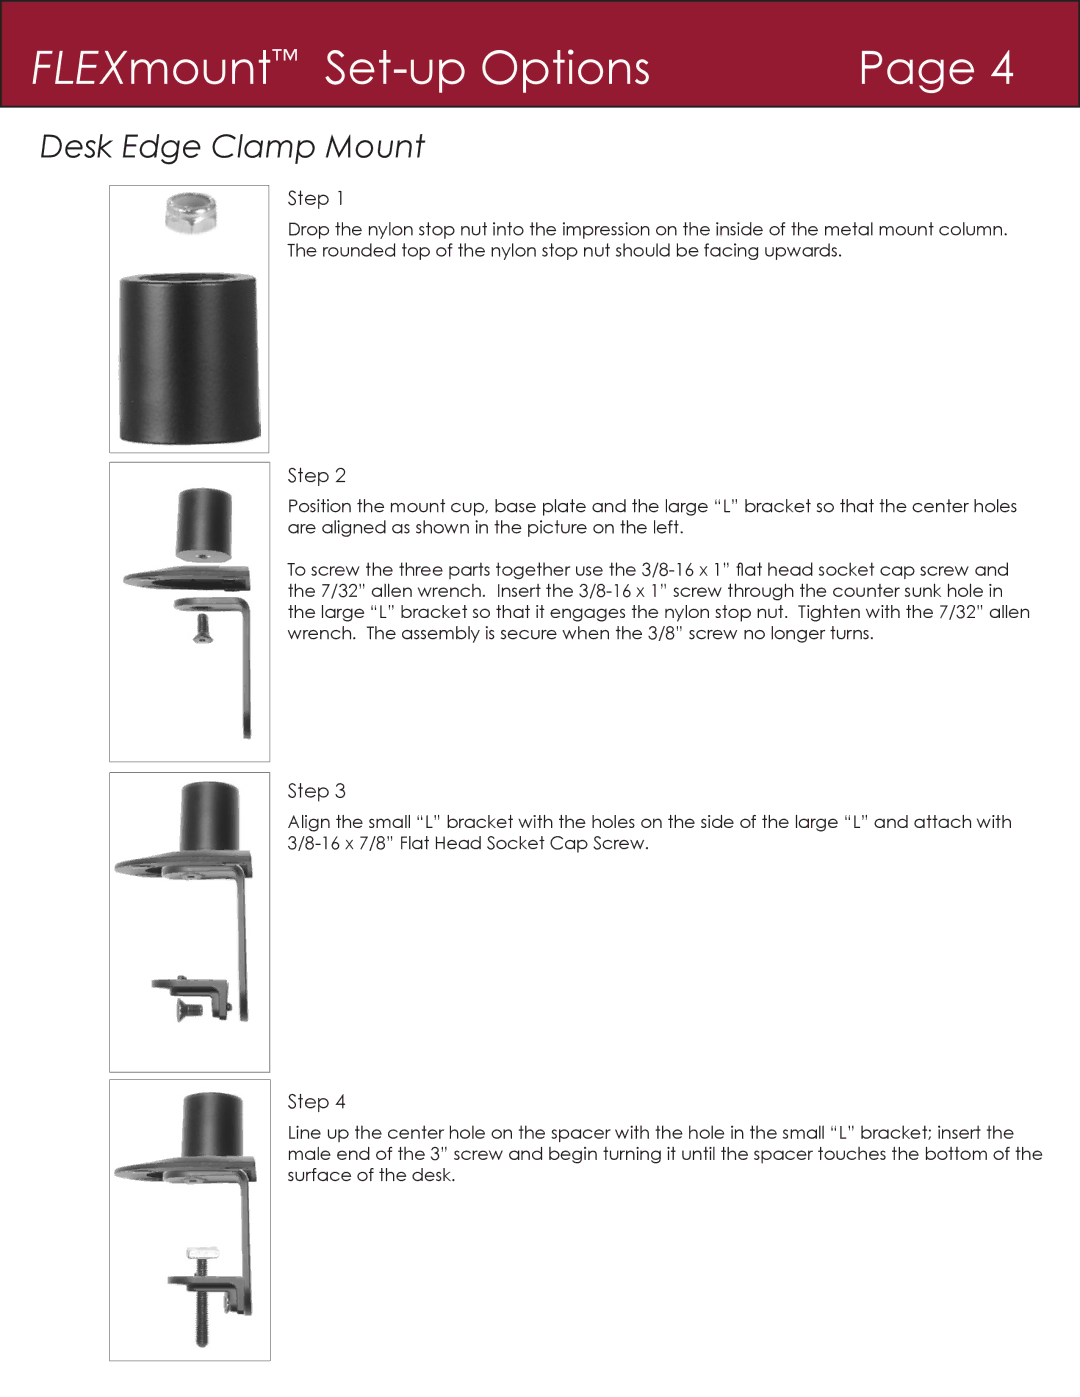
Step 1
Drop the nylon stop nut into the impression on the inside of the metal mount column.
The rounded top of the nylon stop nut should be facing upwards.
Step 2
Position the mount cup, base plate and the large “L” bracket so that the center holes are aligned as shown in the picture on the left.
To screw the three parts together use the
Step 3
Align the small “L” bracket with the holes on the side of the large “L” and attach with
Step 4
Line up the center hole on the spacer with the hole in the small “L” bracket; insert the male end of the 3” screw and begin turning it until the spacer touches the bottom of the surface of the desk.