Manuals
/
American Power Conversion
/
Computer Equipment
/
Power Supply
American Power Conversion
ES 500
specifications
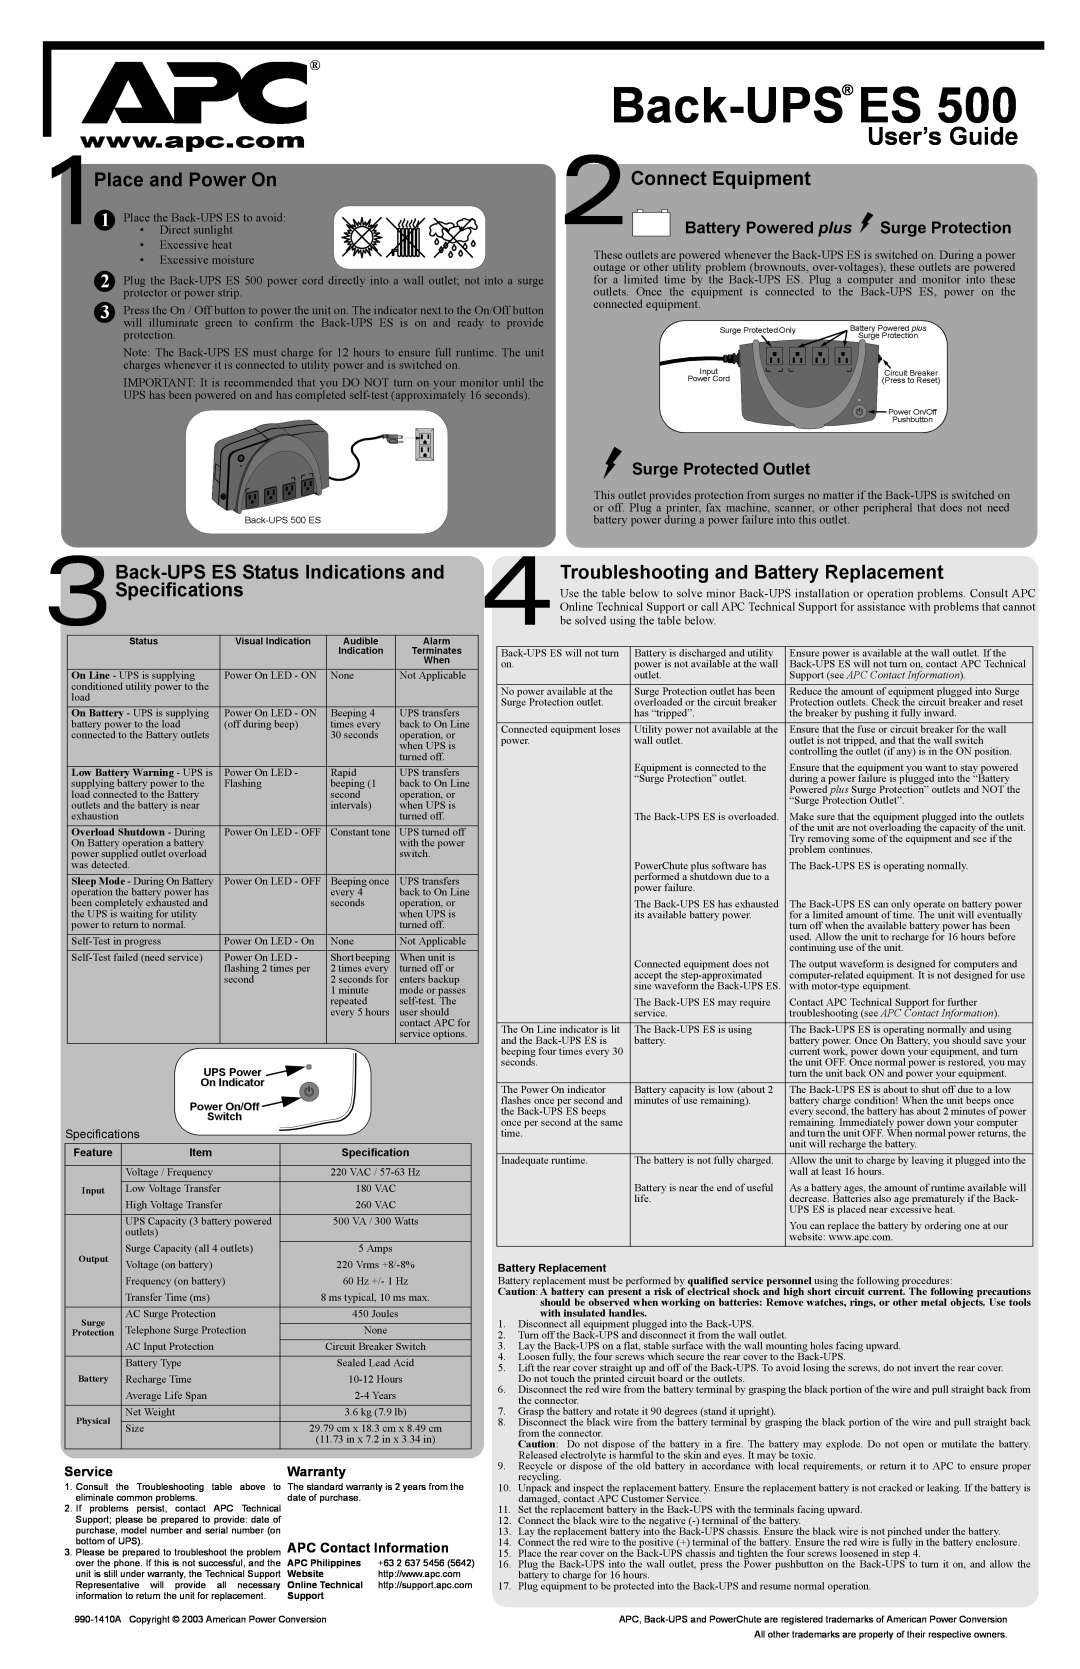
Back-UPS ES, User’s Guide, 2Connect Equipment
Models:
ES 500
1
1
1
Download
1 pages
5.07 Kb
1
Specs
Page 1
Image 1
Page 1
Page 1
Page 1
Image 1
Page 1
Page 1
Contents
Specifications
Troubleshooting and Battery Replacement
Battery Powered plus Surge Protection
Service
Top
Page
Image
Contents