1340.105 specifications
The American Standard 1340.105 is a premium sink faucet that combines modern aesthetics with functional efficiency. This faucet is designed to enhance the overall experience of using a kitchen or bathroom sink, providing users with reliable performance and stylish appeal.One of the main features of the American Standard 1340.105 is its sleek, contemporary design. Crafted with a polished chrome finish, it adds a touch of elegance to any setting. The minimalist lines and smooth contours make this faucet an attractive addition to both traditional and more modern interiors.
The faucet is equipped with a high-arc spout, allowing for ample clearance to accommodate large pots and pans in the kitchen or providing an elegant flow of water in the bathroom. The swivel spout adds further versatility, enabling easy maneuverability. This is particularly useful for multitasking in the kitchen or for rinsing out larger vessels in a bathroom setting.
Technology plays a significant role in the functionality of the American Standard 1340.105. It features a ceramic disc valve that ensures a drip-free performance and longevity. This technology effectively prevents leaks, saving water and reducing waste, while also minimizing the need for frequent repairs or replacements.
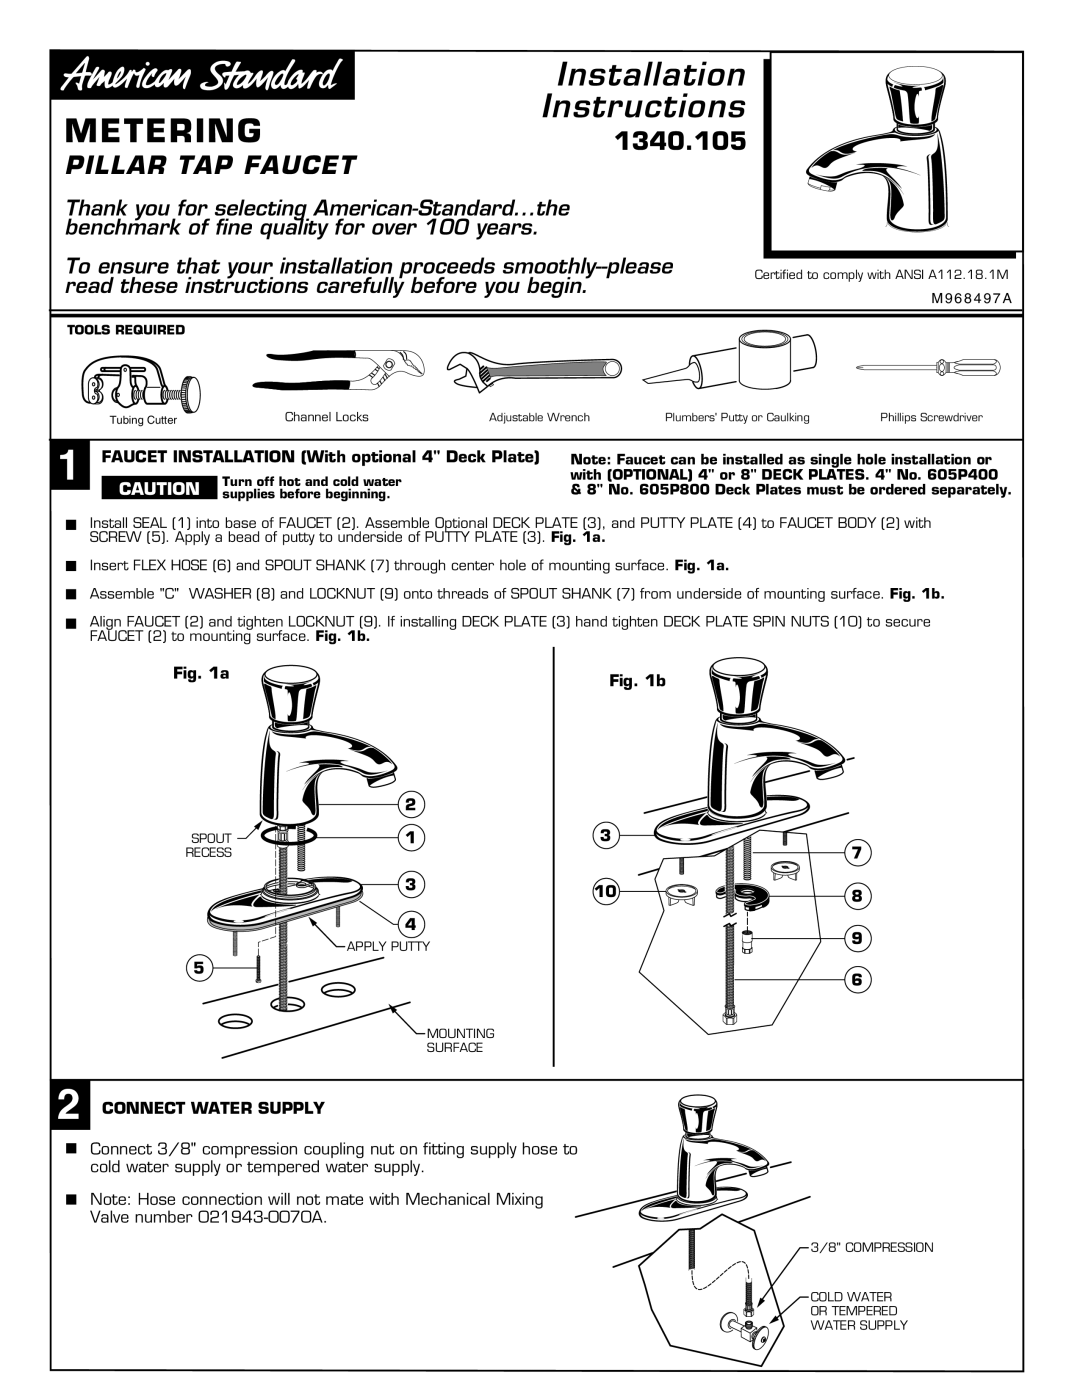
Another notable characteristic of this faucet is its ease of installation. The faucet comes with a simple mounting system designed for do-it-yourselfers and professional plumbers alike. This allows for a quick setup that can be completed in no time, making it a hassle-free upgrade for homeowners.
Additionally, the American Standard 1340.105 faucet is designed with user comfort in mind. It includes an ergonomic lever handle that provides smooth operation, allowing for easy adjustment of water flow and temperature. The handle’s placement is intuitive, ensuring that users can operate the faucet without difficulty, even with wet or soapy hands.
The faucet also complies with the latest water conservation standards, making it an environmentally friendly choice. With its user-friendly design, reliable performance, and stylish appearance, the American Standard 1340.105 is a fantastic option for those looking to enhance their kitchen or bathroom with a dependable, high-quality faucet.