3 INSTALL BODY SPRAY
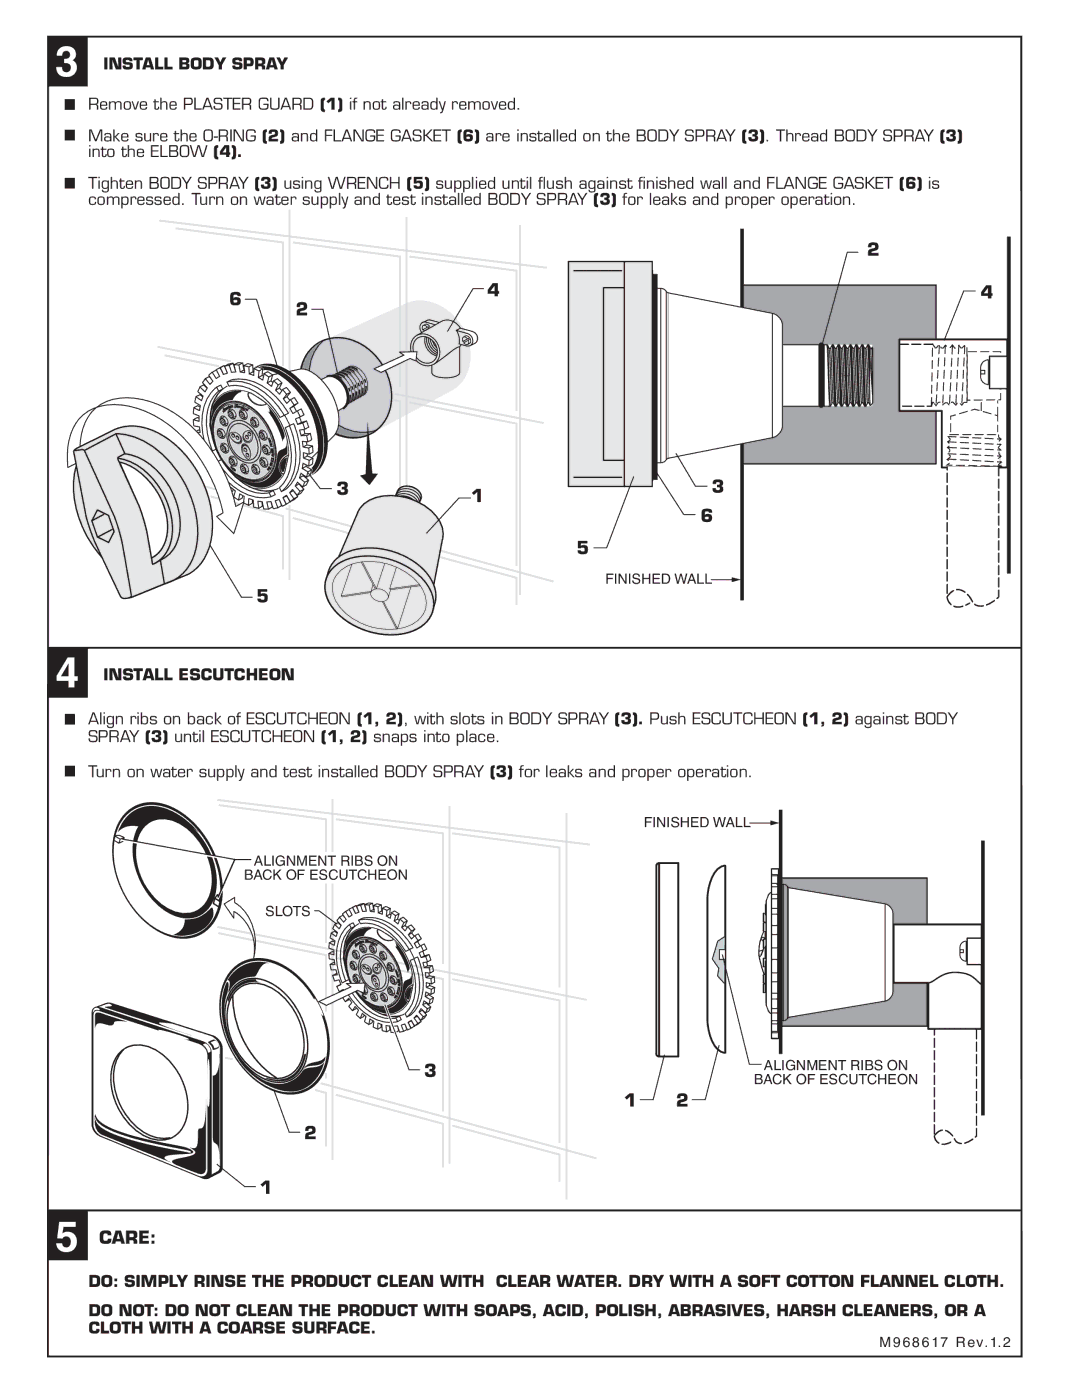
Remove the PLASTER GUARD (1) if not already removed.
Make sure the
Tighten BODY SPRAY (3) using WRENCH (5) supplied until flush against finished wall and FLANGE GASKET (6) is compressed. Turn on water supply and test installed BODY SPRAY (3) for leaks and proper operation.
6 | 4 | |
2 | ||
|
3 ![]() 1
1
5
![]() 3 6
3 6
5
FINISHED WALL![]()
2 |
4 |
4 INSTALL ESCUTCHEON
Align ribs on back of ESCUTCHEON (1, 2), with slots in BODY SPRAY (3). Push ESCUTCHEON (1, 2) against BODY SPRAY (3) until ESCUTCHEON (1, 2) snaps into place.
Turn on water supply and test installed BODY SPRAY (3) for leaks and proper operation.
FINISHED WALL![]()
![]() ALIGNMENT RIBS ON
ALIGNMENT RIBS ON
BACK OF ESCUTCHEON
SLOTS ![]()
![]()
![]()
![]()
![]()
![]()
![]()
3 | ALIGNMENT RIBS ON |
| BACK OF ESCUTCHEON |
1 | 2 |
2
![]() 1
1
5 CARE:
DO: SIMPLY RINSE THE PRODUCT CLEAN WITH CLEAR WATER. DRY WITH A SOFT COTTON FLANNEL CLOTH.
DO NOT: DO NOT CLEAN THE PRODUCT WITH SOAPS, ACID, POLISH, ABRASIVES, HARSH CLEANERS, OR A CLOTH WITH A COARSE SURFACE.
M968617 Rev. 1. 2
