2373.900, 2373.921, 2373.901, 2373.920 specifications
The American Standard 2373.900, 2373.921, 2373.901, and 2373.920 are a series of high-quality bathroom sink faucets designed to blend style, functionality, and innovation. These models are distinguished by their modern aesthetic, making them ideal for contemporary bathrooms while maintaining American Standard's commitment to durability and ease of use.One of the standout features of these faucet models is their EcoPulse technology, which promotes water conservation without sacrificing performance. EcoPulse reduces water flow to 1.2 gallons per minute while maintaining strong pressure, thus helping homeowners save on water bills without compromising the user experience. This feature is particularly appealing to environmentally conscious consumers looking for sustainable solutions for their homes.
In terms of design, the 2373 series boasts sleek lines and geometric shapes, available in various finishes including polished chrome and satin nickel. These finishes not only offer visual appeal but also provide a layer of protection against scratches and tarnishing, ensuring that the faucets maintain their beauty over time. The minimalist design makes it easy to integrate these faucets into any bathroom decor, from traditional to modern styles.
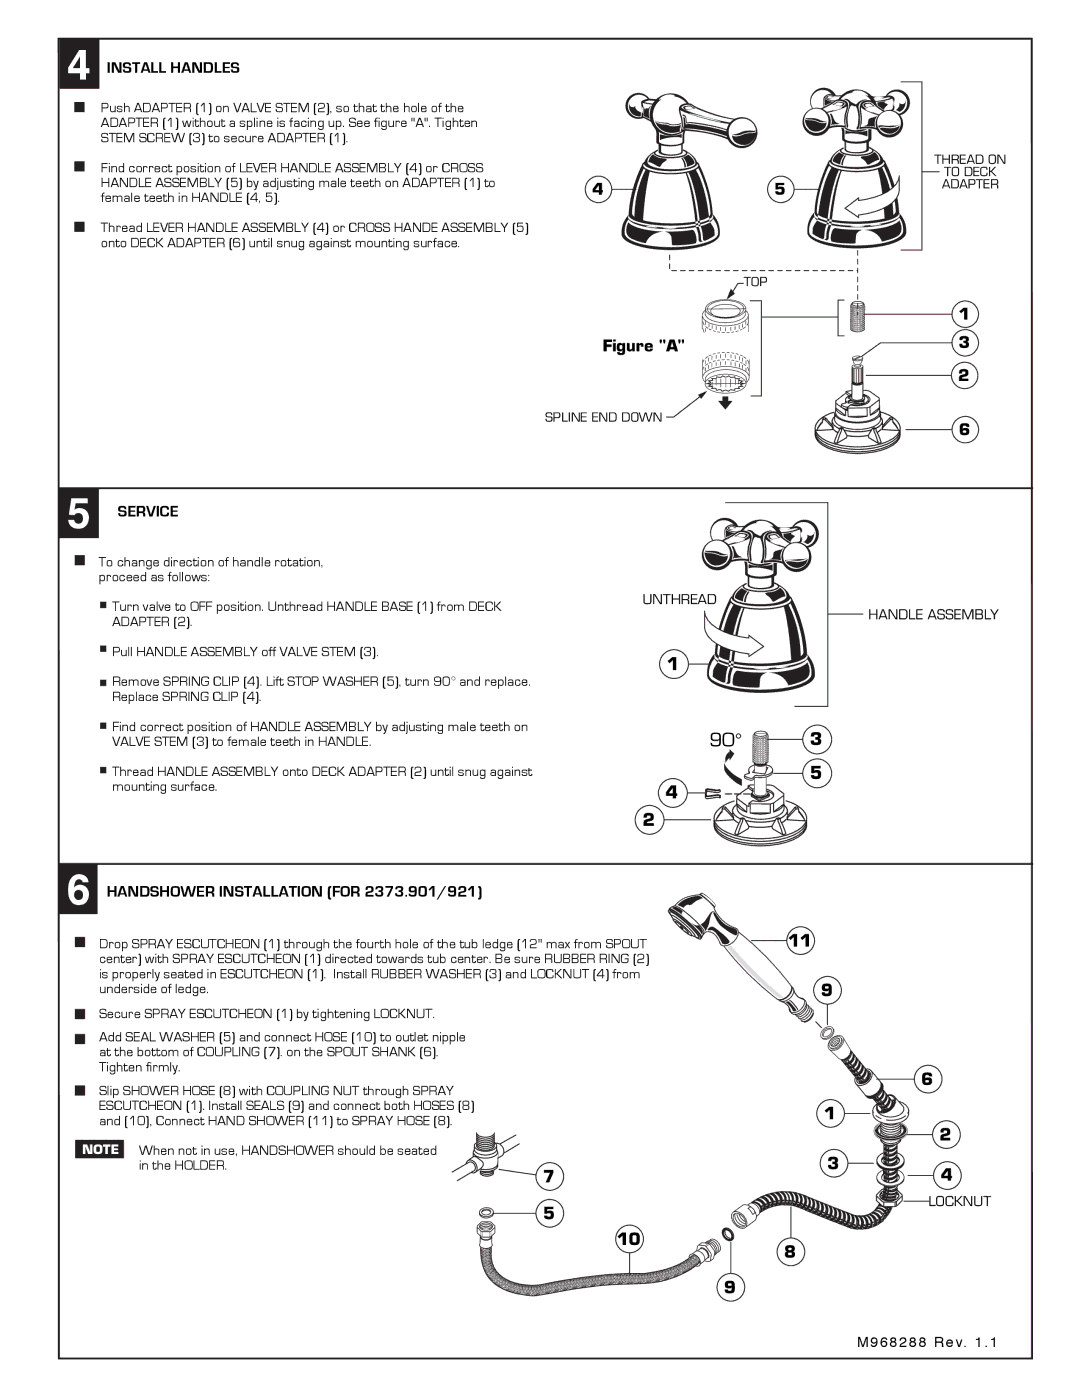
Installation of the American Standard 2373 faucets is user-friendly, as they come with a pre-attached mounting system that simplifies the process, allowing for a seamless setup. Additionally, the faucets feature a ceramic disc cartridge, which ensures a leak-free operation and provides long-lasting performance. This technology enhances durability and reduces the likelihood of maintenance issues, making these faucets a smart investment for any homeowner.
Another key characteristic of the 2373 series is its user-centered design. The faucets are equipped with easy-grip handles that allow for smooth operation, even when hands are wet or soapy. The ergonomic design ensures that the user experience is comfortable and convenient, particularly in busy bathroom settings.
Overall, the American Standard 2373.900, 2373.921, 2373.901, and 2373.920 faucets combine stylish design with practical features and innovative technology. Their emphasis on water conservation, ease of installation, and long-lasting performance make them an excellent choice for anyone looking to upgrade their bathroom fixtures. By choosing these faucets, homeowners not only enhance the aesthetic appeal of their bathrooms but also contribute to a more sustainable future.

