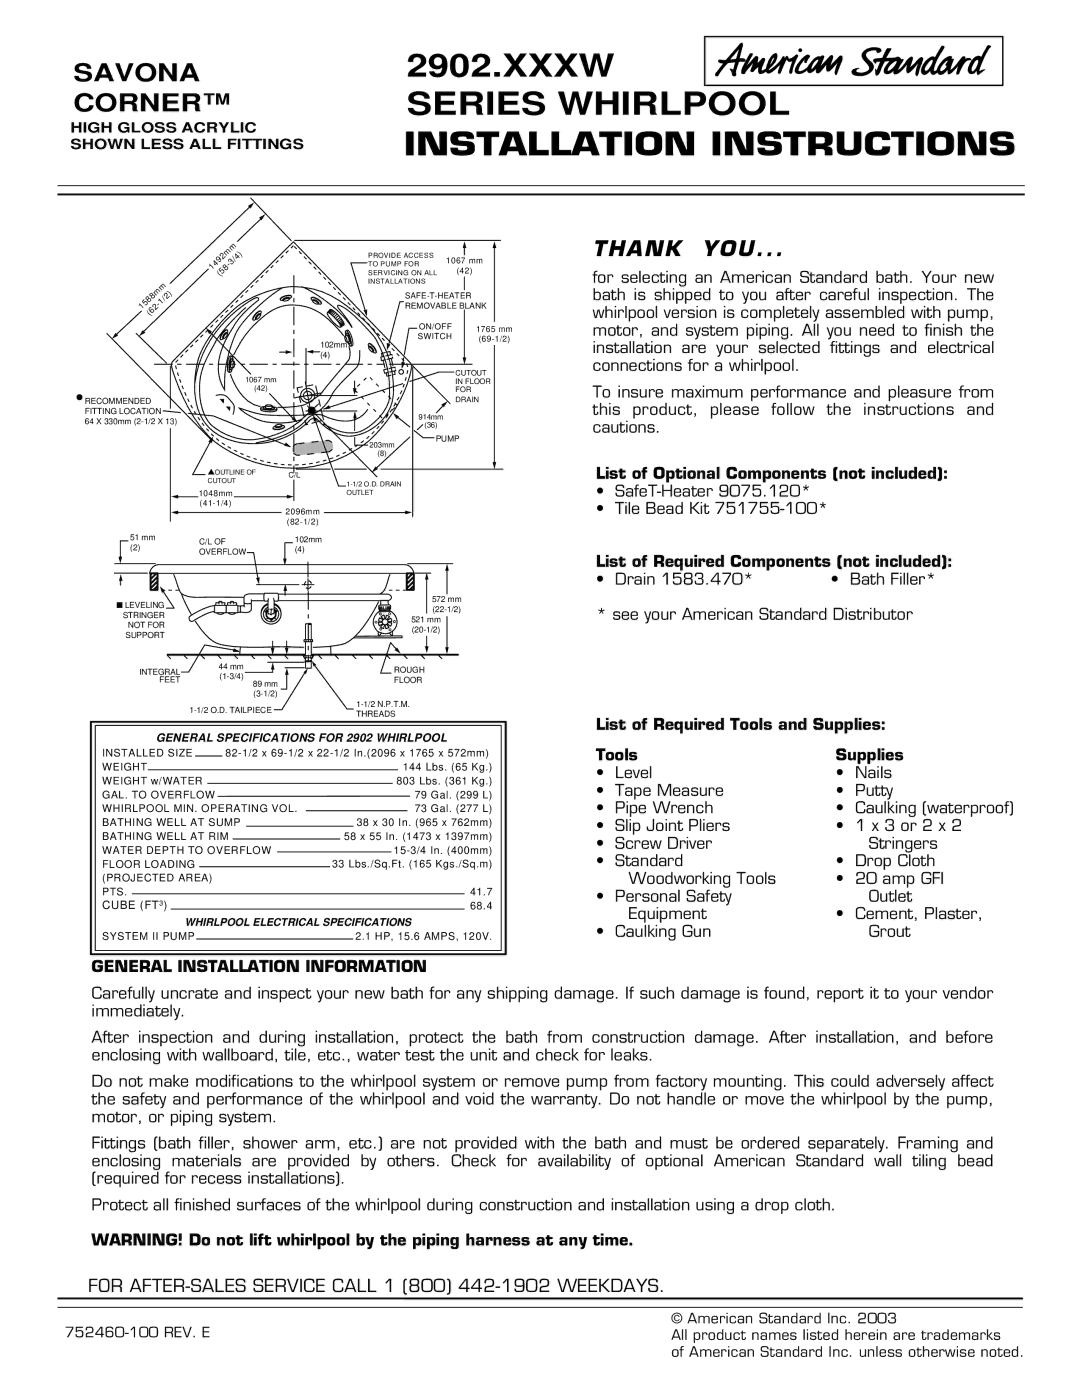
2902.XXXW Series specifications
The American Standard 2902.XXXW Series is a well-regarded line of toilets that exemplifies modern design and efficiency. Renowned for its exceptional performance and innovative features, the series aims to provide a superior bathroom experience.One standout characteristic of the 2902.XXXW Series is its sleek and contemporary design. The toilets in this collection feature a streamlined silhouette, allowing them to seamlessly integrate into a variety of bathroom styles, from modern to traditional. The aesthetic appeal of these toilets is complemented by high-quality materials that ensure durability and longevity.
A major highlight of the 2902.XXXW Series is its impressive flushing technology. Equipped with the renowned AquaTitan™ system, these toilets utilize a powerful flush mechanism that ensures effective waste removal while minimizing water usage. This incredible efficiency translates to a sustainable solution, as the toilets are designed to meet WaterSense® criteria. As a result, users can save on water bills while contributing to environmental conservation.
Comfort is another key feature of the 2902.XXXW Series, with a chair-height design that enhances accessibility. This elevation makes it easier for individuals of all ages and abilities to use the toilet comfortably. The elongated bowl design further contributes to this comfort, providing users with a spacious seating area.
The 2902.XXXW Series also emphasizes ease of installation and maintenance. With a simple two-piece design, the setup process is straightforward, making it a preferred choice for both homeowners and professionals. Additionally, the smooth surface of the toilet makes cleaning hassle-free, as it minimizes the accumulation of dirt and grime.
Moreover, this series incorporates advanced materials that are resistant to stains and scratches, ensuring the toilet maintains its pristine appearance for years to come. With an array of finishes available, users can choose options that suit their personal style and bathroom décor.
In conclusion, the American Standard 2902.XXXW Series combines style, comfort, and innovative technology, making it an excellent choice for anyone seeking a reliable and aesthetically pleasing toilet solution. Its commitment to efficiency, ease of use, and modern design ensures that it meets the demands of today’s households while promoting sustainability and comfort in everyday life.