3808.101 specifications
The American Standard 3808.101 is a renowned model in the realm of bathroom fixtures, specifically designed to enhance both functionality and aesthetic appeal in contemporary bathrooms. This model is particularly recognized for its combination of quality construction, innovative features, and modern design.One of the standout features of the American Standard 3808.101 is its sleek and compact design. It fits seamlessly into a variety of bathroom sizes without compromising on style. The unit is often manufactured with a smooth surface, making it not only visually appealing but also easy to clean and maintain.
In terms of materials, the American Standard brand is known for using high-quality porcelain, which is not only durable but also resistant to scratches and stains. This ensures that the product maintains its look and functionality even after years of use. The item is designed to withstand the demands of everyday use, making it a reliable choice for any bathroom setup.
The 3808.101 model incorporates advanced technologies aimed at improving user experience. One key technology is the integrated siphon jet system, which promotes efficient water flow and enhances flushing performance. This feature ensures a powerful and quiet flush, reducing the chances of clogs and maintenance issues over time. Additionally, the design accounts for water efficiency, helping users reduce their water consumption and lower their utility bills.
Comfort is another priority for the American Standard 3808.101. The height and shape of the toilet seat are ergonomically designed, ensuring that it is comfortable for all users. The model often includes features such as a slow-close seat, which prevents slamming and enhances user comfort.
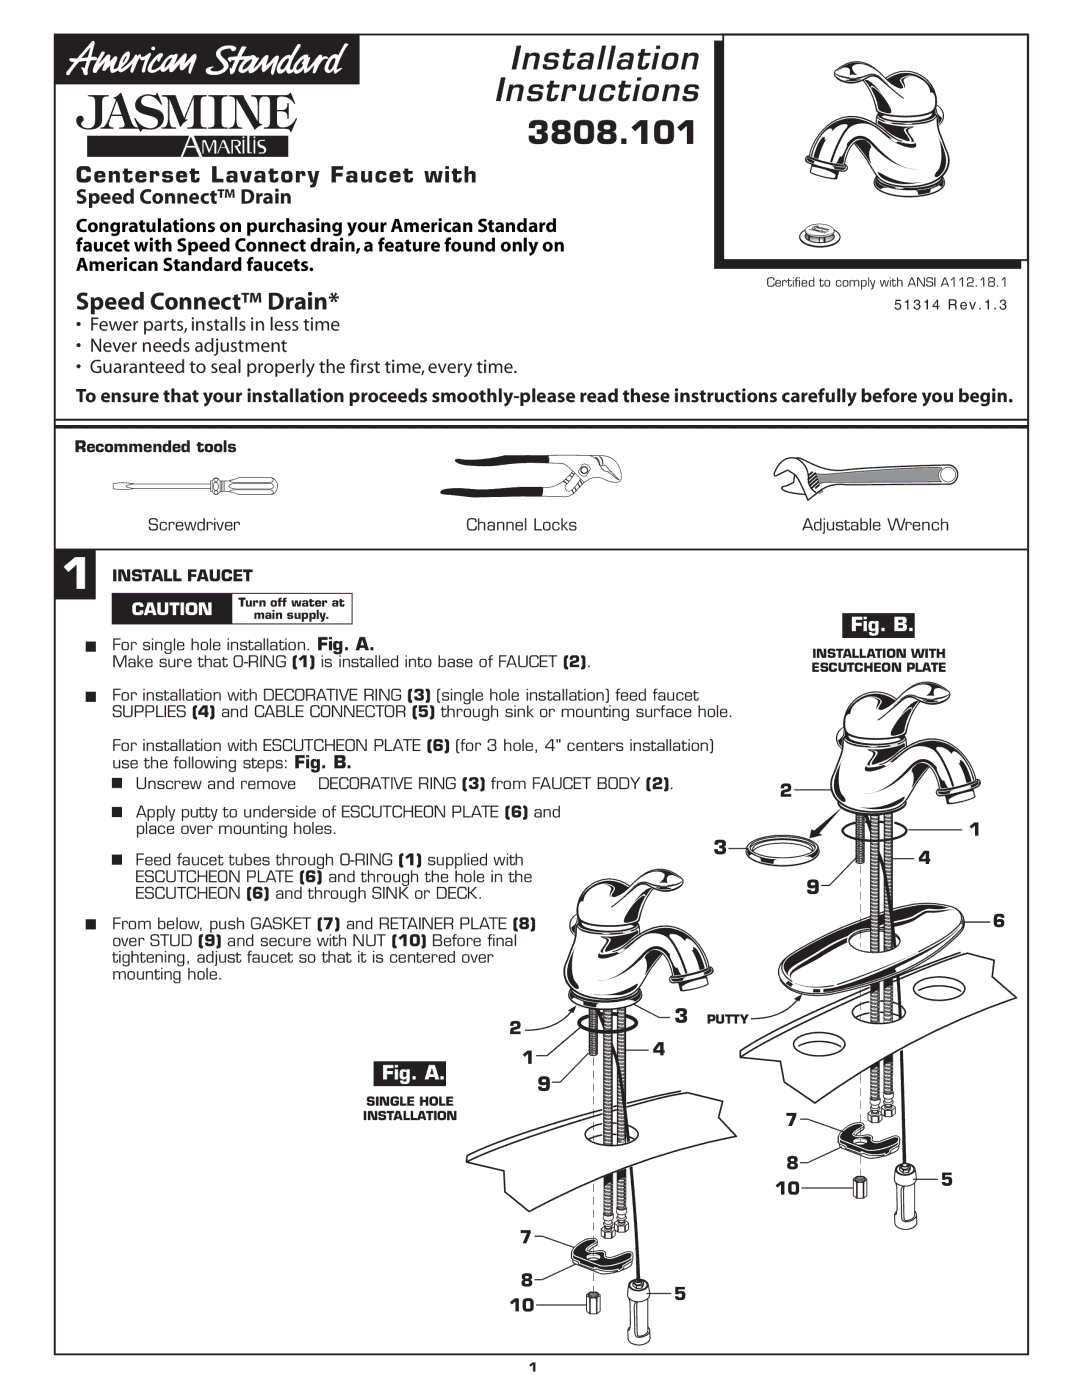
Another characteristic that stands out is the ease of installation. The American Standard 3808.101 comes with a standard size that fits most bathroom setups, making it a hassle-free option for both professionals and DIY enthusiasts. The comprehensive installation instructions and necessary hardware simplify the process, saving both time and effort.
In summary, the American Standard 3808.101 is a well-rounded toilet model that combines a compact design with advanced technology, high-quality materials, and user-friendly features. Its emphasis on water efficiency, comfort, and ease of installation make it a popular choice among homeowners and builders alike, reinforcing American Standard's reputation as a leader in bathroom fixtures.