
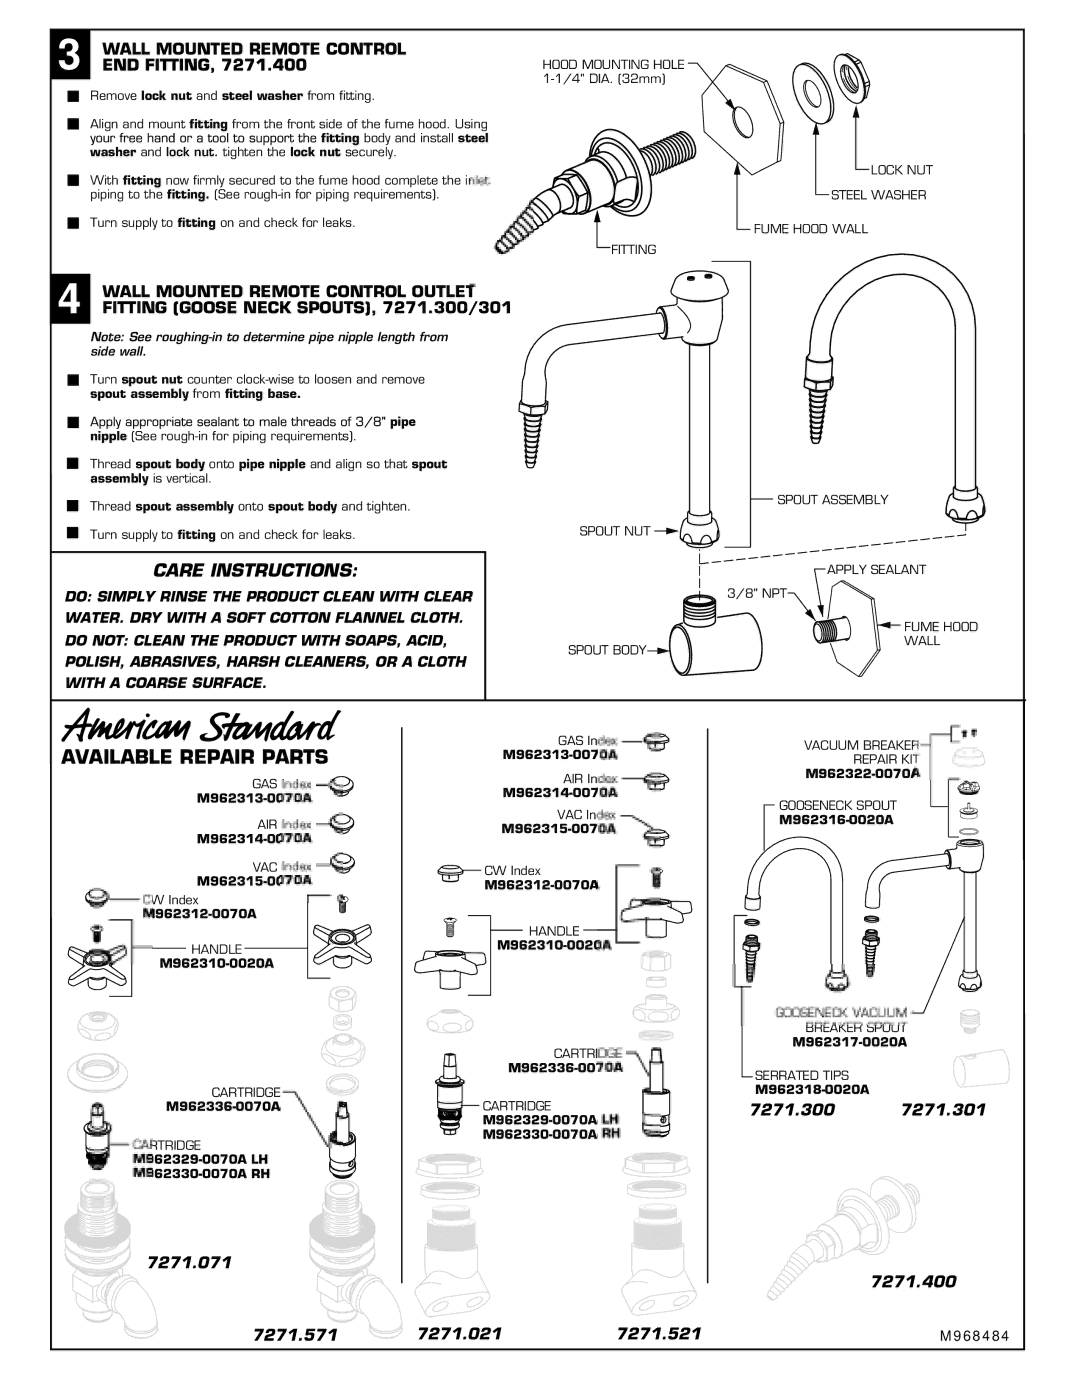
7271.571, 7271.300, 7271.071, 7271.021, 7271.301 specifications
The American Standard 7271 series of bathroom fixtures represents a blend of stylish design and practical functionality, making it a popular choice for homeowners seeking to elevate their bathroom space. This series includes models 7271.521, 7271.400, 7271.301, 7271.021, and 7271.300, each offering unique features while maintaining a cohesive aesthetic appeal.One of the main features of the American Standard 7271 series is its commitment to water efficiency. Each model integrates advanced technologies that promote responsible water usage without compromising performance. This is particularly important as more consumers seek eco-friendly solutions in home fixtures. The fixtures are designed to meet or exceed WaterSense standards, ensuring a minimum flow rate that conserves water while delivering optimal performance.
The 7271.521 model, for instance, is noted for its ergonomic design, providing a user-friendly experience for individuals of all ages and abilities. Its high-arc spout not only adds elegance but also allows for easier access when filling large pots or cleaning.
In contrast, the 7271.400 is marked by its contemporary style with a streamlined silhouette. It features a powerful spray function that enhances usability for everyday tasks, making it a favorite among busy families. The easy-to-install design of the entire series helps simplify the renovation process, allowing homeowners to achieve a fresh look with minimal hassle.
The 7271.301 model stands out due to its innovative Touch2O technology. This feature allows users to turn the water on and off with just a touch, promoting convenience and hygiene in the bathroom. This touch-activated functionality is particularly beneficial in busy households where hands-free operation can save time and reduce mess.
In terms of durability, the American Standard 7271 series is built to last, utilizing premium materials that resist tarnishing and corrosion. The ceramic disc valve technology found in every model provides a lifetime of drip-free performance, which is an essential characteristic that underlines the brand's commitment to quality.
Finally, the 7271.021 and 7271.300 models embody American Standard’s dedication to blending form and function. Each fixture is available in a range of finishes, allowing customers to choose options that best fit their personal style and existing décor.
In summary, the American Standard 7271 series, featuring models 7271.521, 7271.400, 7271.301, 7271.021, and 7271.300, is a testament to superior design, water efficiency, user-friendly technology, and durable construction, making it an excellent choice for modern bathrooms.