7411.712, 7411.702, 7411.722, 7411.732 specifications
The American Standard 7411 series of faucets, including models 7411.702, 7411.732, 7411.722, and 7411.712, represents a collection of premium faucet designs that blend functionality with aesthetic appeal. These faucets are ideal for modern bathrooms and kitchens, showcasing a perfect fusion of form and function.One of the standout features of the 7411 series is the use of a durable, high-quality finish that resists tarnishing and corrosion. This ensures that the faucets maintain their sleek appearance even with regular use. The finishes available include chrome and brushed nickel, providing homeowners with choices that complement various interior styles.
Technologically, the 7411 series employs the innovative Microban® antimicrobial protection, which helps to inhibit the growth of bacteria and mold on the faucet's surface. This feature is particularly beneficial for maintaining a hygienic environment in frequently used spaces like kitchens and bathrooms.
Another highlight of these models is the inclusion of the exclusive Spot Resist™ technology. This smart feature minimizes the appearance of water spots and fingerprints, reducing the need for frequent cleaning and upkeep. Homeowners can enjoy the gleaming look of their faucets without the hassle of constant maintenance.
In terms of design, the 7411 series faucets feature a contemporary silhouette with smooth lines and ergonomic handles. The lever design allows for easy operation, delivering a user-friendly experience for family members of all ages. Whether it’s a quick hand wash or filling up a pot, these faucets ensure that the task can be performed effortlessly.
Furthermore, the faucets come equipped with a high-arc spout that provides ample clearance for various tasks, such as washing large pots or filling up containers, while ensuring unrestricted water flow. This practical design element enhances usability while adding an element of luxury to the space.
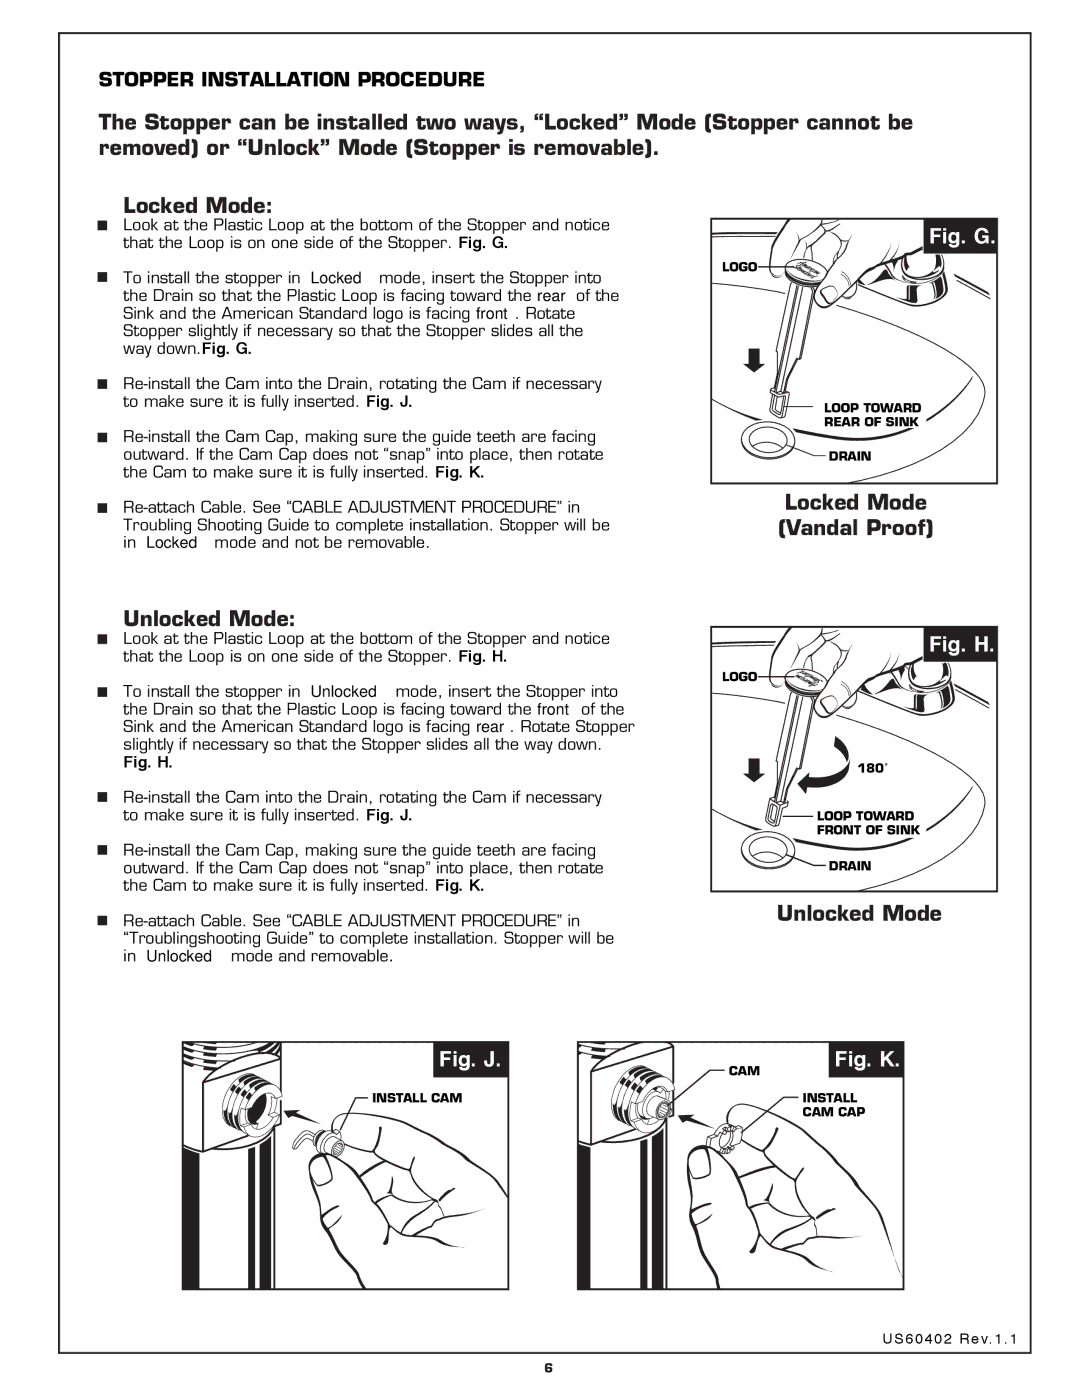
Installation is simplified thanks to the included instructions and the universal fit of the faucet, which is compatible with most standard sink setups. Additionally, the faucets are backed by a limited lifetime warranty, providing peace of mind regarding their durability and performance.
In conclusion, the American Standard 7411.702, 7411.732, 7411.722, and 7411.712 faucets are an exemplary choice for those seeking modern design, advanced technology, and user-friendly features. They not only elevate the aesthetic of any bathroom or kitchen but also enhance the overall user experience, making them a worthy investment for any home.

