1
CAUTION
Turn off hot and cold water supplies before beginning.
See
The DIVERTER can be installed with the inlet rotated in any position.
Supply connections are 1/2" NPT connections.
For proper positioning the finished wall must be within side of PLASTER GUARD.
Connect water to valve. The reverse side of the body is marked with arrows. CAUTION: Do not solder near the VALVE. Damage to the SEAL may occur.
Do not seal any outlets. The DIVERTER cannot be used as a stop valve.
For support use pipe braces secured to wooden braces.
2 TEST DIVERTER
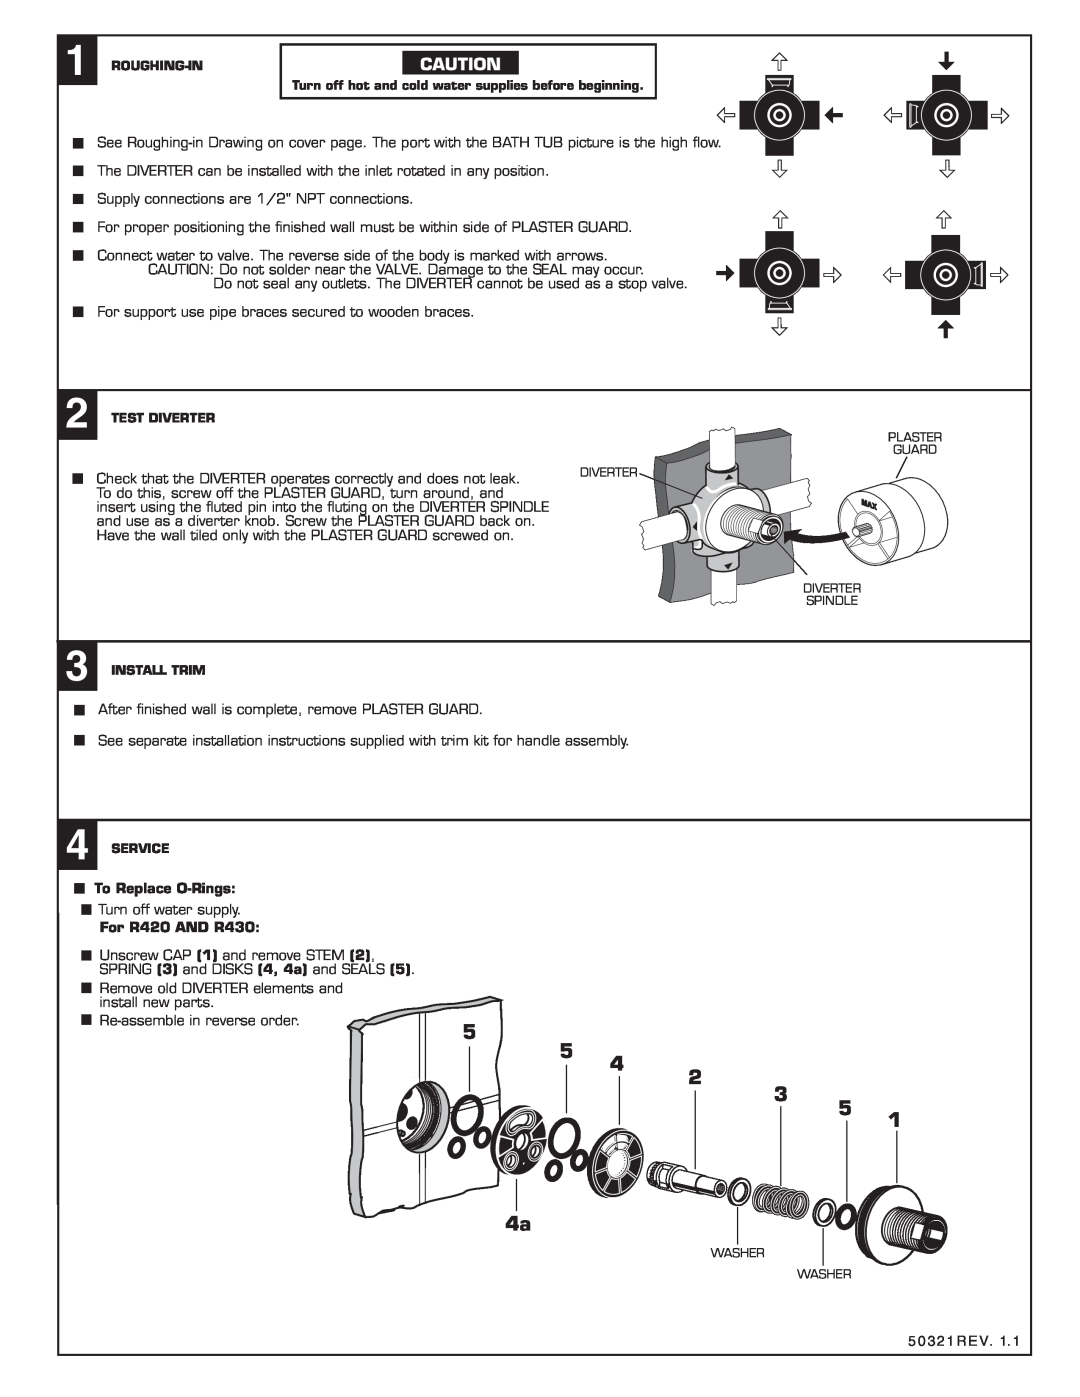
Check that the DIVERTER operates correctly and does not leak. To do this, screw off the PLASTER GUARD, turn around, and insert using the fluted pin into the fluting on the DIVERTER SPINDLE and use as a diverter knob. Screw the PLASTER GUARD back on. Have the wall tiled only with the PLASTER GUARD screwed on.
PLASTER
GUARD
DIVERTER
DIVERTER
SPINDLE
3 INSTALL TRIM
After finished wall is complete, remove PLASTER GUARD.
See separate installation instructions supplied with trim kit for handle assembly.
4 SERVICE
To Replace O-Rings:
![]() Turn off water supply.
Turn off water supply.
For R420 AND R430:
Unscrew CAP (1) and remove STEM (2), SPRING (3) and DISKS (4, 4a) and SEALS (5).
Remove old DIVERTER elements and install new parts.
5 | |
|
5
4a
4
2
3
WASHER
5 1
WASHER
50321REV. 1. 1