CHAPTER 4
INSTALLATION
A. Battery (included with RC–200)
Speakerphone
1. Six "AA" size, Nickel Cadmium (NiCad) recharge- able batteries are
used for
age (Fig 3). They power the DIA- LOGUE RC for approximately
3 hours. DO NOT USE ALKALINE BATTERIES, they will damage your equipment.
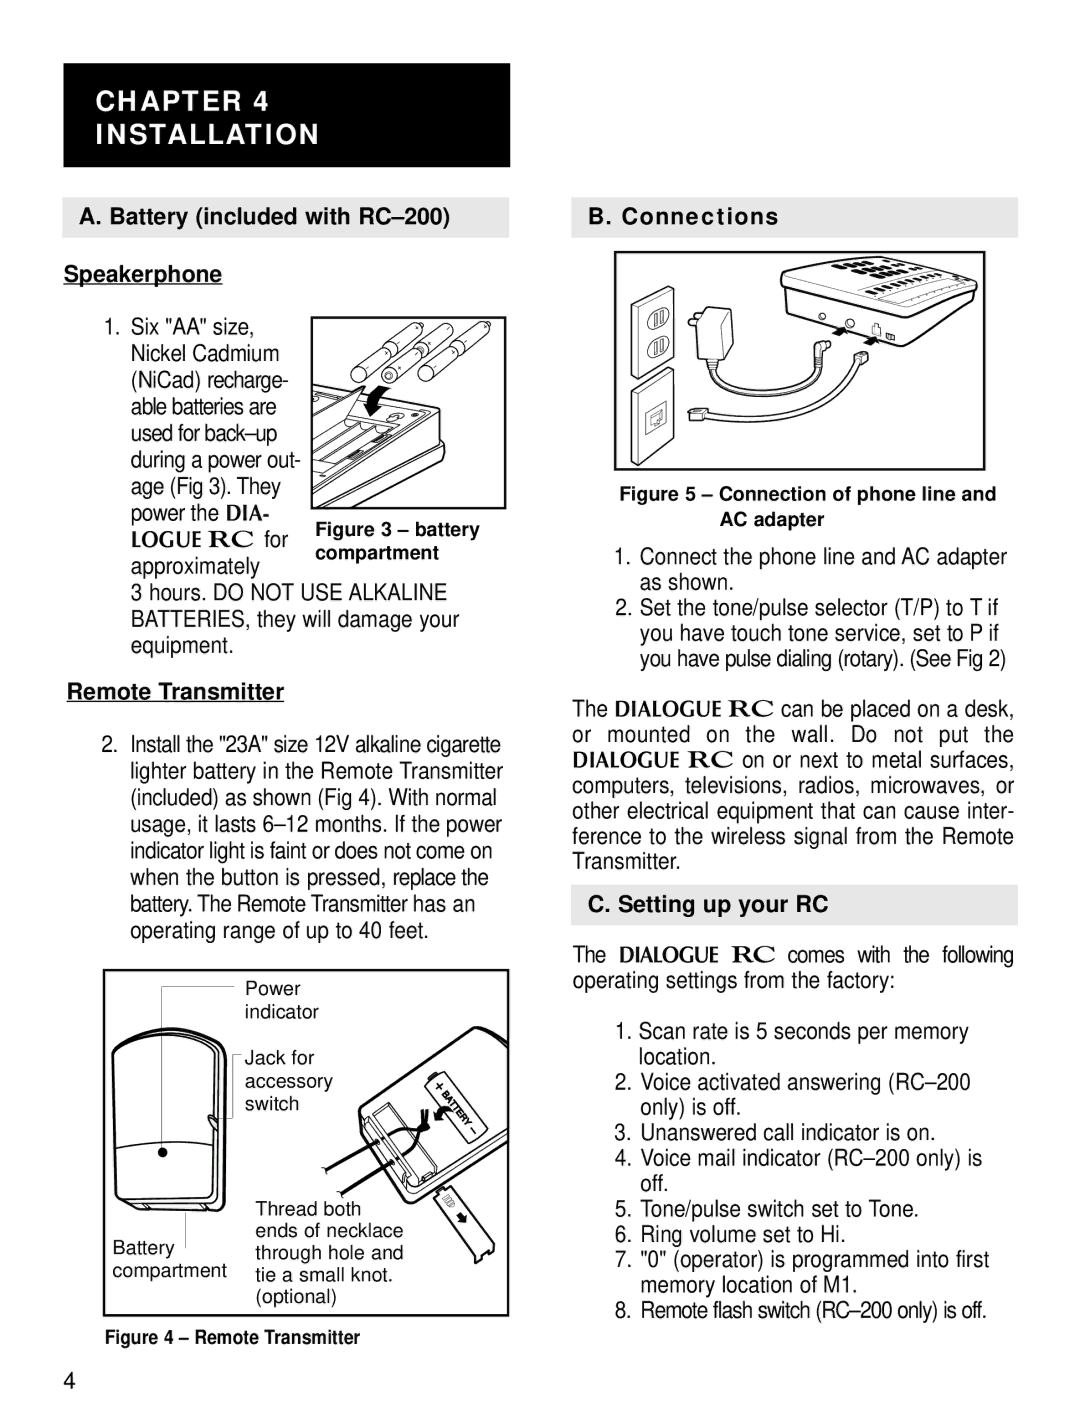
Remote Transmitter
2.Install the "23A" size 12V alkaline cigarette lighter battery in the Remote Transmitter (included) as shown (Fig 4). With normal usage, it lasts
| Power |
| indicator |
| Jack for |
| accessory |
| switch |
| Thread both |
Battery | ends of necklace |
through hole and | |
compartment | tie a small knot. |
| (optional) |
Figure 4 – Remote Transmitter
B. Connections
Figure 5 – Connection of phone line and AC adapter
1.Connect the phone line and AC adapter as shown.
2.Set the tone/pulse selector (T/P) to T if you have touch tone service, set to P if you have pulse dialing (rotary). (See Fig 2)
The DIALOGUE RC can be placed on a desk, or mounted on the wall. Do not put the DIALOGUE RC on or next to metal surfaces, computers, televisions, radios, microwaves, or other electrical equipment that can cause inter- ference to the wireless signal from the Remote Transmitter.
C. Setting up your RC
The DIALOGUE RC comes with the following operating settings from the factory:
1.Scan rate is 5 seconds per memory location.
2.Voice activated answering
3.Unanswered call indicator is on.
4.Voice mail indicator
5.Tone/pulse switch set to Tone.
6.Ring volume set to Hi.
7."0" (operator) is programmed into first memory location of M1.
8.Remote flash switch
4