Operation | ATM 300 Series |
|
|
1.7Operation
To operate the ATM units:
1.For initial installations, perform the
2.Verify the TEST LOOP switch, on the rear panel, is in the NORMAL position.
3.Place the POWER switch to the ON position. The POWER indicator should light.
4.Verify the ERROR indicator (rear panel) is off.
5.Verify the tape drive is setup for External Playback Clock (see DIS Tape Drive or ACL Installation and Operation manual).
6.Set the DATA FLOW switch to CONTINUOUS or GATED as required (see Table 2).
7.Perform record or playback operations.
For synchronized data transfers in multiple
a.For record operations, hold the common SyncStart signal low until all tape drives are ready to accept data and the desired input data is available. Set the common SyncStart signal high, to begin delivering data from the ATM units to their respective tape drives.
b.For playback operations, hold the common SyncStart signal low until all tape drives are ready to deliver data and the unit accepting data is ready. Set the common SyncStart signal high to begin providing data to the units accepting data.
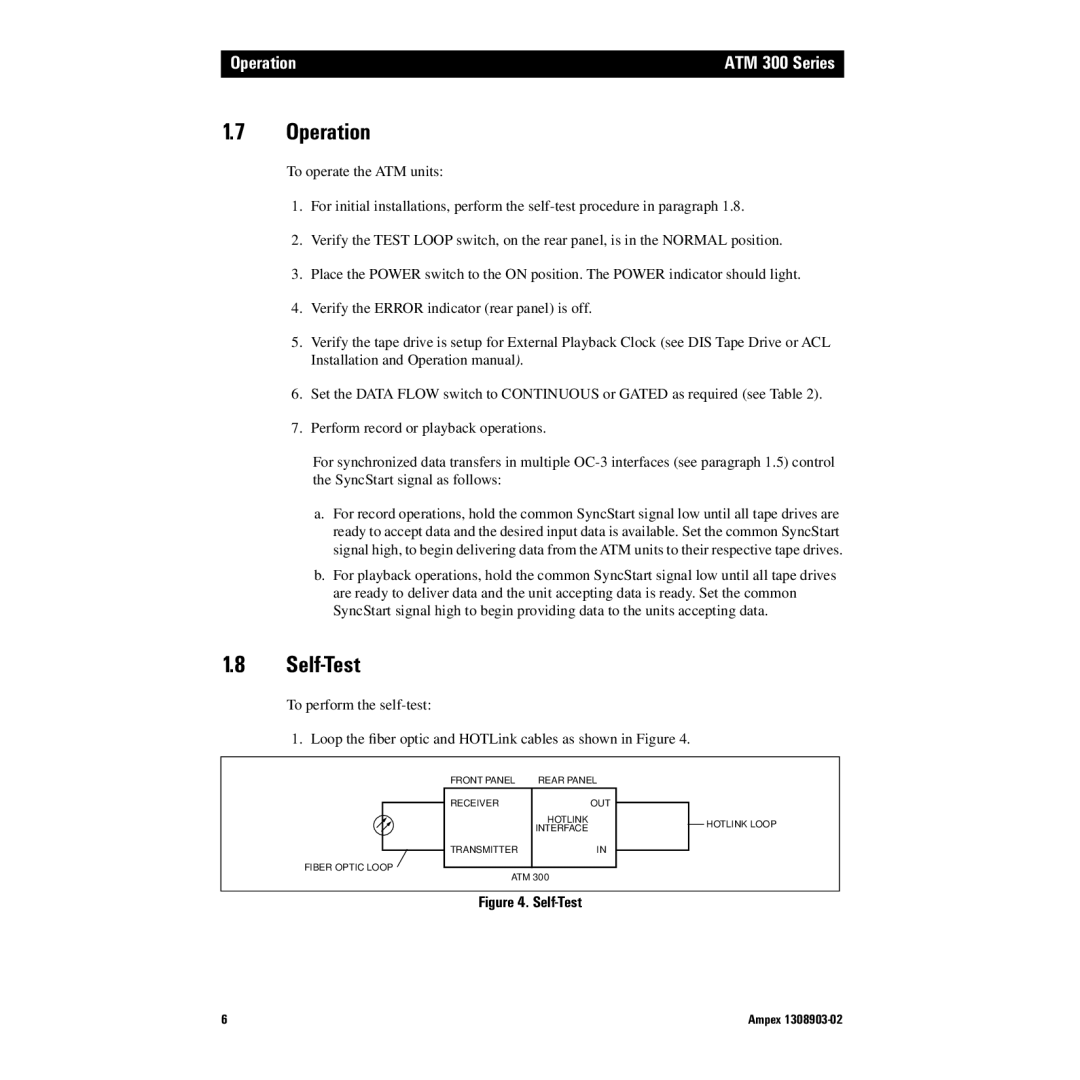
1.8Self-Test
To perform the
1. Loop the fiber optic and HOTLink cables as shown in Figure 4.
FIBER OPTIC LOOP
FRONT PANEL | REAR PANEL |
|
RECEIVER | OUT |
|
| ||
| HOTLINK |
|
| INTERFACE |
|
TRANSMITTER | IN |
|
| ||
|
|
|
ATM 300
HOTLINK LOOP
Figure 4. Self-Test
6 | Ampex |