
MINUET 300 specifications
The Antec MINUET 300 is an exquisite mini tower case that seamlessly blends style and functionality, crafted for those who appreciate compact design without compromising on performance. Designed for small form factor builds, the MINUET 300 is ideal for users looking to create a powerful workstation or gaming rig in a space-efficient package.One of the standout features of the MINUET 300 is its sleek and stylish exterior. The case comes with a minimalist design that fits well into any modern environment, making it suitable for both home and office setups. Its compact dimensions do not limit its capability; instead, they allow for a refined aesthetic that enhances any space.
Inside, the MINUET 300 is engineered for versatility. The case supports a range of motherboard sizes, from Mini-ITX to Micro-ATX, providing users with the flexibility to select the components they prefer. It features ample room for expansion, allowing for the installation of multiple storage drives, including two 3.5-inch and three 2.5-inch drives. This means users can enjoy significant data storage capabilities in a compact footprint.
Cooling performance is another critical aspect of the MINUET 300. The case includes multiple ventilation points that support a range of cooling solutions, ensuring that the system remains cool during intense gaming sessions or demanding workloads. Users can install up to five 120mm fans or various radiators, providing options for custom cooling setups.
Antec's commitment to quality is evident in the MINUET 300's build. The case is constructed with high-quality materials to ensure durability and a solid feel. Additionally, cable management is thoughtfully considered, with ample routing options for clean and tidy builds.
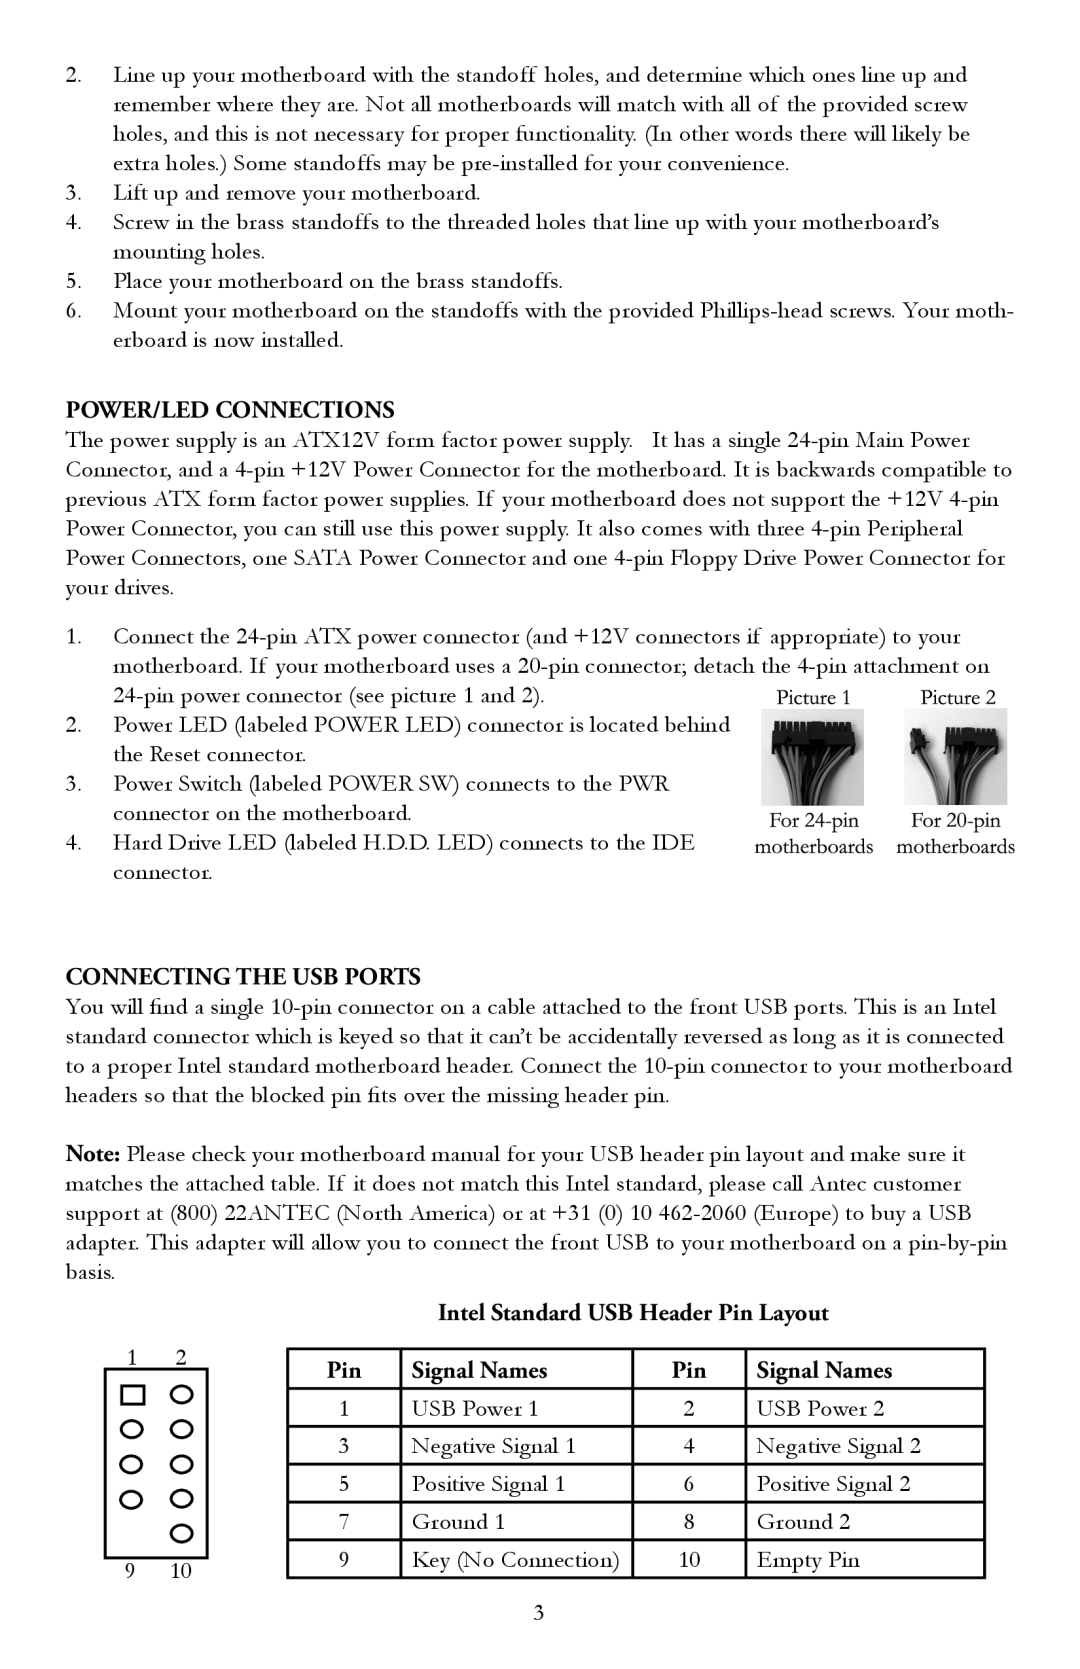
For connectivity, the MINUET 300 offers USB 3.0 ports and audio input/output at the front panel, allowing for convenient access to essential connections. This addition reflects Antec's focus on providing a user-friendly experience.
In summary, the Antec MINUET 300 is a sophisticated mini tower case that showcases a perfect blend of aesthetics and functionality. Its intelligent design, robust cooling options, and thoughtful features make it an excellent choice for compact PC builds that require both performance and style.