to connect the
Installing 5.25" Devices
The Super LANBOY features three external 5.25" drive bays. A metal plate covers each drive bay opening.
1.For each drive bay you wish to use, carefully remove the metal plate covering the bay by twisting it back and forth until it separates from the case. If you don't wish to use a drive bay, leave the corresponding metal plate in place. Note: Watch your fingers. When you remove the metal plate, there may be a sharp metal burr remaining where the plate was attached.
2.Remove the thumbscrews from the left side panel and detach the left side panel from the case.
3.Slide your 5.25" drive into the open drive bay, so that it is flush with the front bezel. Secure the drive with the provided screws. (You'll find openings for the screws on both sides of the drive bays.)
4.Connect a large white
5.To mount other 5.25" devices, simply repeat this procedure.
Installing External 3.5" Devices
You'll find two external 3.5" drive bays underneath the 5.25" drive bays.
1.Remove the toolbox by pushing on its cover and sliding it out of the case.
2.For each drive bay you wish to use, carefully remove the metal plate covering the bay by twisting it back and forth until it separates from the case. If you don't wish to use a drive bay, leave the corresponding metal plate in its place. Note: Watch your fingers. When you remove the metal plate, there may be a sharp metal burr remaining where the plate was attached.
3.Slide your 3.5" device into the open drive bay, so that it's flush with the front bezel. Secure the device with the provided screws. (You'll find openings for the screws on both sides of the drive bays.)
4.Connect a small white
5.To install other 3.5" devices, simply repeat this procedure.
Installing Internal 3.5" Devices
Note: You can mount the drives with the connectors facing toward or away from you. If you mount them with the connectors facing away (into the case) you may wish to connect the data cables before sliding the drive into the locked position. If you are installing Serial ATA drives we recommend positioning the drives so that the connectors face you.
Toolbox
Use the toolbox to store anything you need. There's a picture frame on the front of the toolbox, so feel free to customize your case by inserting your favorite picture.
Connecting the Data Cables
After you've connected the devices to the power supply, you need to connect data cables between the devices and the motherboard. Although data cables aren't included with the Super LANBOY, here are some useful tips:
1.For hard drives and
2.Attach the side of the cable that has 2 connectors to your devices. This allows you to connect another device if you wish.
3.Connect the far end of the cable to your motherboard on the IDE port, either IDE 1 or IDE 2, or the FLOPPY port.
Installing the Fan
Your Super LANBOY includes two
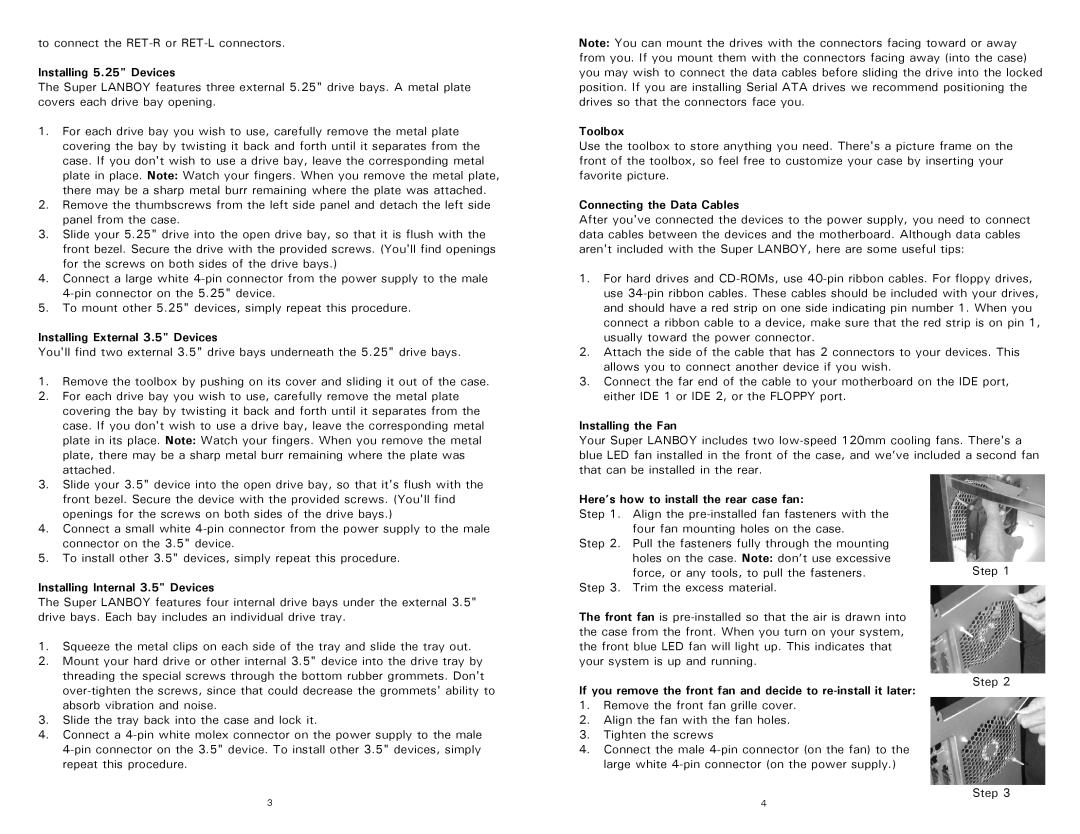
Here’s how to install the rear case fan:
Step 1. Align the
Step 2. Pull the fasteners fully through the mounting holes on the case. Note: don’t use excessive
force, or any tools, to pull the fasteners.Step 1 Step 3. Trim the excess material.
The Super LANBOY features four internal drive bays under the external 3.5" drive bays. Each bay includes an individual drive tray.
1.Squeeze the metal clips on each side of the tray and slide the tray out.
2.Mount your hard drive or other internal 3.5" device into the drive tray by threading the special screws through the bottom rubber grommets. Don't
3.Slide the tray back into the case and lock it.
4.Connect a
3
The front fan is
If you remove the front fan and decide to
1.Remove the front fan grille cover.
2.Align the fan with the fan holes.
3.Tighten the screws
4.Connect the male
4
Step 2
Step 3