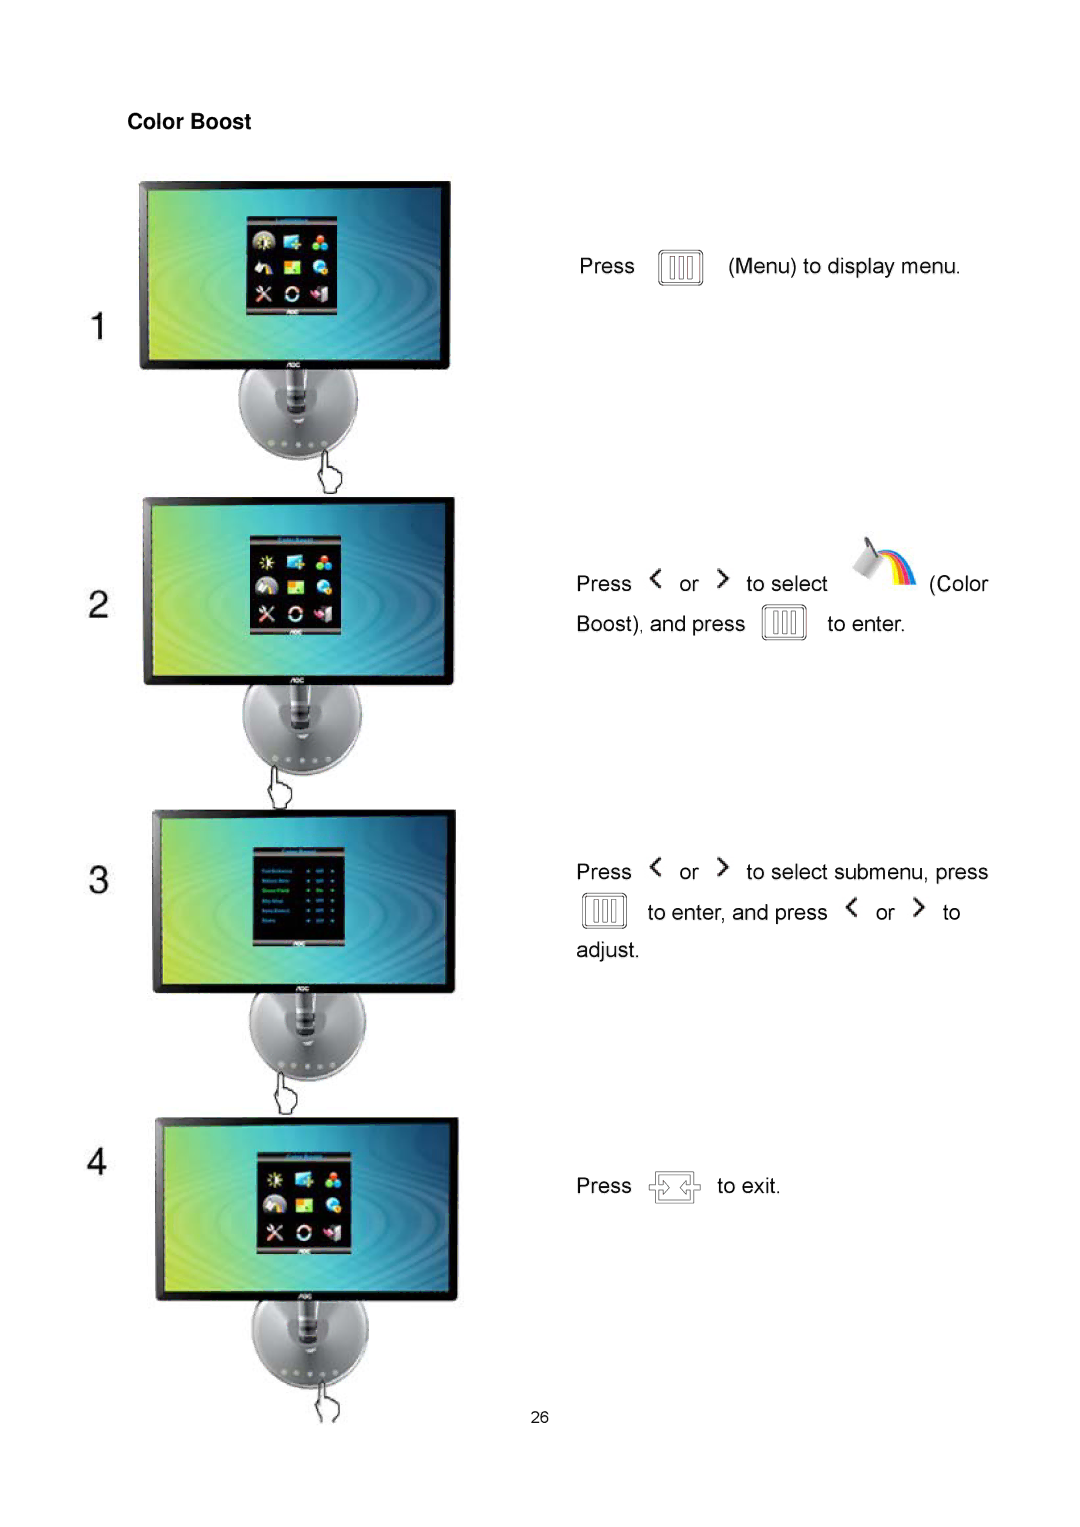
Page
Installation
Safety
Power
Cleaning
Warranty Statement for North & South America excluding Brazil
Service
Warranty Statement for Europe
Warranty Statement for AP
Safety
National Conventions
Power
Installation
Cleaning
Other
Power Cable Analog Cable
Setup
Contents in Box
Adaptor
Setup Stand & Base
Adjusting Viewing Angle
Connecting the Monitor
Wall Mounting
Windows Vista
Adjusting
Setting Optimal Resolution
5 Click Display Settings
6 Set the resolution SLIDE-BAR to 1920 by
For Windows XP
Windows XP
2 Click SETTINGS 3 Click CONTROL PANEL 4 Click Appearance and Themes
2 Click SETTINGS 3 Click CONTROL PANEL
Windows ME/2000
6 Click SETTINGS
5 Click SETTINGS
Hotkeys
Auto/Source/Exit
OSD Setting
Basic and simple instruction on the control keys
Press Menu to display menu
to enter, and press or to adjust Press to exit
Luminance
Press or to select
Text Mode
Backlight Adjustment
Standard Mode
Eco mode
Press
Image Setup
Setup , and press
Menu to display menu
reduce
Color
Color Temperature
Temperature , and press
to enter, and press or to adjust Press to exit
Temperature
Temperature
Temperature
Temperature
to enter, and press or to adjust Press to exit
Color Boost
Boost , and press
Press
Disable or Enable Green Field Mode
Disable or Enable Full Enhance Mode
Disable or Enable Nature Skin Mode
Disable or Enable Sky-blue Mode
Picture
Picture Boost
Menu to display MENU
Boost and press
Adjust Frame Contrast
Adjust Frame Size
Adjust Frame Brightness
Adjust Frame horizontal Position
to enter, and press or to adjust Press to exit
OSD Setup
Setup , and press
Press
Adjust the vertical position of OSD
OSD Setup
Adjust the horizontal position of
Timeout
to enter, and press or to adjust Press to exit
Extra
Setup , and press
Press
Select DVI Signal Source as Input
Select to Auto Detect input signal
Select Analog Signal Source as Input
Auto Config
Press or to select YES or NO Press to exit
Reset
Press or to select Reset and press to enter
Press
yes or no
Reset
Reset the menu to default
Exit
Exit
or to select
and press
LED Color
LED Indicator
Status
Windows
Driver
Monitor Driver
6.Click the “Monitor” tab and then click the “Properties” button
4.Ckick on the “Change display settings” button
5.Click the “Advanced Settings” button
7.Click the “Driver” tab
9. Select Let me pick from a list of device drivers on my computer
13. Close all open windows and remove the CD
Windows Vista
2. Click Personalization and then Display Settings
3. Click Advanced Settings
5. Click Update Driver... in the Driver tab
8. Select your monitor model and click on the Next button
2. Click on the Start button and then click on Control Panel
Windows XP
1. Start Windows XP
3. Select and click on the category ‘Appearance and Themes’
6. Select Monitor tab
5. Select the Settings tab then click on the Advanced button
7. Click on the Driver tab and then click on Update Driver... button
If the Properties button is active, click on Properties button
13. Click on the Finish button then the Close button
11. Click on the Open button, then click the OK button
12. Select your monitor model and click on the Next button
Windows ME
Windows
i-Menu
e-Saver
Screen+
Power LED Is Not ON
Troubleshoot
Problem & Question
Ghosting Shadowing Problem
Monitor Is Stuck In Active
Specification
General Specification
SVGA
Preset Display Modes
SVGA
SVGA
TMDS Data 0/5 Shield
Pin Assignments
15-Pin Side of the Signal Cable
Plug and Play
Plug & Play DDC2B Feature
Regulation
FCC Notice
WEEE Declaration
HG Declaration
For Germany
EPEAT Declaration
Only for North and South American, excluding Brazil
For Brazil
Service
Warranty Statement for Europe
Information in this document is subject to change without notice
Warranty Statement for North & South America excluding Brazil
BOLIVIA http//bo.aoc.com/support/findservicecenter
USA http//us.aoc.com/support/findservicecenter
ARGENTINA http//ar.aoc.com/support/findservicecenter
CHILE http//cl.aoc.com/support/findservicecenter
Warranty Statement for AP
How to get your Warranty ?