Unpacking
Care must be taken at all times when handling the
A feature of the
The feet/spike assemblies are attached to your product ready to use. The mains power cord is contained separately in the packaging and should be removed prior to unpacking the product.
To remove the
Spiked Foot Assembly
For Wooden/Hard Floors
The engineering behind the foot assembly for the
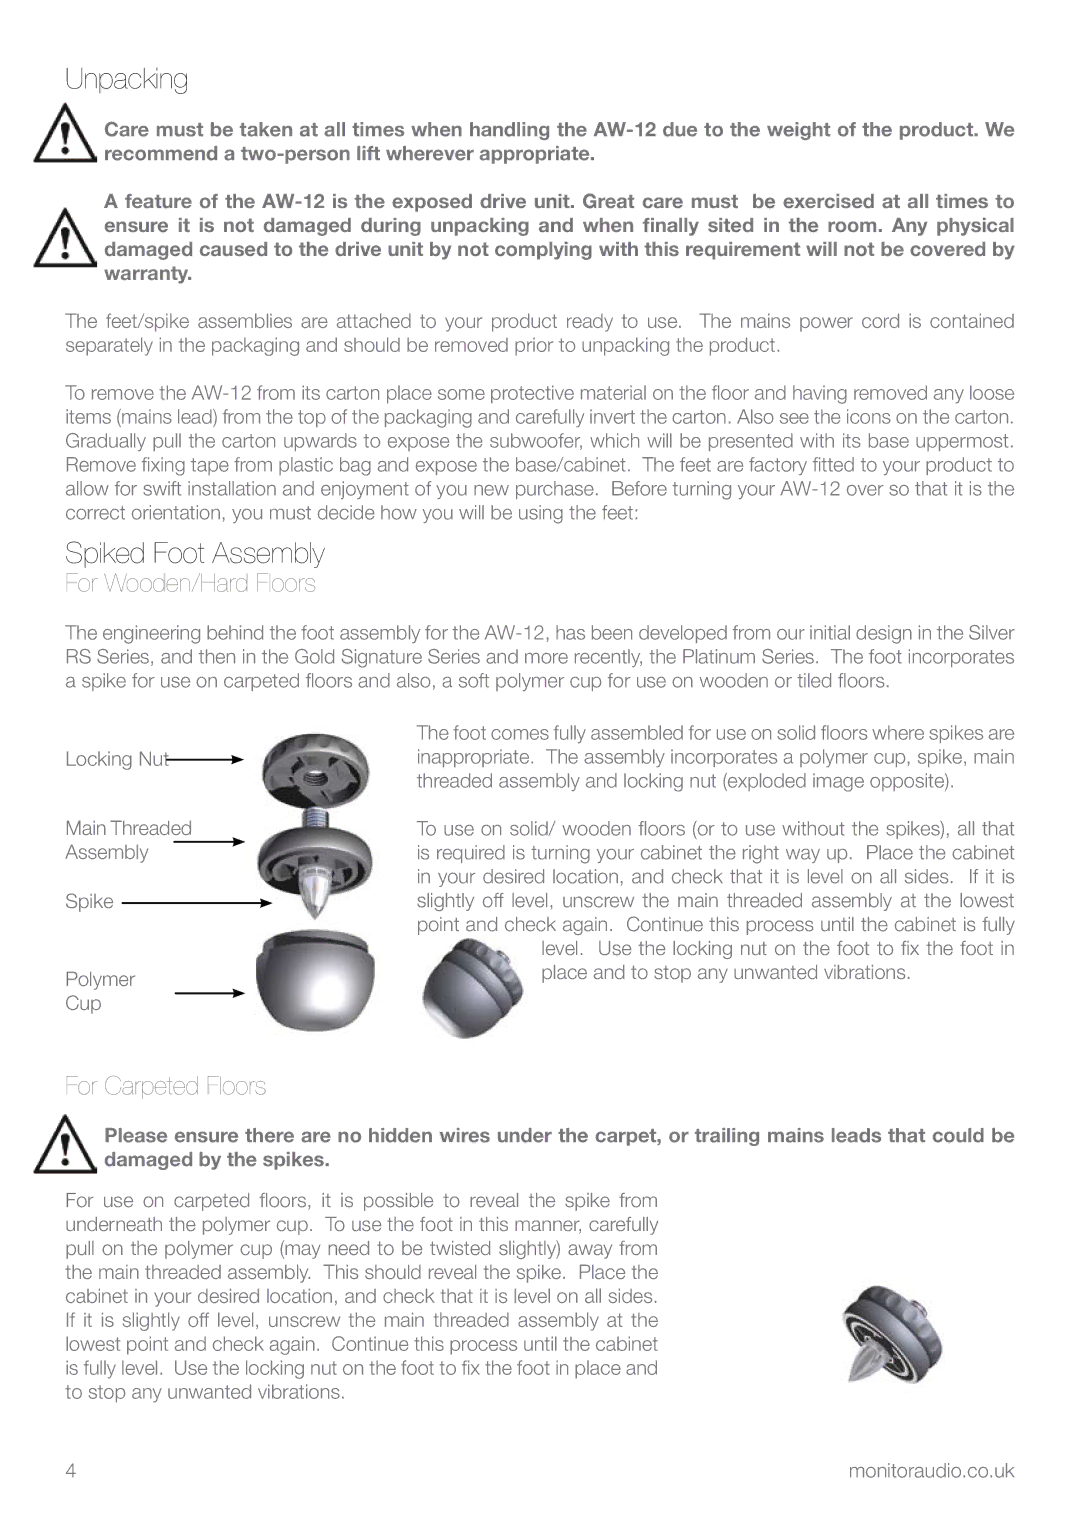
Locking Nut![]()
Main Threaded Assembly ![]()
Spike
Polymer
Cup
The foot comes fully assembled for use on solid floors where spikes are inappropriate. The assembly incorporates a polymer cup, spike, main threaded assembly and locking nut (exploded image opposite).
To use on solid/ wooden floors (or to use without the spikes), all that is required is turning your cabinet the right way up. Place the cabinet in your desired location, and check that it is level on all sides. If it is slightly off level, unscrew the main threaded assembly at the lowest point and check again. Continue this process until the cabinet is fully
level. Use the locking nut on the foot to fix the foot in place and to stop any unwanted vibrations.
For Carpeted Floors
Please ensure there are no hidden wires under the carpet, or trailing mains leads that could be damaged by the spikes.
For use on carpeted floors, it is possible to reveal the spike from underneath the polymer cup. To use the foot in this manner, carefully pull on the polymer cup (may need to be twisted slightly) away from the main threaded assembly. This should reveal the spike. Place the cabinet in your desired location, and check that it is level on all sides. If it is slightly off level, unscrew the main threaded assembly at the lowest point and check again. Continue this process until the cabinet is fully level. Use the locking nut on the foot to fix the foot in place and to stop any unwanted vibrations.
4 | monitoraudio.co.uk |