Installing the Replacement Bottom Case
1.To install the new bottom case, place it over the bottom of the computer in the same orientation as the original bottom case.
2.Align the notches on the right and left sides of the case (some of these can be viewed through the battery opening). Then press down and toward you slightly to secure the case.
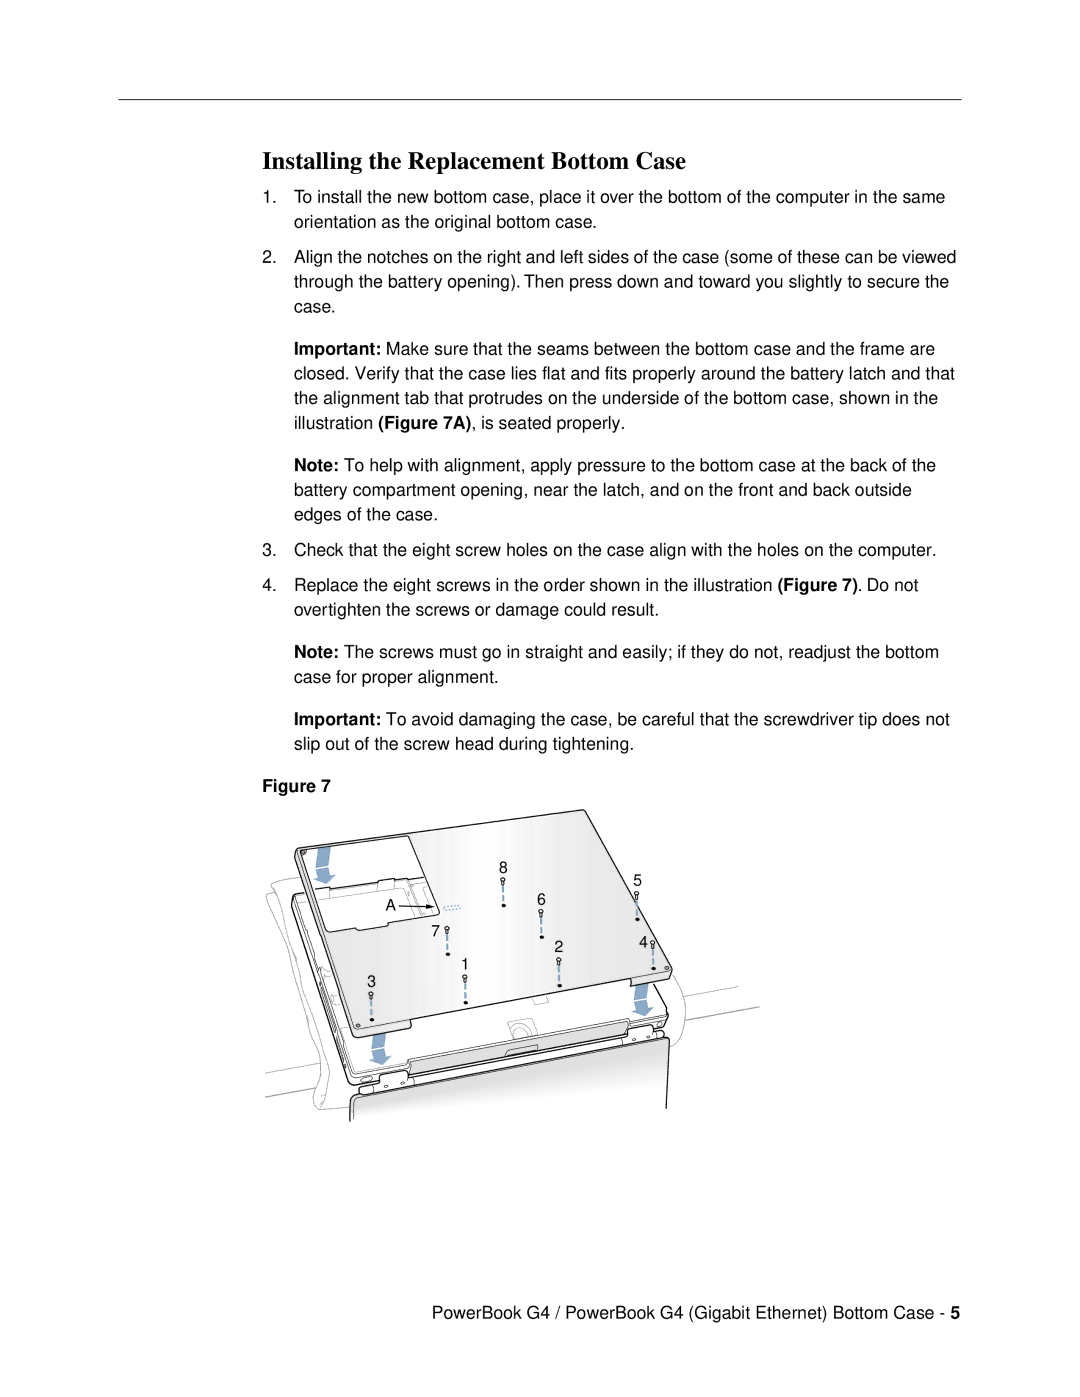
Important: Make sure that the seams between the bottom case and the frame are closed. Verify that the case lies flat and fits properly around the battery latch and that the alignment tab that protrudes on the underside of the bottom case, shown in the illustration (Figure 7A), is seated properly.
Note: To help with alignment, apply pressure to the bottom case at the back of the battery compartment opening, near the latch, and on the front and back outside edges of the case.
3.Check that the eight screw holes on the case align with the holes on the computer.
4.Replace the eight screws in the order shown in the illustration (Figure 7). Do not overtighten the screws or damage could result.
Note: The screws must go in straight and easily; if they do not, readjust the bottom case for proper alignment.
Important: To avoid damaging the case, be careful that the screwdriver tip does not slip out of the screw head during tightening.
Figure 7
8
5
A | 6 |
|
7 | 4 |
2 | |
1 |
|
3
PowerBook G4 / PowerBook G4 (Gigabit Ethernet) Bottom Case - 5