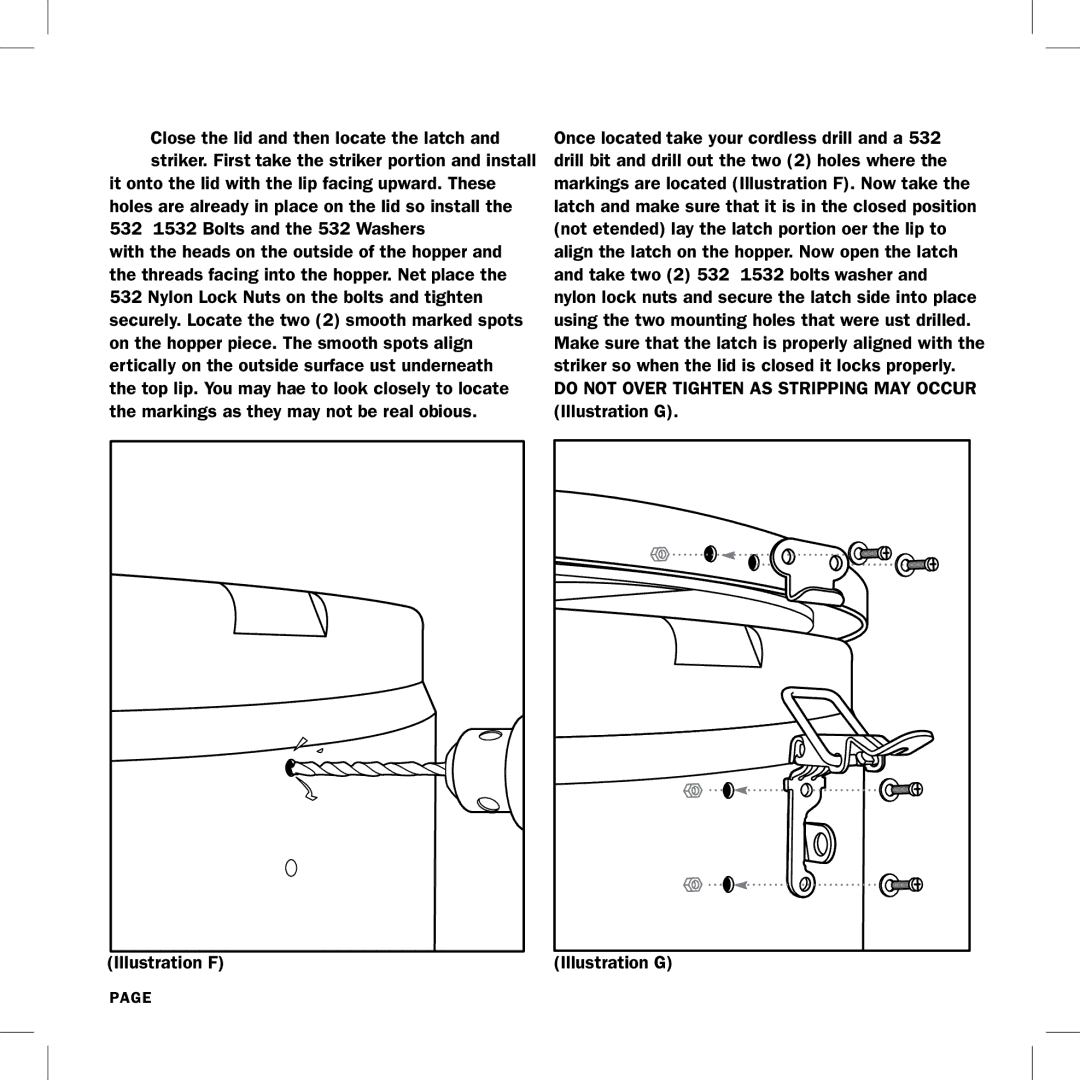
9 Close the lid and then locate the latch and striker. First, take the striker portion and install
it onto the lid with the j-lip facing upward. These holes are already in place on the lid so install the 5/32” x 15/32” Bolts and the 5/32” Washers with the heads on the outside of the hopper and the threads facing into the hopper. Next, place the 5/32” Nylon Lock Nuts on the bolts and tighten securely. Locate the two (2) smooth marked spots on the hopper piece. The smooth spots align vertically on the outside surface just underneath the top lip. You may have to look closely to locate the markings as they may not be real obvious.
Once located, take your cordless drill and a 5/32” drill bit and drill out the two (2) holes where the markings are located (Illustration F). Now take the latch and make sure that it is in the closed position (not extended); lay the latch portion over the j-lip to align the latch on the hopper. Now open the latch and take two (2) 5/32” x 15/32” bolts, washer and nylon lock nuts and secure the latch side into place using the two mounting holes that were just drilled. Make sure that the latch is properly aligned with the striker so when the lid is closed it locks properly.
DO NOT OVER TIGHTEN AS STRIPPING MAY OCCUR (Illustration G).

