Digital Camera DC1500 User Guide
•PhotoPrinter Main Screen
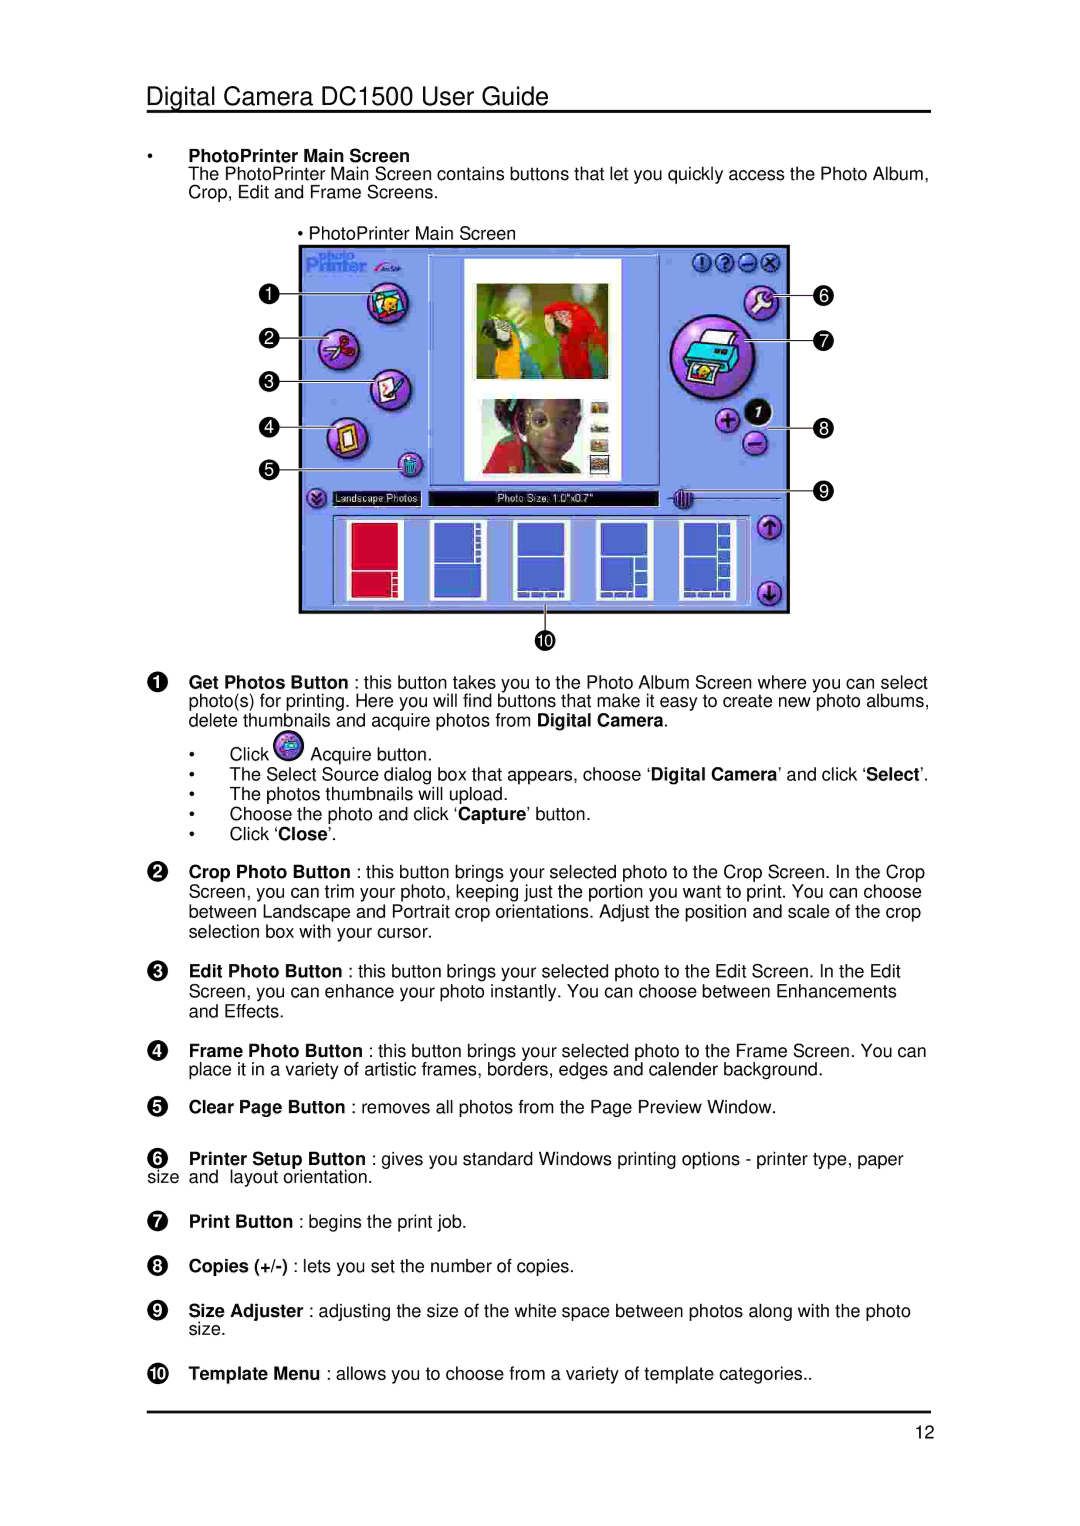
The PhotoPrinter Main Screen contains buttons that let you quickly access the Photo Album, Crop, Edit and Frame Screens.
•PhotoPrinter Main Screen
1
2
3
4
5
10
6
7
8
9
1Get Photos Button : this button takes you to the Photo Album Screen where you can select photo(s) for printing. Here you will find buttons that make it easy to create new photo albums, delete thumbnails and acquire photos from Digital Camera.
•Click ![]() Acquire button.
Acquire button.
•The Select Source dialog box that appears, choose ‘Digital Camera’ and click ‘Select’.
•The photos thumbnails will upload.
•Choose the photo and click ‘Capture’ button.
•Click ‘Close’.
2Crop Photo Button : this button brings your selected photo to the Crop Screen. In the Crop Screen, you can trim your photo, keeping just the portion you want to print. You can choose between Landscape and Portrait crop orientations. Adjust the position and scale of the crop selection box with your cursor.
3Edit Photo Button : this button brings your selected photo to the Edit Screen. In the Edit Screen, you can enhance your photo instantly. You can choose between Enhancements and Effects.
4Frame Photo Button : this button brings your selected photo to the Frame Screen. You can place it in a variety of artistic frames, borders, edges and calender background.
5Clear Page Button : removes all photos from the Page Preview Window.
6Printer Setup Button : gives you standard Windows printing options - printer type, paper size and layout orientation.
7Print Button : begins the print job.
8Copies
9Size Adjuster : adjusting the size of the white space between photos along with the photo size.
10Template Menu : allows you to choose from a variety of template categories..
12