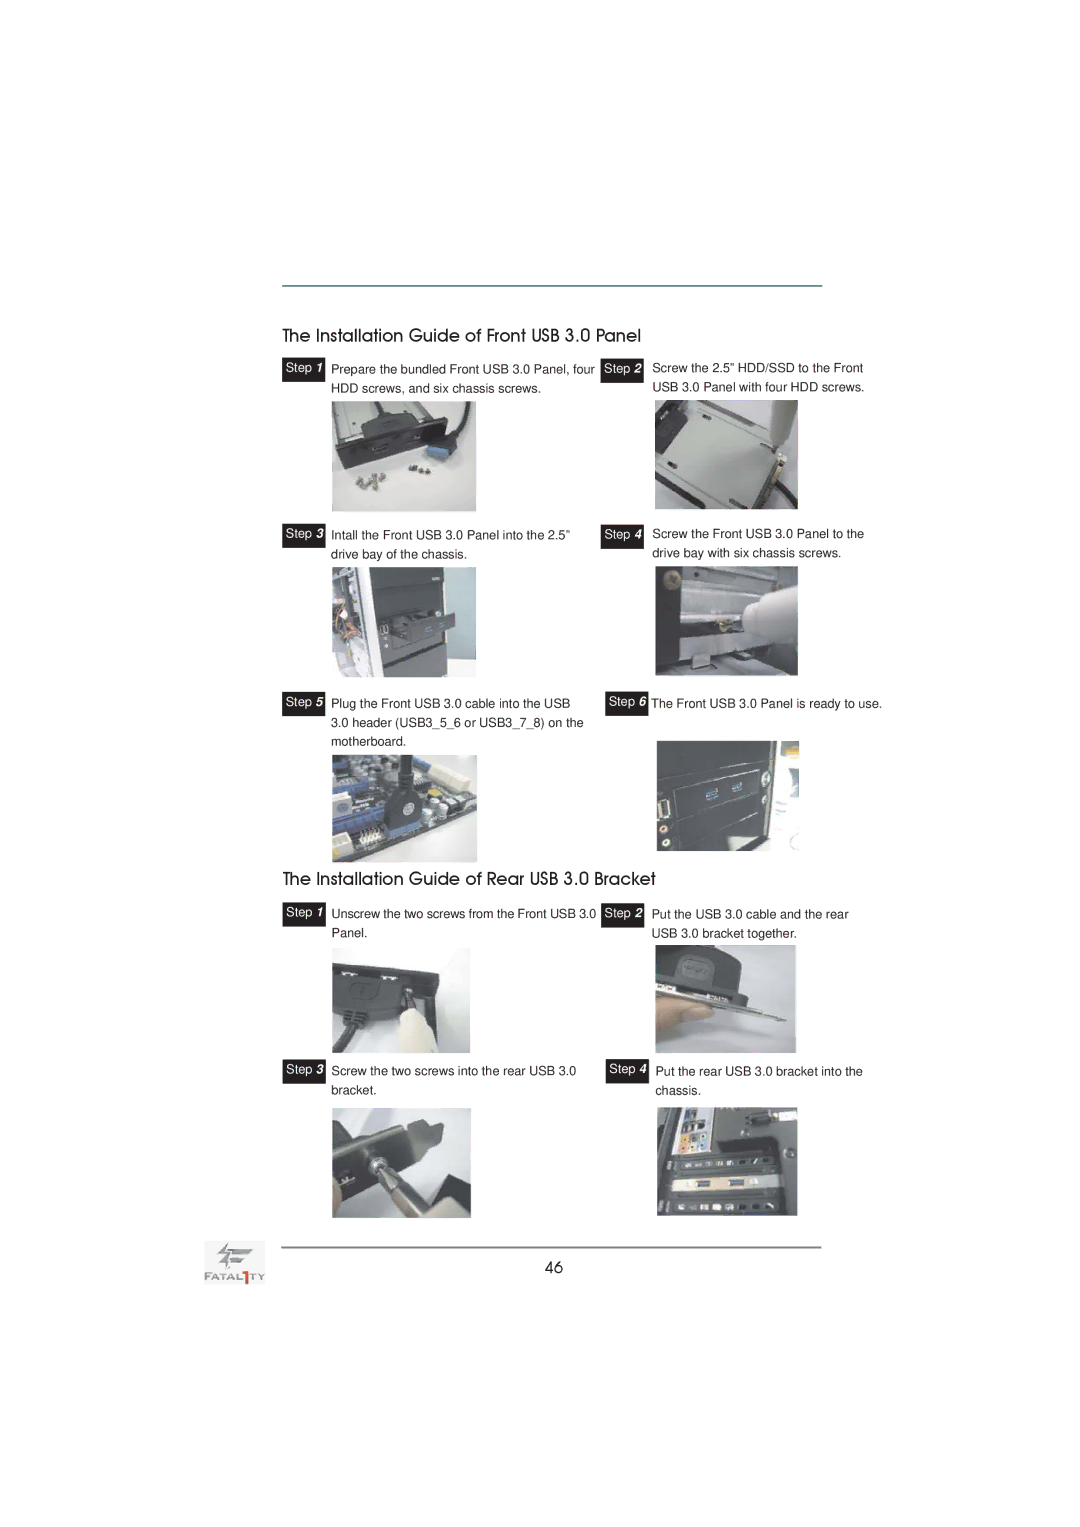
The Installation Guide of Front USB 3.0 Panel
Step 1
Prepare the bundled Front USB 3.0 Panel, four Step 2 HDD screws, and six chassis screws.
Screw the 2.5” HDD/SSD to the Front USB 3.0 Panel with four HDD screws.
Step 3
Step 5
Intall the Front USB 3.0 Panel into the 2.5” drive bay of the chassis.
Plug the Front USB 3.0 cable into the USB
3.0header (USB3_5_6 or USB3_7_8) on the motherboard.
Step 4
Step 6
Screw the Front USB 3.0 Panel to the drive bay with six chassis screws.
The Front USB 3.0 Panel is ready to use.
The Installation Guide of Rear USB 3.0 Bracket
Step 1
Unscrew the two screws from the Front USB 3.0 Step 2 Panel.
Put the USB 3.0 cable and the rear USB 3.0 bracket together.
Step 3
Screw the two screws into the rear USB 3.0 bracket.
Step 4
Put the rear USB 3.0 bracket into the chassis.
46