1.5Monitor introduction
1.5.1Using the Controls button
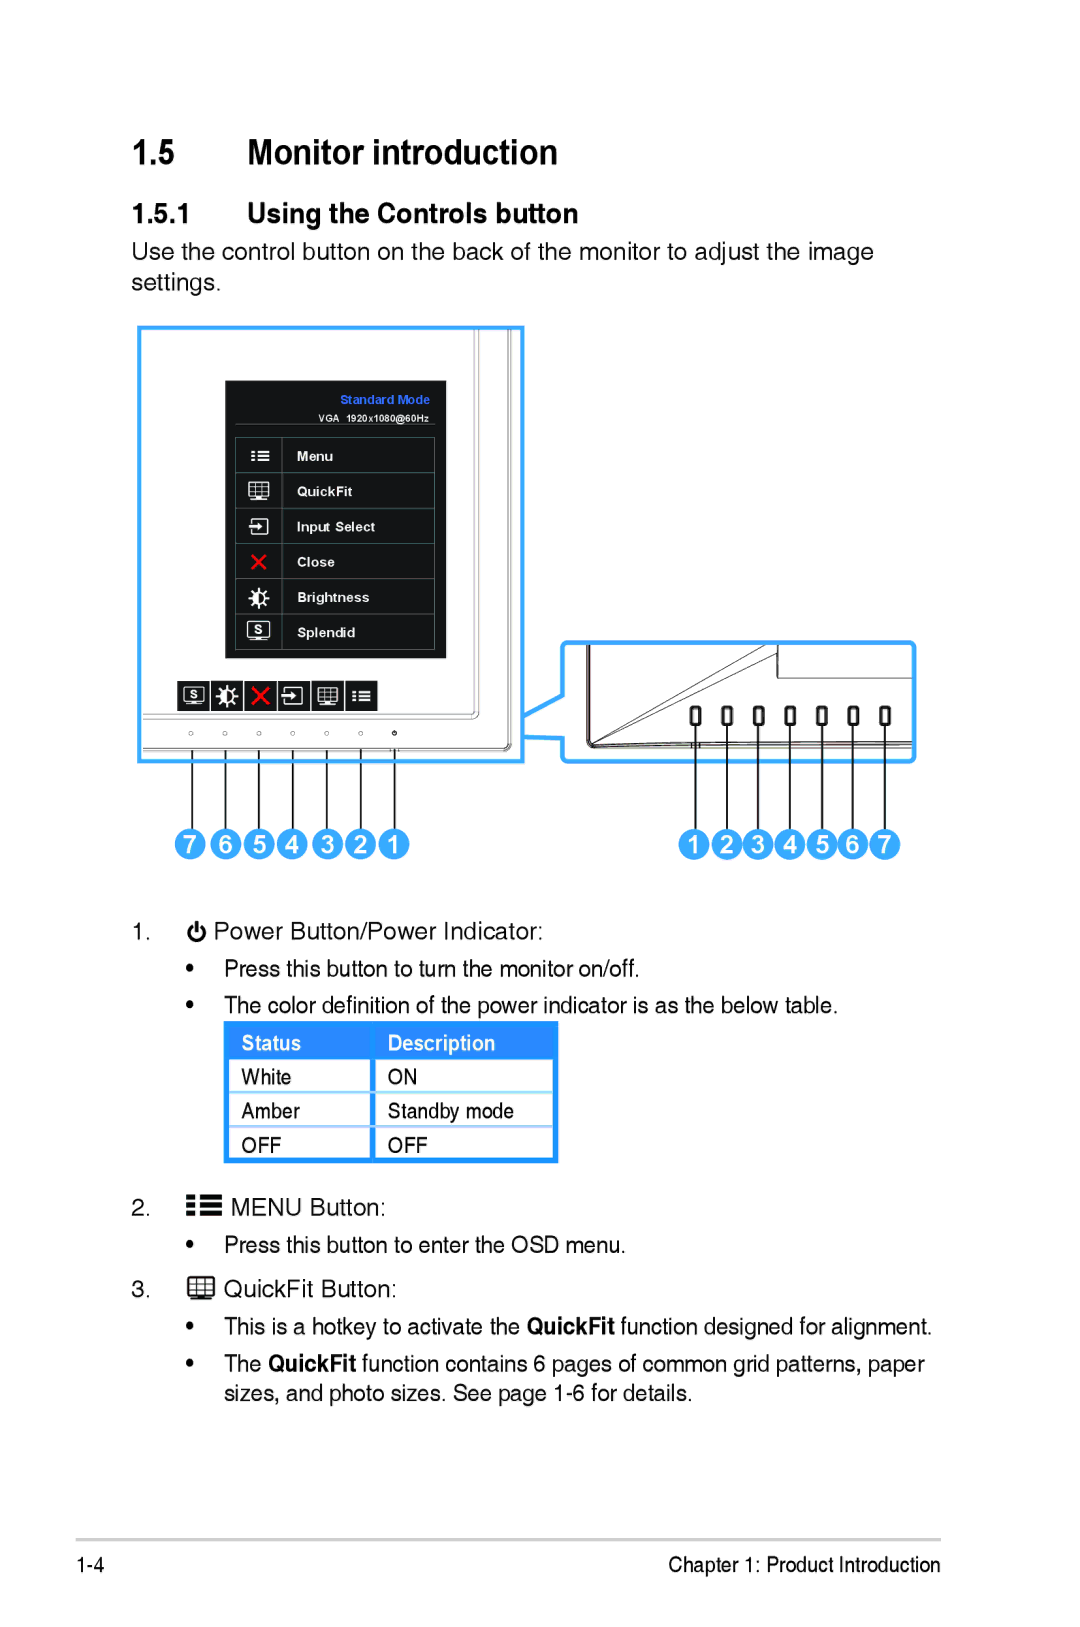
Use the control button on the back of the monitor to adjust the image settings.
|
|
|
|
| Standard Mode |
|
|
|
|
|
|
| |
|
|
|
| VGA 1920x1080@60Hz |
|
|
|
|
|
|
| ||
|
|
| Menu |
|
|
|
|
|
|
|
|
| |
|
|
| QuickFit |
|
|
|
|
|
|
|
| ||
|
|
| Input Select |
|
|
|
|
|
|
|
| ||
|
|
| Close |
|
|
|
|
|
|
|
|
| |
|
|
| Brightness |
|
|
|
|
|
|
|
| ||
|
|
| Splendid |
|
|
|
|
|
|
|
| ||
7 | 6 | 5 | 4 | 3 | 2 | 1 | 1 | 2 | 3 | 4 | 5 | 6 | 7 |
1.![]()
•
•
Power Button/Power Indicator:
Press this button to turn the monitor on/off.
The color definition of the power indicator is as the below table.
Status | Description |
White | ON |
Amber | Standby mode |
OFF | OFF |
2.![]()
![]() MENU Button:
MENU Button:
• Press this button to enter the OSD menu.
3.![]()
•
•
QuickFit Button:
This is a hotkey to activate the QuickFit function designed for alignment.
The QuickFit function contains 6 pages of common grid patterns, paper sizes, and photo sizes. See page
Chapter 1: Product Introduction |
