1.4.2Rear of the LCD monitor
10
|
|
|
|
|
| 9 |
|
|
|
|
|
| 8 |
| DVI | HDMI/MHL | DP |
|
|
|
1 | 2 | 3 | 4 | 5 | 6 | 7 |
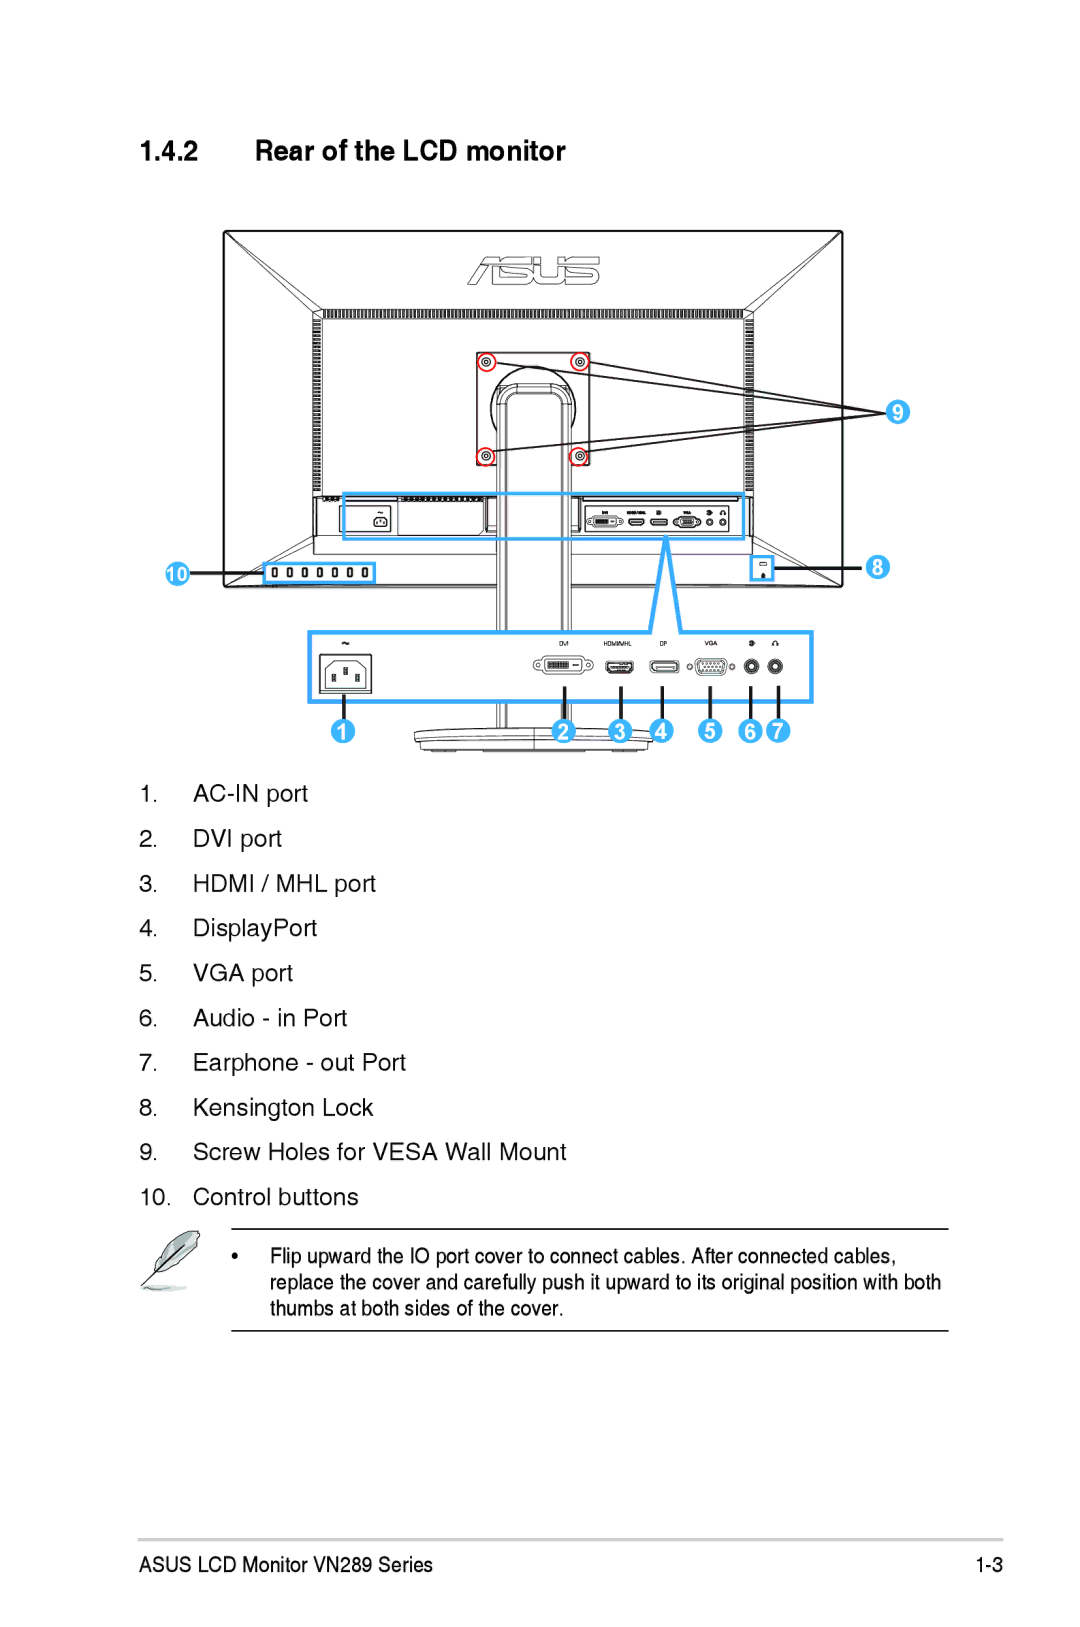
1.
2.DVI port
3.HDMI / MHL port
4.DisplayPort
5.VGA port
6.Audio - in Port
7.Earphone - out Port
8.Kensington Lock
9.Screw Holes for VESA Wall Mount
10.Control buttons
• Flip upward the IO port cover to connect cables. After connected cables, replace the cover and carefully push it upward to its original position with both thumbs at both sides of the cover.
ASUS LCD Monitor VN289 Series |