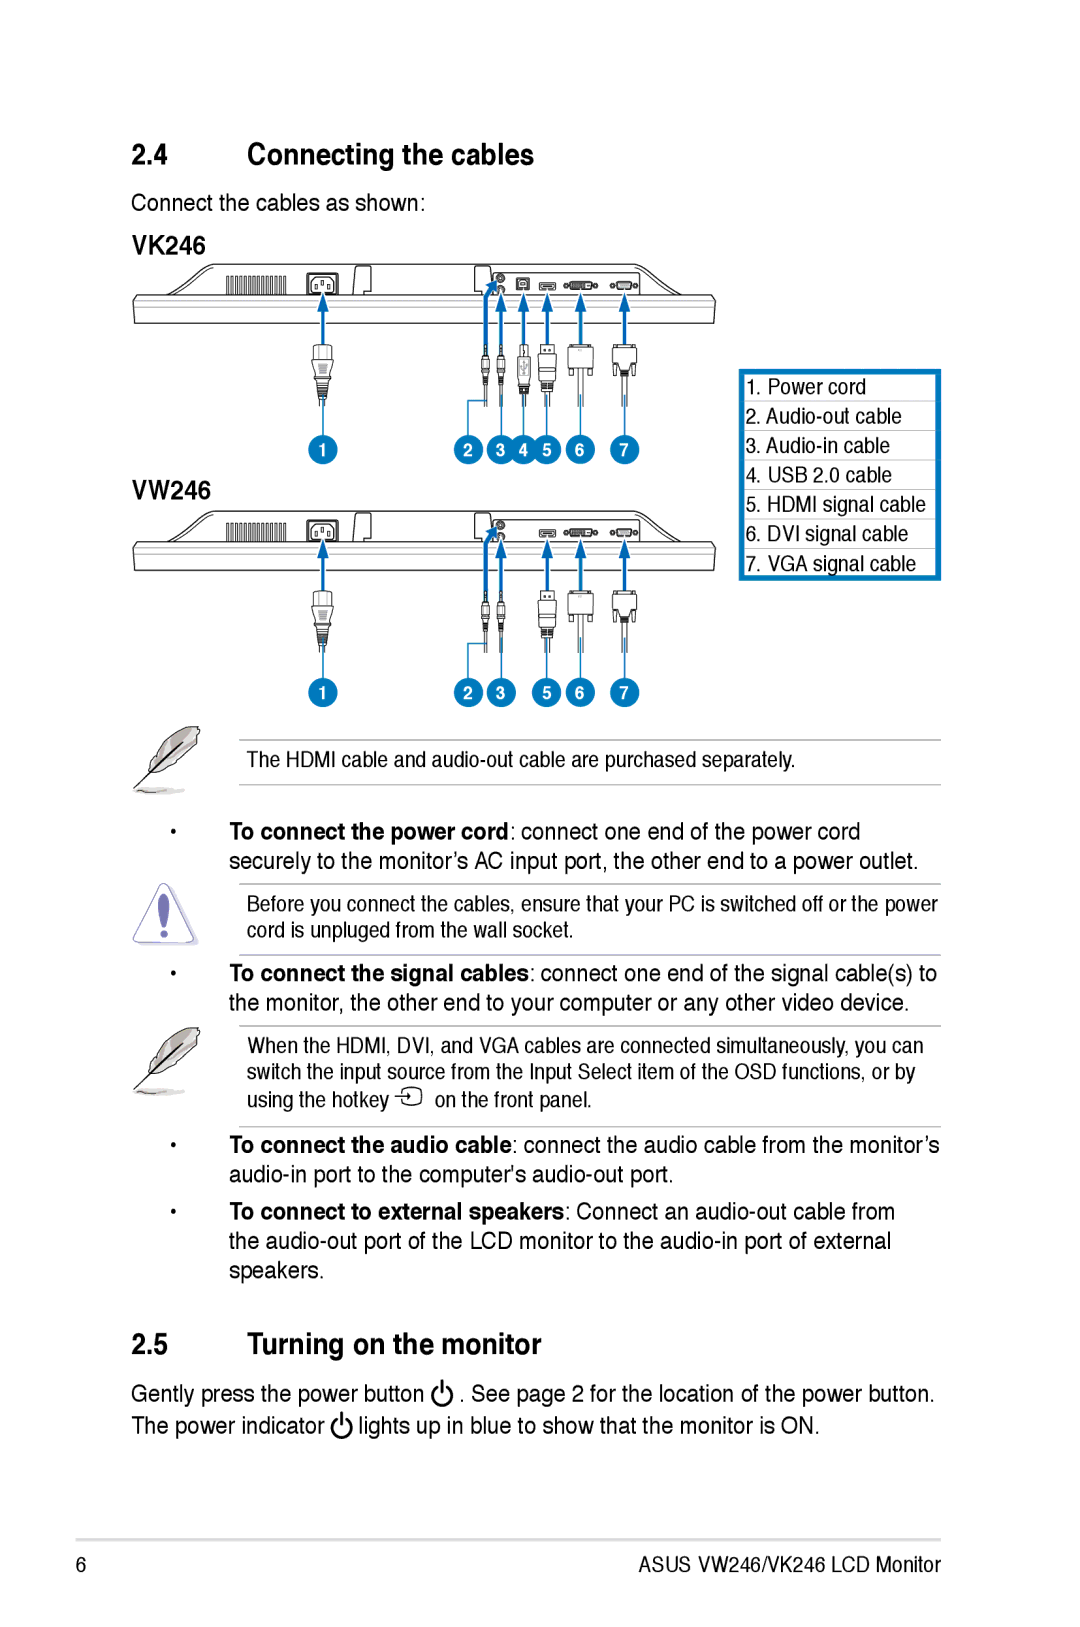
2.4Connecting the cables
Connect the cables as shown:
VK246
1 | 2 | 3 | 4 | 5 | 6 | 7 |
VW246
1 | 2 | 3 | 5 | 6 | 7 |
1.Power cord
2.
3.
4.USB 2.0 cable
5.HDMI signal cable
6.DVI signal cable
7.VGA signal cable
The HDMI cable and
•To connect the power cord: connect one end of the power cord securely to the monitor’s AC input port, the other end to a power outlet.
Before you connect the cables, ensure that your PC is switched off or the power cord is unpluged from the wall socket.
•To connect the signal cables: connect one end of the signal cable(s) to the monitor, the other end to your computer or any other video device.
When the HDMI, DVI, and VGA cables are connected simultaneously, you can switch the input source from the Input Select item of the OSD functions, or by using the hotkey ![]() on the front panel.
on the front panel.
•To connect the audio cable: connect the audio cable from the monitor’s
•To connect to external speakers: Connect an
2.5Turning on the monitor
Gently press the power button ![]() . See page 2 for the location of the power button. The power indicator
. See page 2 for the location of the power button. The power indicator ![]() lights up in blue to show that the monitor is ON.
lights up in blue to show that the monitor is ON.
ASUS VW246/VK246 LCD Monitor