Getting started
Battery installation and charging
BY 1021
BT183342/BT283342 2.4V 400mAh
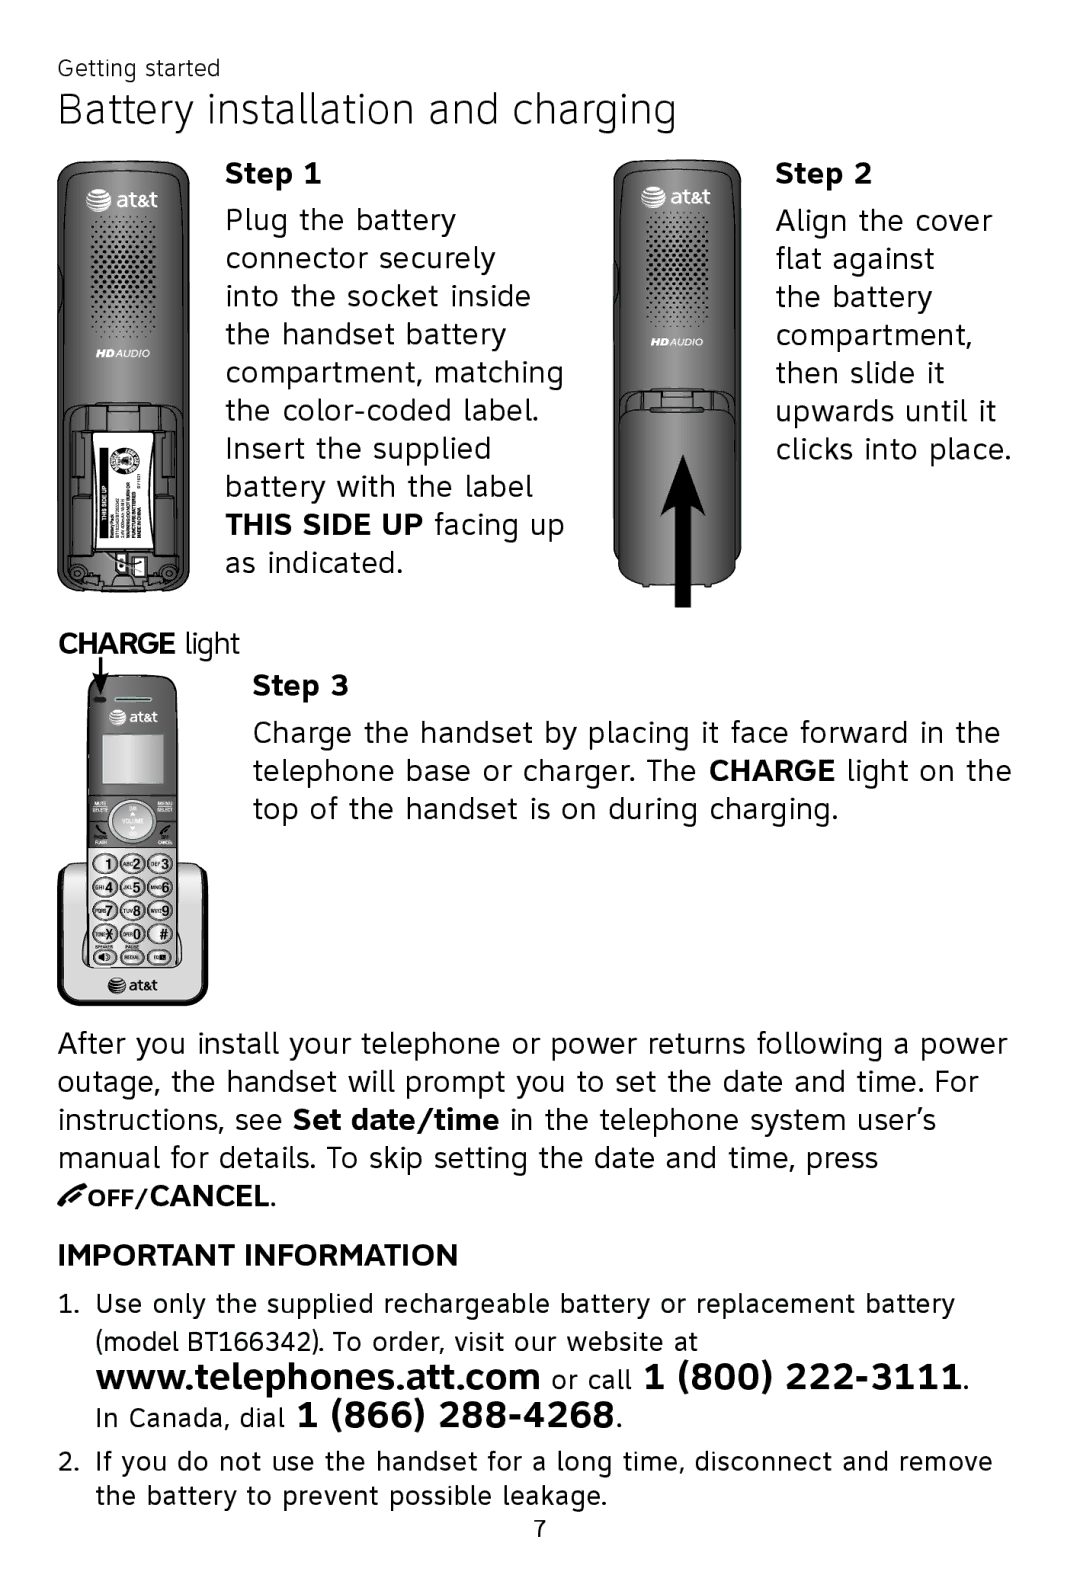
Step 1
Plug the battery connector securely into the socket inside the handset battery compartment, matching the
Step 2
Align the cover flat against the battery compartment, then slide it upwards until it clicks into place.
CHARGE light
Step 3
Charge the handset by placing it face forward in the telephone base or charger. The CHARGE light on the top of the handset is on during charging.
After you install your telephone or power returns following a power outage, the handset will prompt you to set the date and time. For instructions, see Set date/time in the telephone system user’s manual for details. To skip setting the date and time, press
OFF/CANCEL.
IMPORTANT INFORMATION
1.Use only the supplied rechargeable battery or replacement battery (model BT166342). To order, visit our website at
www.telephones.att.com or call 1 (800)
2.If you do not use the handset for a long time, disconnect and remove the battery to prevent possible leakage.