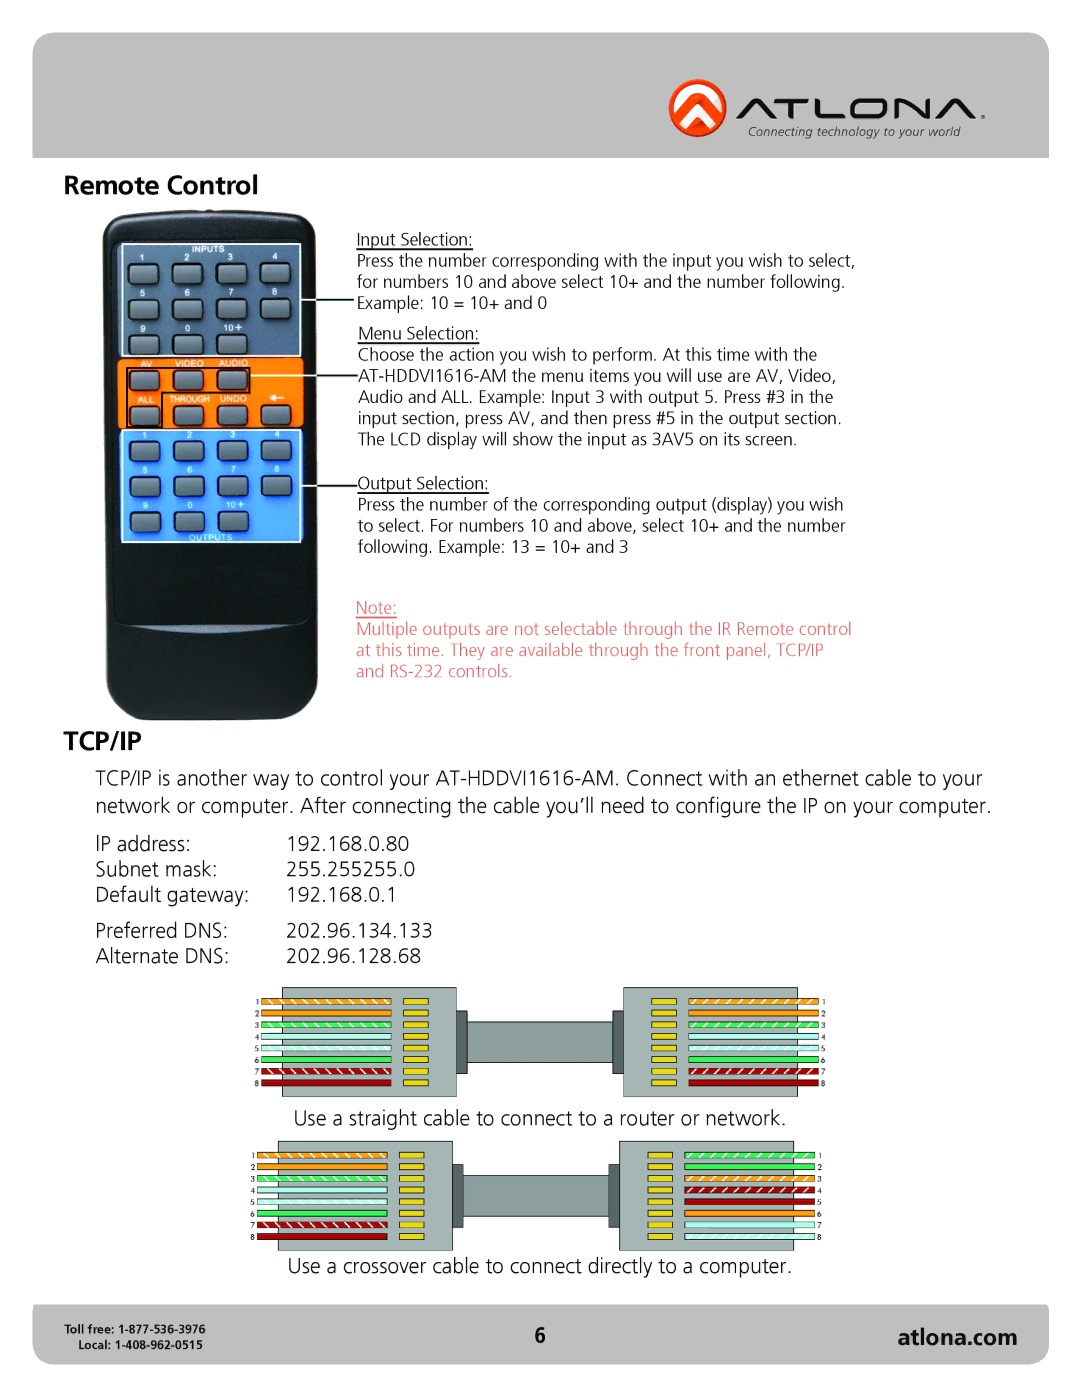
Remote Control
Input Selection:
Press the number corresponding with the input you wish to select, for numbers 10 and above select 10+ and the number following. Example: 10 = 10+ and 0
Menu Selection:
Choose the action you wish to perform. At this time with the ![]()
![]() AT-HDDVI1616-AM
AT-HDDVI1616-AM
Audio and ALL. Example: Input 3 with output 5. Press #3 in the input section, press AV, and then press #5 in the output section. The LCD display will show the input as 3AV5 on its screen.
Output Selection:
Press the number of the corresponding output (display) you wish to select. For numbers 10 and above, select 10+ and the number following. Example: 13 = 10+ and 3
Note:
Multiple outputs are not selectable through the IR Remote control at this time. They are available through the front panel, TCP/IP and
TCP/IP
TCP/IP is another way to control your
network or computer. After connecting the cable you’ll need to configure the IP on your computer.
IP address: | 192.168.0.80 |
Subnet mask: | 255.255255.0 |
Default gateway: | 192.168.0.1 |
Preferred DNS: | 202.96.134.133 |
Alternate DNS: | 202.96.128.68 |
Use a straight cable to connect to a router or network.
Use a crossover cable to connect directly to a computer.
Toll free: | 6 | atlona.com |
Local: |
