RETICLE PATTERNS
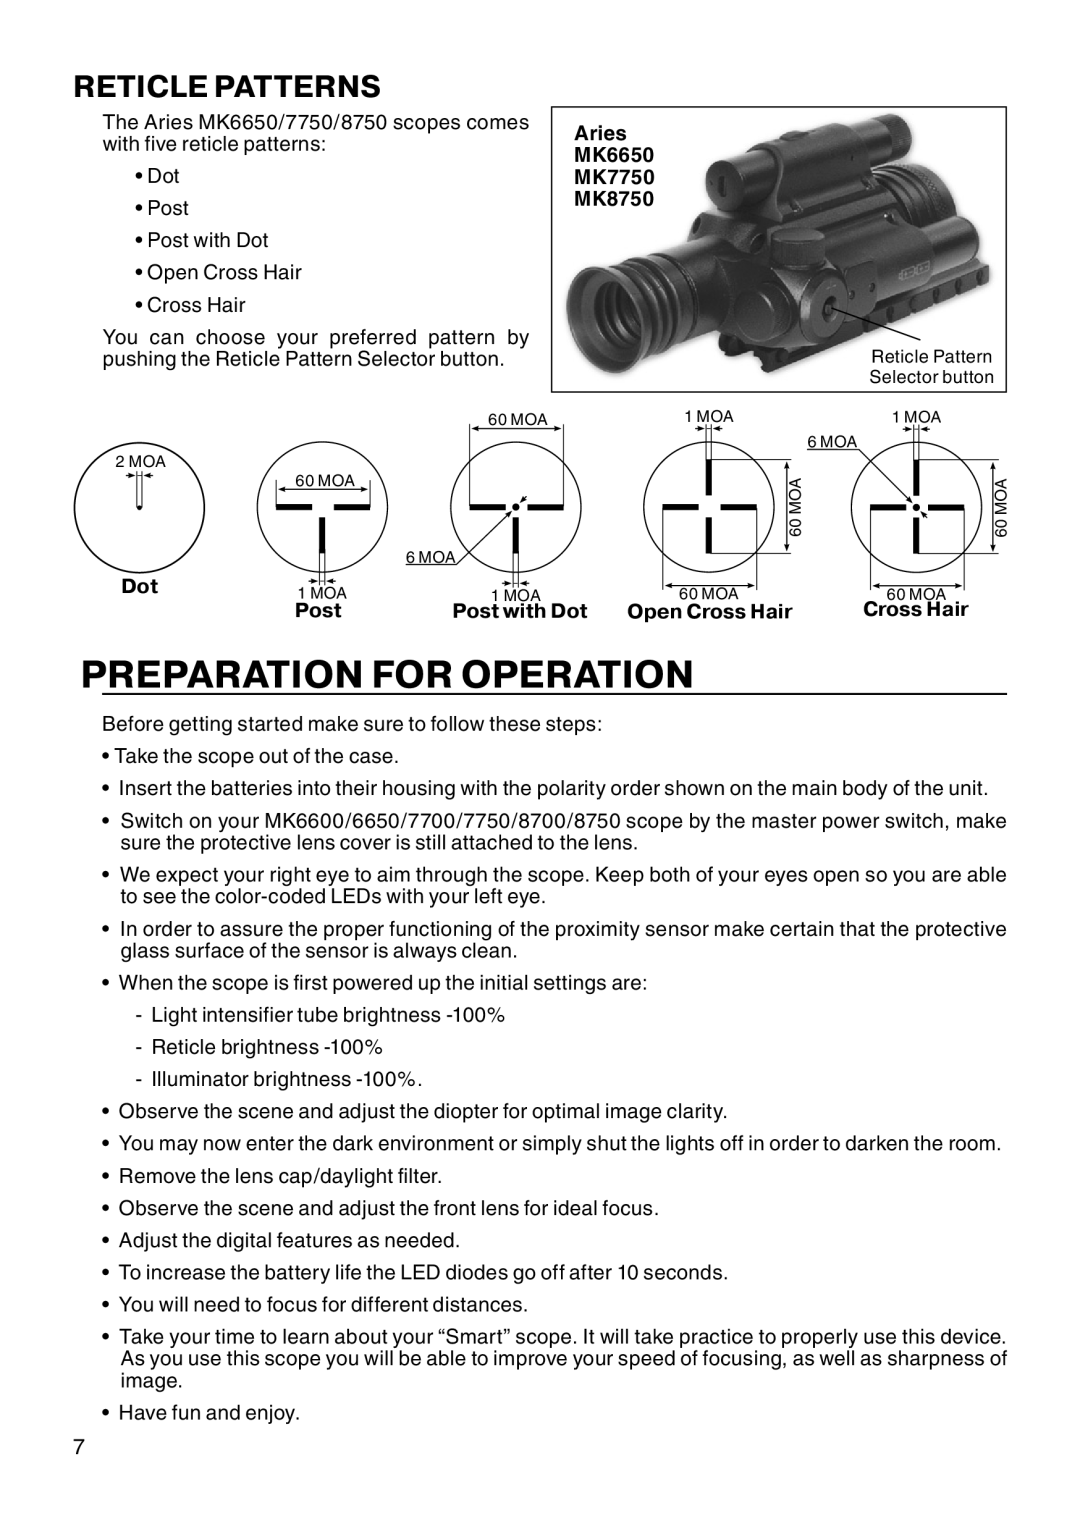
The Aries MK6650/7750/8750 scopes comes | Aries | |
with five reticle patterns: | ||
MK6650 | ||
• Dot | ||
MK7750 | ||
• Post | MK8750 | |
| ||
• Post with Dot |
| |
• Open Cross Hair |
| |
• Cross Hair |
|
You can choose your preferred pattern by |
|
|
|
|
|
|
|
|
|
|
| Reticle Pattern | |||||||||||||||||||||||||||
pushing the Reticle Pattern Selector button. |
|
|
|
|
|
|
|
|
|
|
| ||||||||||||||||||||||||||||
|
|
|
|
|
|
|
|
|
|
|
|
|
|
|
|
|
|
|
|
|
|
|
|
|
|
|
|
| Selector button | ||||||||||
|
|
|
|
|
|
|
|
|
|
| 60 MOA |
|
|
| 1 | MOA |
| 1 | MOA | ||||||||||||||||||||
|
|
|
|
|
|
|
|
|
|
|
| ||||||||||||||||||||||||||||
|
|
|
|
|
|
|
|
|
|
|
|
|
|
|
|
|
|
|
|
|
|
|
|
|
|
|
|
| 6 MOA |
|
|
|
|
| |||||
2 MOA |
| 60 MOA |
|
|
|
|
|
|
|
|
|
|
|
|
|
|
|
|
|
|
|
|
|
|
|
|
|
|
|
|
|
|
| ||||||
|
|
|
|
|
|
|
|
|
|
|
|
|
|
|
|
|
|
|
|
|
| 60 MOA |
|
|
|
|
|
|
|
|
| 60 MOA | |||||||
|
|
|
|
|
|
|
|
|
|
|
|
|
|
|
|
|
|
|
|
|
|
|
|
|
|
|
|
|
|
|
|
|
|
|
| ||||
|
|
|
|
|
|
|
|
|
|
|
|
|
|
|
|
|
|
|
|
|
|
|
|
|
|
|
|
|
|
|
|
|
|
| |||||
Dot |
|
|
|
|
|
| 6 MOA |
|
|
|
|
|
|
|
|
|
|
|
|
|
|
|
|
|
|
|
|
|
| ||||||||||
|
|
|
|
|
|
|
|
|
|
|
|
|
|
|
|
|
|
|
|
|
|
|
|
|
|
|
|
|
|
|
|
| |||||||
|
|
|
|
|
|
|
|
|
|
|
|
|
|
|
|
|
|
|
|
|
|
|
|
|
|
|
|
|
|
| |||||||||
|
|
|
|
|
|
|
|
|
|
|
|
|
|
|
|
|
|
|
|
|
|
|
|
|
|
| |||||||||||||
|
|
|
|
|
|
|
|
|
|
|
|
|
|
|
|
|
|
|
|
|
|
|
|
|
|
|
|
|
|
|
|
| |||||||
|
|
|
|
|
|
|
|
|
|
|
|
|
|
|
|
|
|
|
|
|
|
|
|
|
|
|
|
| |||||||||||
| 1 MOA |
|
| 1 MOA |
|
| 60 MOA |
|
|
|
|
| 60 MOA |
|
|
|
| ||||||||||||||||||||||
|
|
|
| Post | Post with Dot | Open Cross Hair | Cross Hair | ||||||||||||||||||||||||||||||||
PREPARATION FOR OPERATION
Before getting started make sure to follow these steps:
•Take the scope out of the case.
•Insert the batteries into their housing with the polarity order shown on the main body of the unit.
•Switch on your MK6600/6650/7700/7750/8700/8750 scope by the master power switch, make sure the protective lens cover is still attached to the lens.
•We expect your right eye to aim through the scope. Keep both of your eyes open so you are able to see the
•In order to assure the proper functioning of the proximity sensor make certain that the protective glass surface of the sensor is always clean.
•When the scope is first powered up the initial settings are:
-Light intensifier tube brightness
-Reticle brightness
-Illuminator brightness
•Observe the scene and adjust the diopter for optimal image clarity.
•You may now enter the dark environment or simply shut the lights off in order to darken the room.
•Remove the lens cap/daylight filter.
•Observe the scene and adjust the front lens for ideal focus.
•Adjust the digital features as needed.
•To increase the battery life the LED diodes go off after 10 seconds.
•You will need to focus for different distances.
•Take your time to learn about your “Smart” scope. It will take practice to properly use this device. As you use this scope you will be able to improve your speed of focusing, as well as sharpness of image.
•Have fun and enjoy.
7