OTIS-14 specifications
The ATN OTIS-14 is a cutting-edge night vision device designed to enhance the capabilities of users in low-light conditions, making it an essential tool for law enforcement, military personnel, and outdoor enthusiasts. This advanced optic device combines innovative technologies with user-friendly features, resulting in exceptional performance and reliability.One of the standout features of the ATN OTIS-14 is its high-resolution image intensifier tube, which delivers crystal-clear images in varying light conditions. With superior sensitivity, this night vision device allows users to see in complete darkness without the distortion or graininess often associated with traditional night vision systems. The device is capable of operating in bright daylight as well, providing versatility for various environments.
The OTIS-14 is equipped with a robust, lightweight design, making it easy and comfortable to wear for extended periods. Its modular, dual-tube system offers enhanced depth perception and a wider field of view compared to monocular devices. The adjustable diopter ensures that users can fine-tune the focus for optimal clarity, accommodating individual vision needs.
Another significant feature is the built-in infrared (IR) illuminator. This technology allows users to operate effectively in total darkness by providing additional lighting that is invisible to the naked eye. The OTIS-14 also supports a range of accessories, including magnifiers and cameras, enabling users to customize their setups based on mission requirements.
In addition to superior optics, the ATN OTIS-14 boasts advanced electronics for quick startup and seamless operation. Its intuitive controls allow for easier navigation through settings, enhancing the overall user experience. The device also features a durable housing designed to withstand rugged conditions, ensuring reliability even in challenging environments.
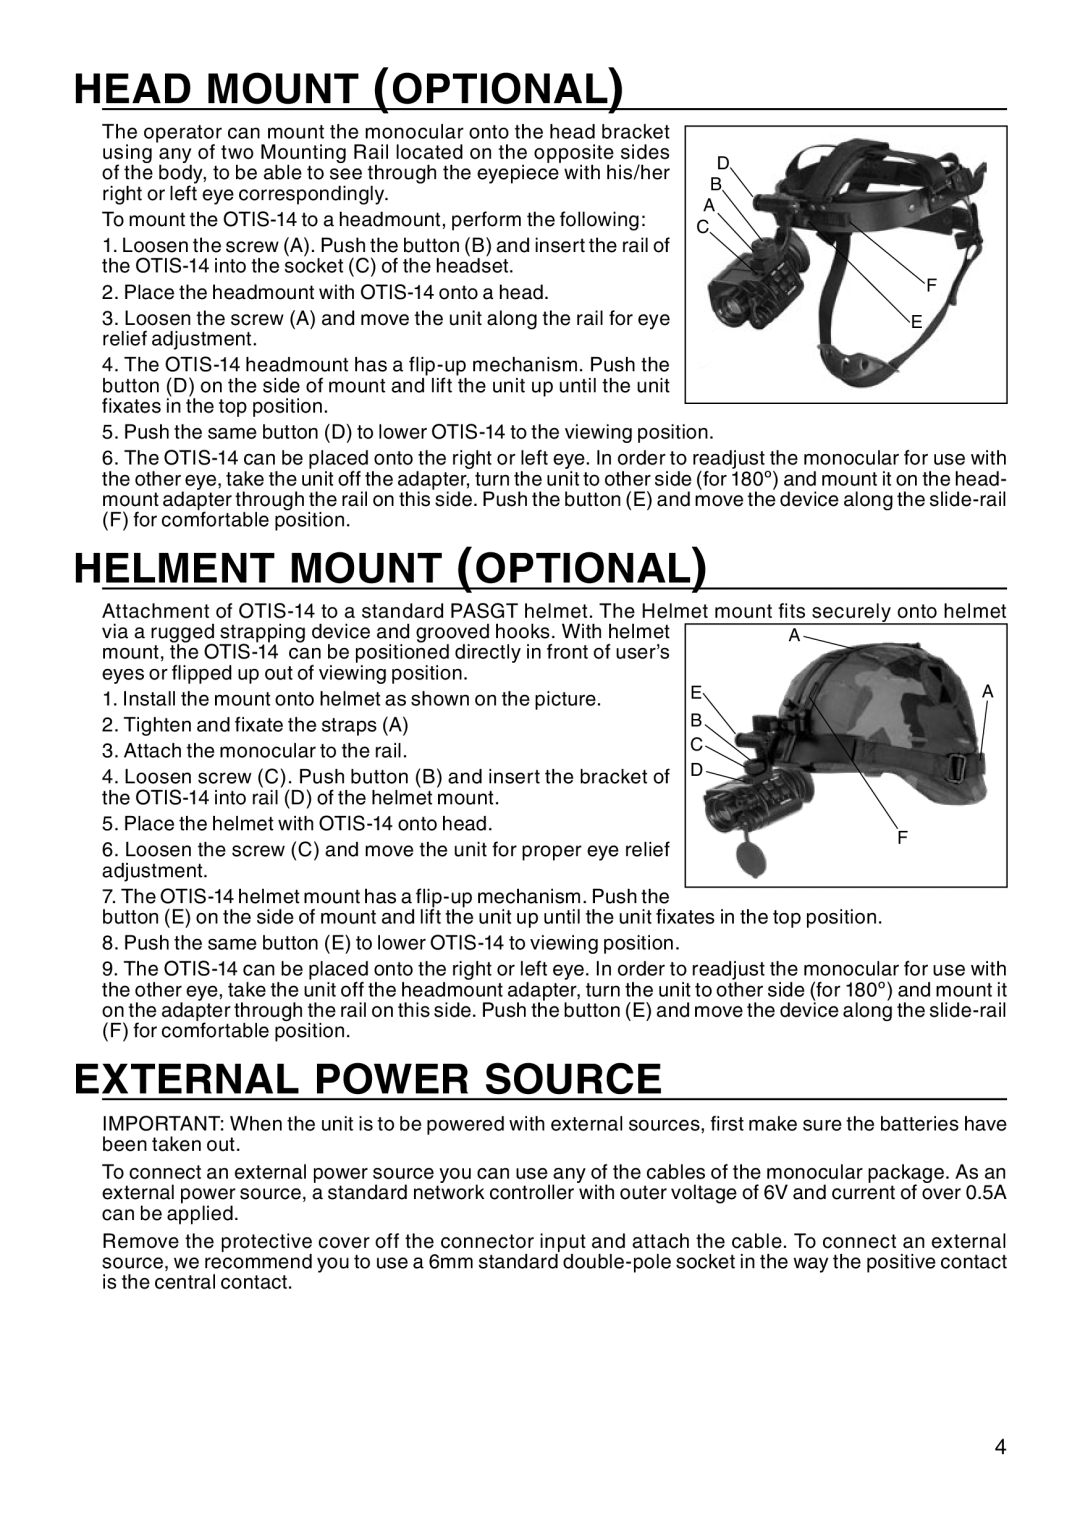
With a focus on user safety, the OTIS-14 includes automatic shut-off capabilities to prevent battery drain, alongside long-lasting battery performance that makes it suitable for extended missions. Its ergonomic design and adjustable straps ensure that it can be comfortably worn on helmets or headgear.
The ATN OTIS-14 exemplifies modern night vision technology, combining sophisticated features with practical usability. Whether for tactical operations, wildlife observation, or nighttime navigation, this device represents a significant advancement in the field of night vision optics, offering users unparalleled performance and reliability in low-light situations.

