5
Pro Series 5 Installation and Operation
Transmitter Door
(Open Positon)
Screwdriver
Channel Selector
Switch
Transmitter
Door
RF Power
Select Switch
Instrument Trim
![]()
![]()
![]() Control (Volume)
Control (Volume)
Microphone Trim
![]()
![]()
![]() Control (Volume)
Control (Volume)
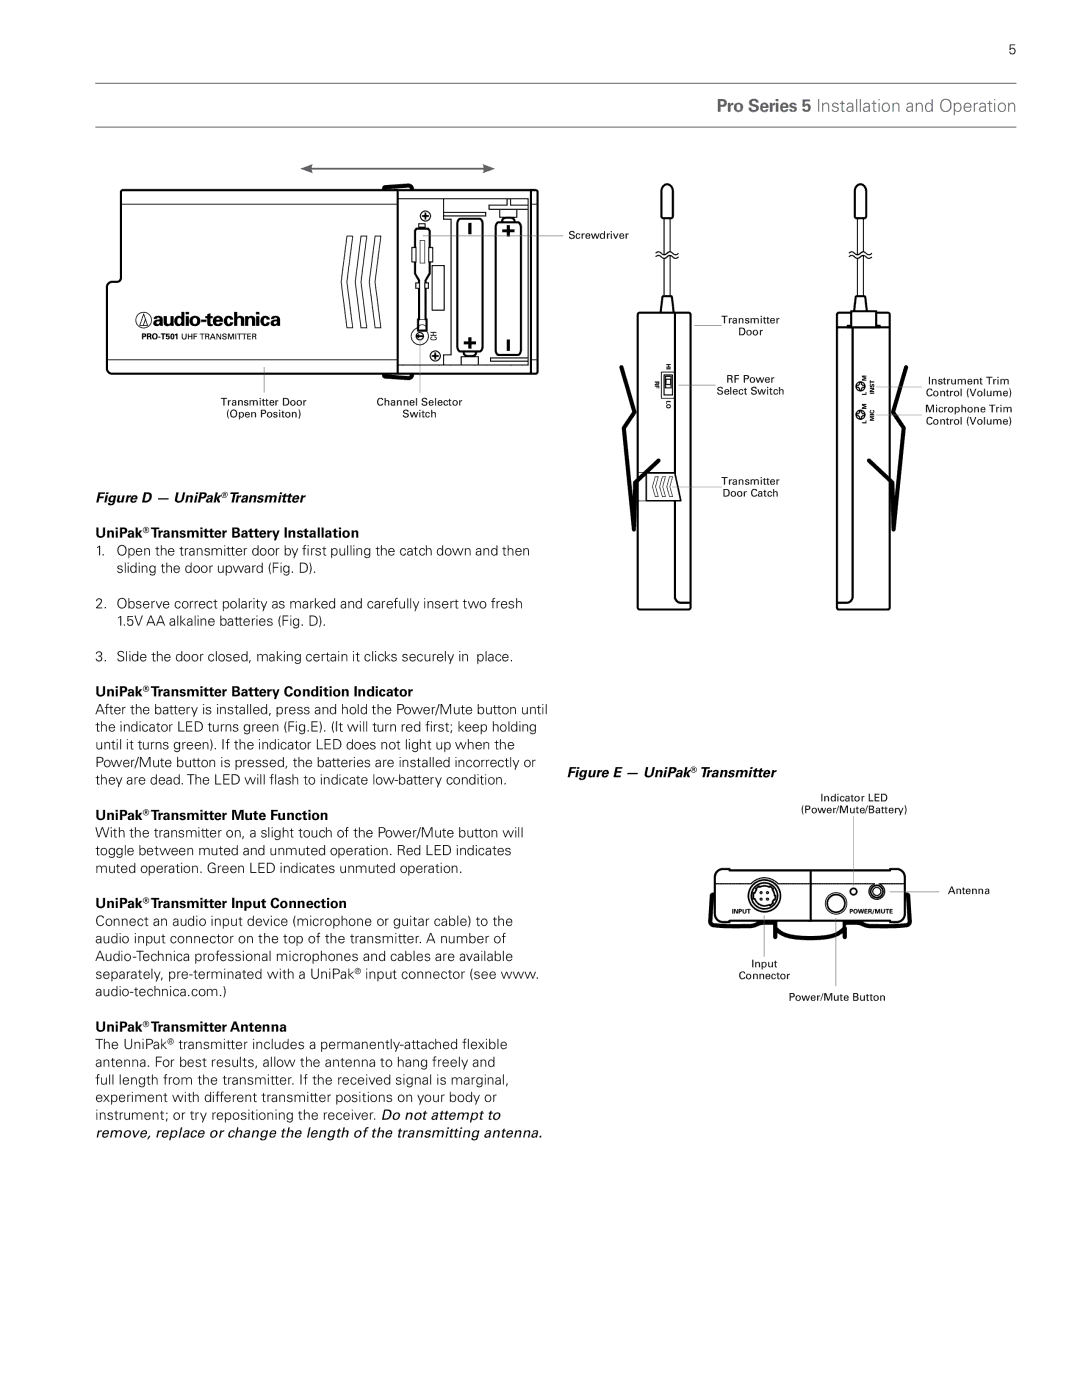
Figure D — UniPak® Transmitter
UniPak® Transmitter Battery Installation
1.Open the transmitter door by first pulling the catch down and then sliding the door upward (Fig. D).
2.Observe correct polarity as marked and carefully insert two fresh 1.5V AA alkaline batteries (Fig. D).
3.Slide the door closed, making certain it clicks securely in place.
UniPak® Transmitter Battery Condition Indicator
After the battery is installed, press and hold the Power/Mute button until the indicator LED turns green (Fig.E). (It will turn red first; keep holding until it turns green). If the indicator LED does not light up when the Power/Mute button is pressed, the batteries are installed incorrectly or they are dead. The LED will flash to indicate
Transmitter
Door Catch
Figure E — UniPak® Transmitter
UniPak® Transmitter Mute Function
With the transmitter on, a slight touch of the Power/Mute button will toggle between muted and unmuted operation. Red LED indicates muted operation. Green LED indicates unmuted operation.
UniPak® Transmitter Input Connection
Connect an audio input device (microphone or guitar cable) to the audio input connector on the top of the transmitter. A number of
UniPak® Transmitter Antenna
The UniPak® transmitter includes a
Indicator LED
(Power/Mute/Battery)
Antenna
Input
Connector
Power/Mute Button
