IV. INSTALLATION OF OVERHEAD CONSOLE.
Caution: Do not overtighten screws. Use extra support for the console until secured to the vehicle. Failure to do so may cause damage to console or installed components.
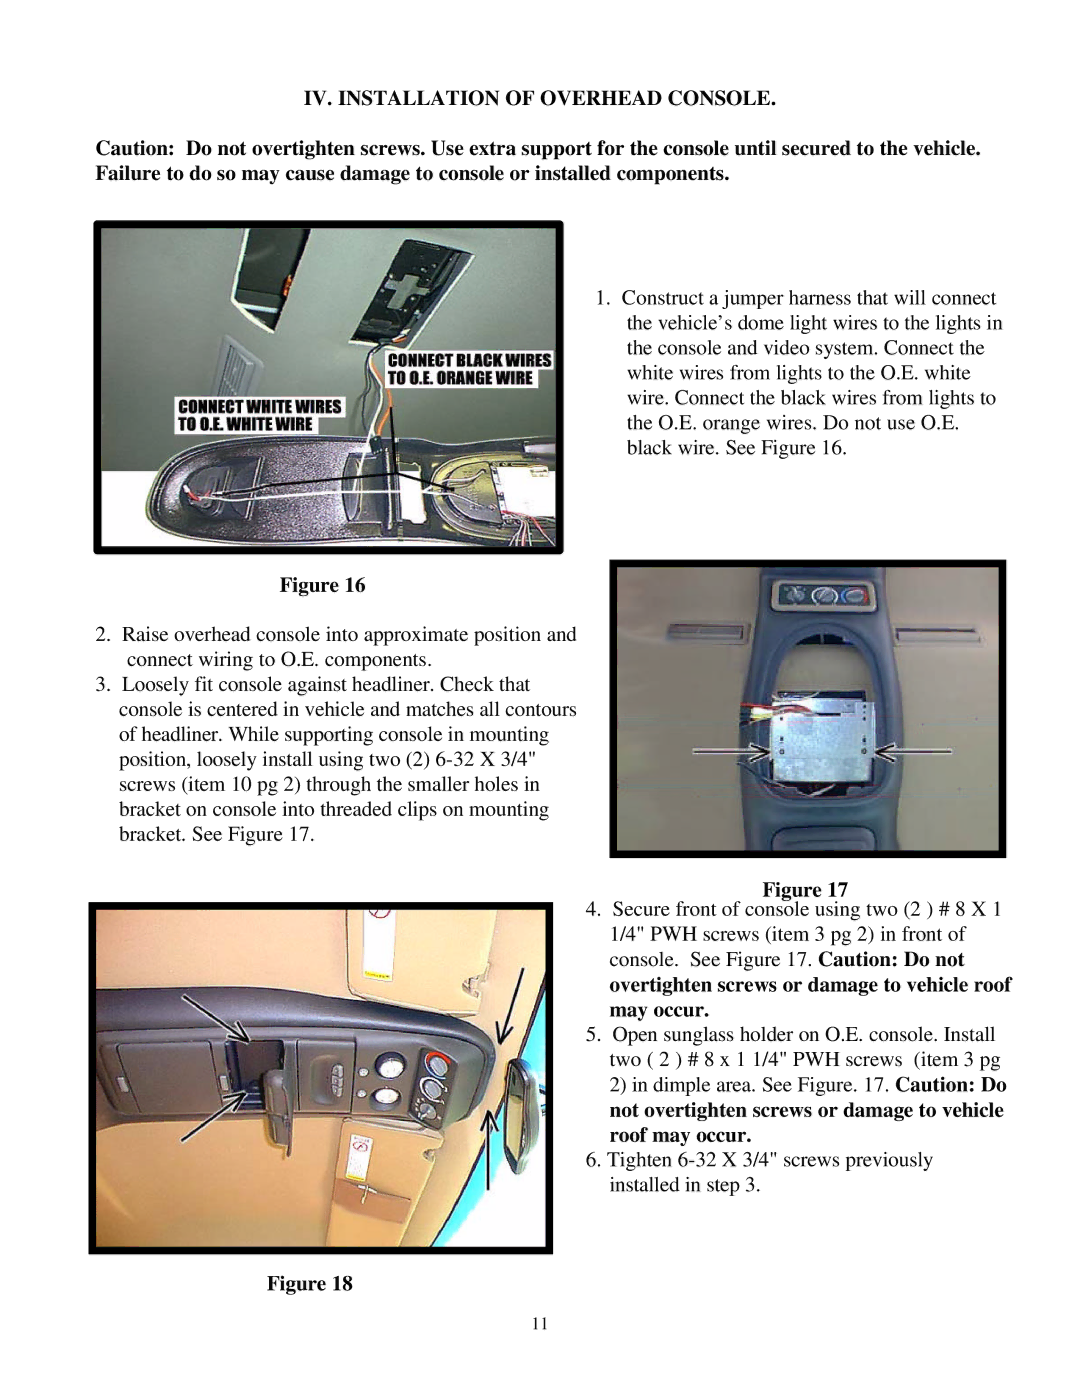
1. Construct a jumper harness that will connect the vehicle’s dome light wires to the lights in the console and video system. Connect the white wires from lights to the O.E. white wire. Connect the black wires from lights to the O.E. orange wires. Do not use O.E. black wire. See Figure 16.
Figure 16
2.Raise overhead console into approximate position and connect wiring to O.E. components.
3.Loosely fit console against headliner. Check that console is centered in vehicle and matches all contours of headliner. While supporting console in mounting position, loosely install using two (2)
Figure 17
4. Secure front of console using two (2 ) # 8 X 1 1/4" PWH screws (item 3 pg 2) in front of console. See Figure 17. Caution: Do not
overtighten screws or damage to vehicle roof may occur.
5. Open sunglass holder on O.E. console. Install two ( 2 ) # 8 x 1 1/4" PWH screws (item 3 pg 2) in dimple area. See Figure. 17. Caution: Do
not overtighten screws or damage to vehicle roof may occur.
6. Tighten
Figure 18
11