REMOVE AND DISCARD (2) TWO SCREWS WHICH SECURE BRACKET TO HOUSING.
SEPARATE HOUSING TOP FROM HOUSING BOTTOM.
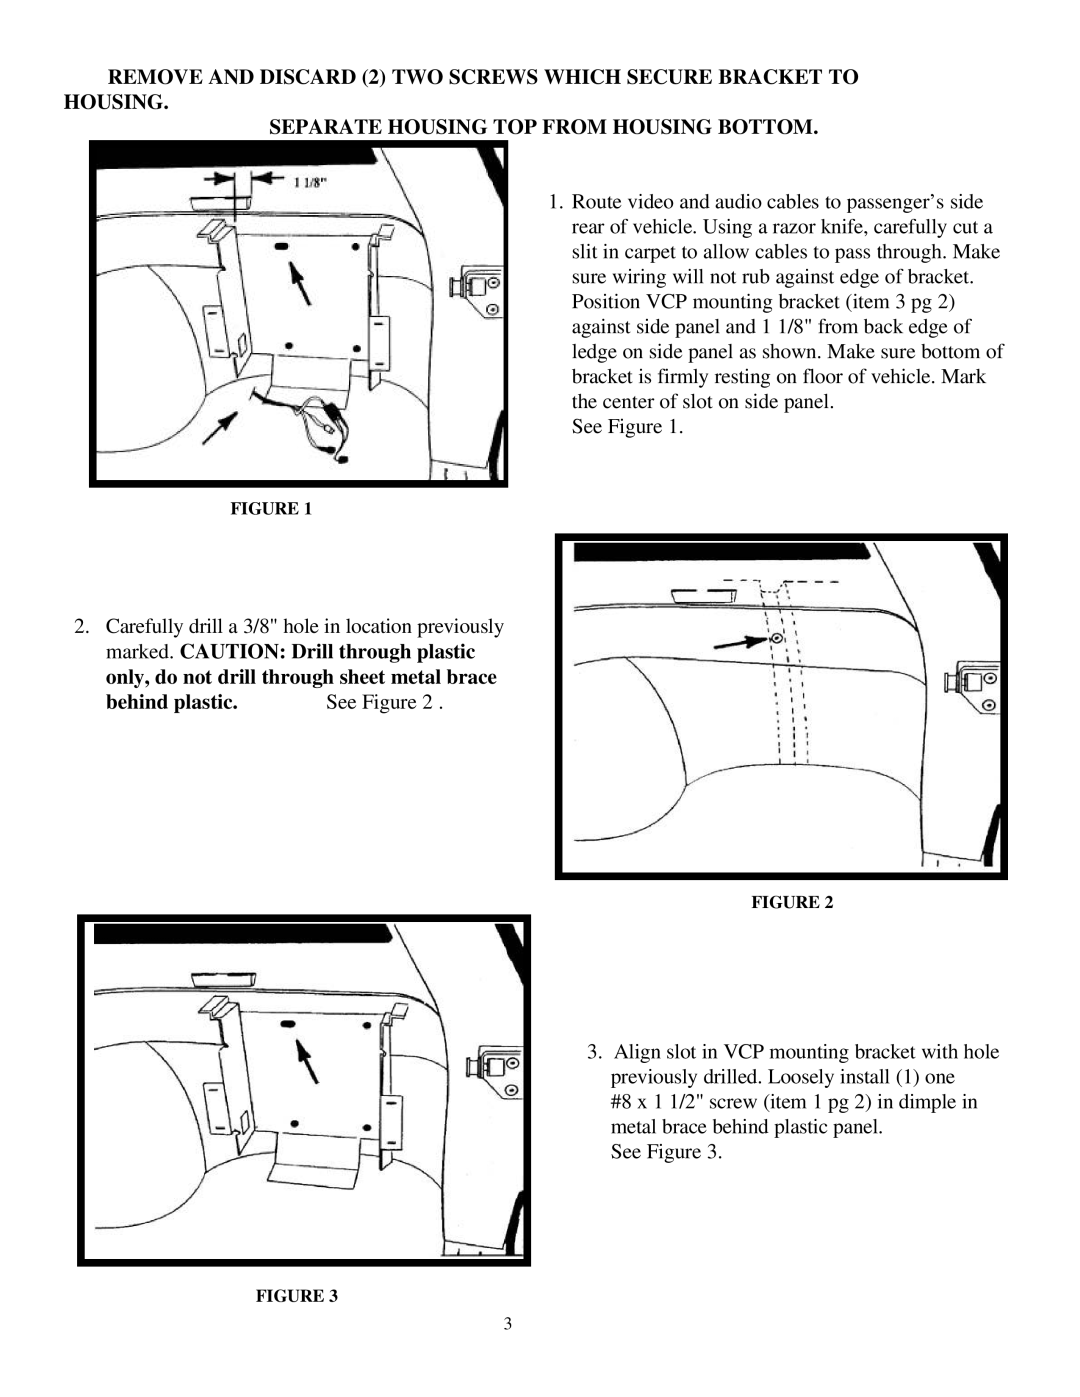
1. Route video and audio cables to passenger’s side rear of vehicle. Using a razor knife, carefully cut a slit in carpet to allow cables to pass through. Make sure wiring will not rub against edge of bracket. Position VCP mounting bracket (item 3 pg 2) against side panel and 1 1/8" from back edge of ledge on side panel as shown. Make sure bottom of bracket is firmly resting on floor of vehicle. Mark the center of slot on side panel.
See Figure 1.
FIGURE 1
2.Carefully drill a 3/8" hole in location previously marked. CAUTION: Drill through plastic
only, do not drill through sheet metal brace
behind plastic. | See Figure 2 . |
FIGURE 2
3. Align slot in VCP mounting bracket with hole previously drilled. Loosely install (1) one
#8 x 1 1/2" screw (item 1 pg 2) in dimple in metal brace behind plastic panel.
See Figure 3.
FIGURE 3
3