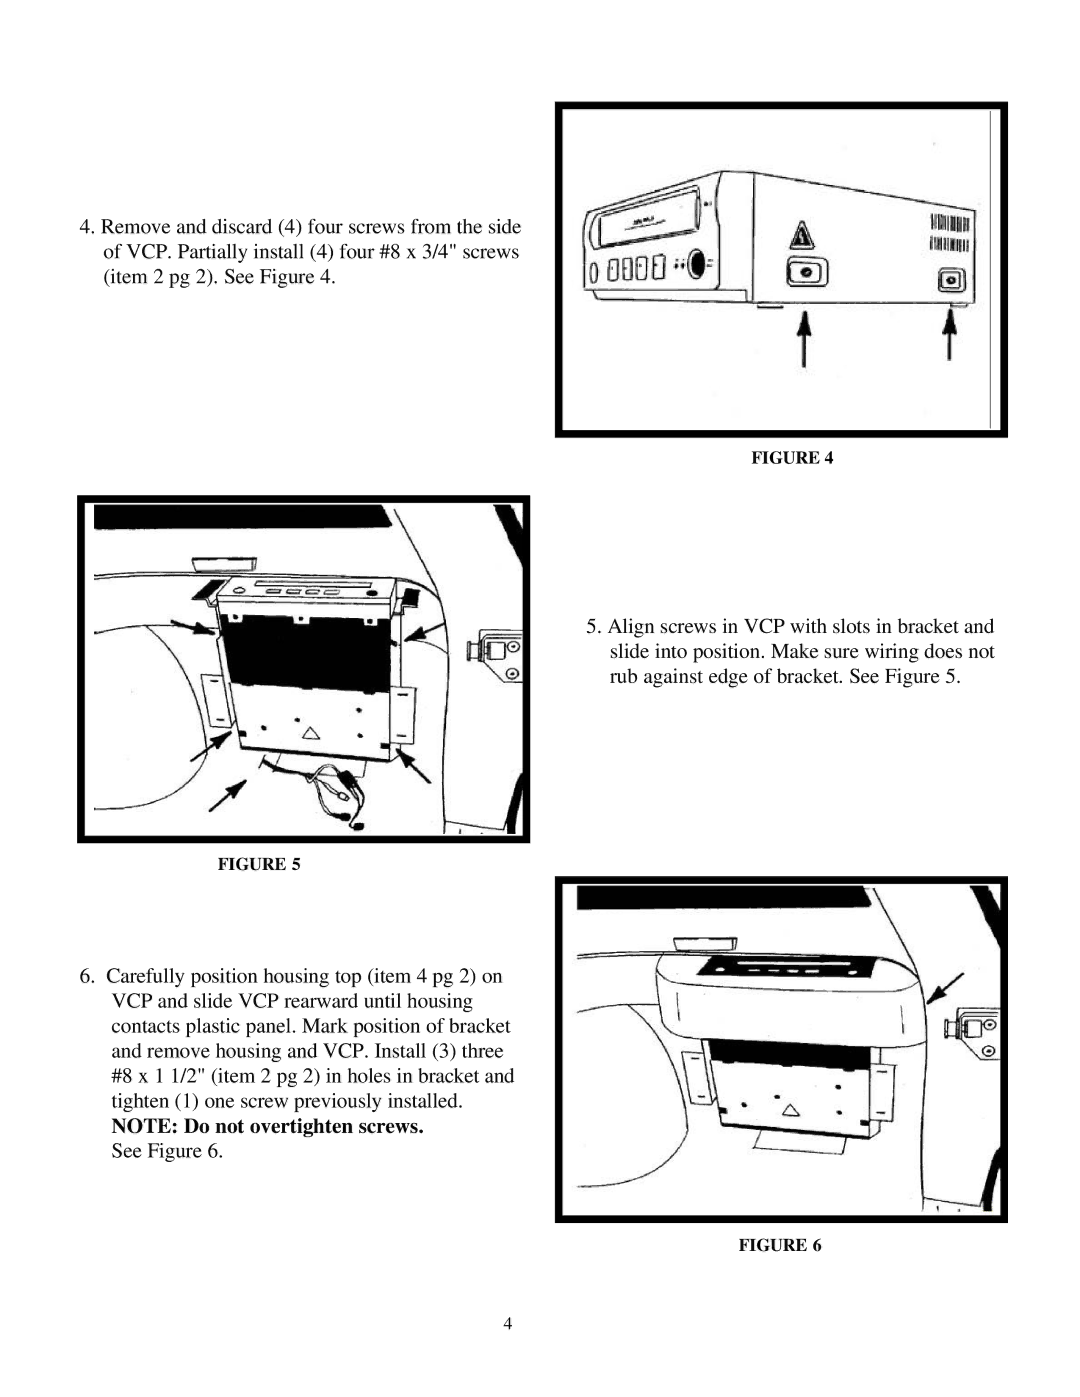
4.Remove and discard (4) four screws from the side of VCP. Partially install (4) four #8 x 3/4" screws (item 2 pg 2). See Figure 4.
FIGURE 4
5. Align screws in VCP with slots in bracket and slide into position. Make sure wiring does not rub against edge of bracket. See Figure 5.
FIGURE 5
6.Carefully position housing top (item 4 pg 2) on VCP and slide VCP rearward until housing contacts plastic panel. Mark position of bracket and remove housing and VCP. Install (3) three #8 x 1 1/2" (item 2 pg 2) in holes in bracket and tighten (1) one screw previously installed.
NOTE: Do not overtighten screws. See Figure 6.
FIGURE 6
4