SETUP
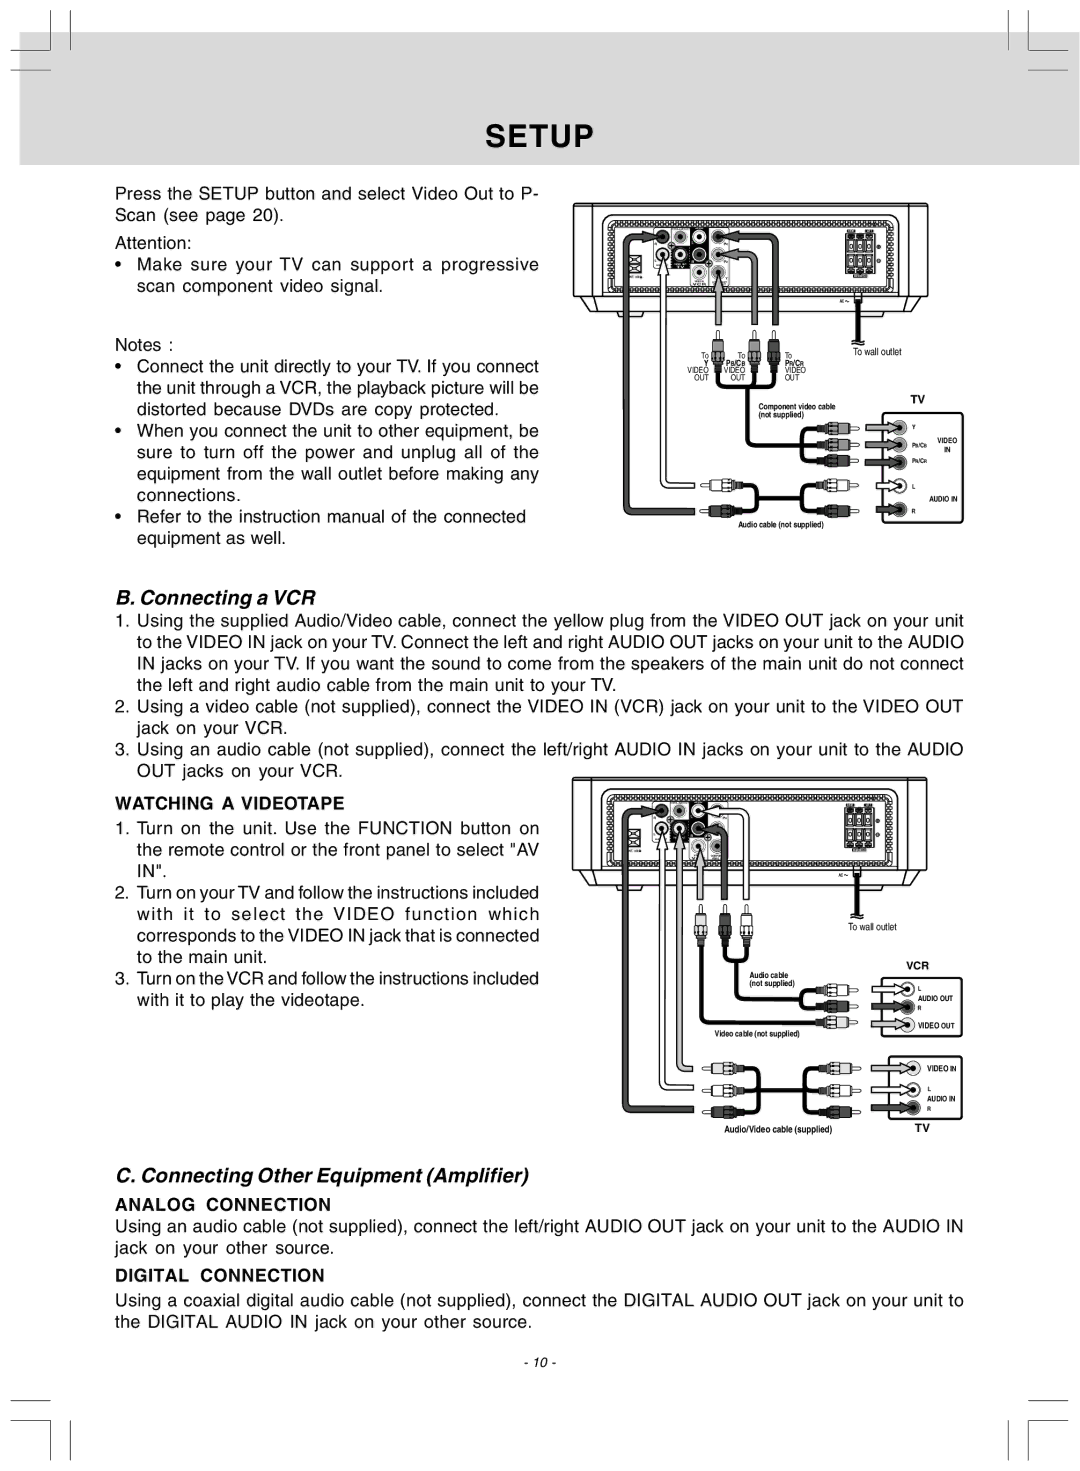
Press the SETUP button and select Video Out to P- Scan (see page 20).
Attention:
•Make sure your TV can support a progressive scan component video signal.
Notes :
• | Connect the unit directly to your TV. If you connect |
| the unit through a VCR, the playback picture will be |
| distorted because DVDs are copy protected. |
• | When you connect the unit to other equipment, be |
|
| RIGHT | LEFT |
R | L | PR |
|
L | R | PB |
|
AUDIO OUT | VIDEO OUT |
|
|
| TV |
|
|
FM ANT. 300 |
| SUBWOOFER |
|
| Y |
| |
|
| VIDEO IN |
|
VCR
AC ![]()
To | To | To | To wall outlet |
Y | PB/CB | PR/CR |
|
VIDEO | VIDEO | VIDEO |
|
OUT | OUT | OUT |
|
TV
Component video cable (not supplied)
Y
VIDEO
sure to turn off the power and unplug all of the |
equipment from the wall outlet before making any |
connections. |
PB/CB
PR/CR
L
IN
• Refer to the instruction manual of the connected |
equipment as well. |
AUDIO IN
R
Audio cable (not supplied)
B. Connecting a VCR
1.Using the supplied Audio/Video cable, connect the yellow plug from the VIDEO OUT jack on your unit to the VIDEO IN jack on your TV. Connect the left and right AUDIO OUT jacks on your unit to the AUDIO IN jacks on your TV. If you want the sound to come from the speakers of the main unit do not connect the left and right audio cable from the main unit to your TV.
2.Using a video cable (not supplied), connect the VIDEO IN (VCR) jack on your unit to the VIDEO OUT jack on your VCR.
3.Using an audio cable (not supplied), connect the left/right AUDIO IN jacks on your unit to the AUDIO OUT jacks on your VCR.
WATCHING A VIDEOTAPE
1.Turn on the unit. Use the FUNCTION button on the remote control or the front panel to select "AV IN".
2.Turn on your TV and follow the instructions included with it to select the VIDEO function which corresponds to the VIDEO IN jack that is connected to the main unit.
3.Turn on the VCR and follow the instructions included with it to play the videotape.
|
| RIGHT | LEFT |
R | L | PR |
|
L | R | PB |
|
AUDIO OUT | VIDEO OUT |
|
|
| TV |
|
|
FM ANT. 300 |
| SUBWOOFER |
|
| Y |
| |
|
| COMPONENT |
|
|
| VIDEO OUT |
|
AC ![]()
To wall outlet
VCR
Audio cable (not supplied)
L
AUDIO OUT
R
VIDEO OUT
Video cable (not supplied)
VIDEO IN
L
AUDIO IN
| R |
Audio/Video cable (supplied) | TV |
C. Connecting Other Equipment (Amplifier)
ANALOG CONNECTION
Using an audio cable (not supplied), connect the left/right AUDIO OUT jack on your unit to the AUDIO IN jack on your other source.
DIGITAL CONNECTION
Using a coaxial digital audio cable (not supplied), connect the DIGITAL AUDIO OUT jack on your unit to the DIGITAL AUDIO IN jack on your other source.
- 10 -