Manuals
/
Audiovox
/
Car Audio and Video
/
Car Stereo System
Audiovox
PAV9
manual
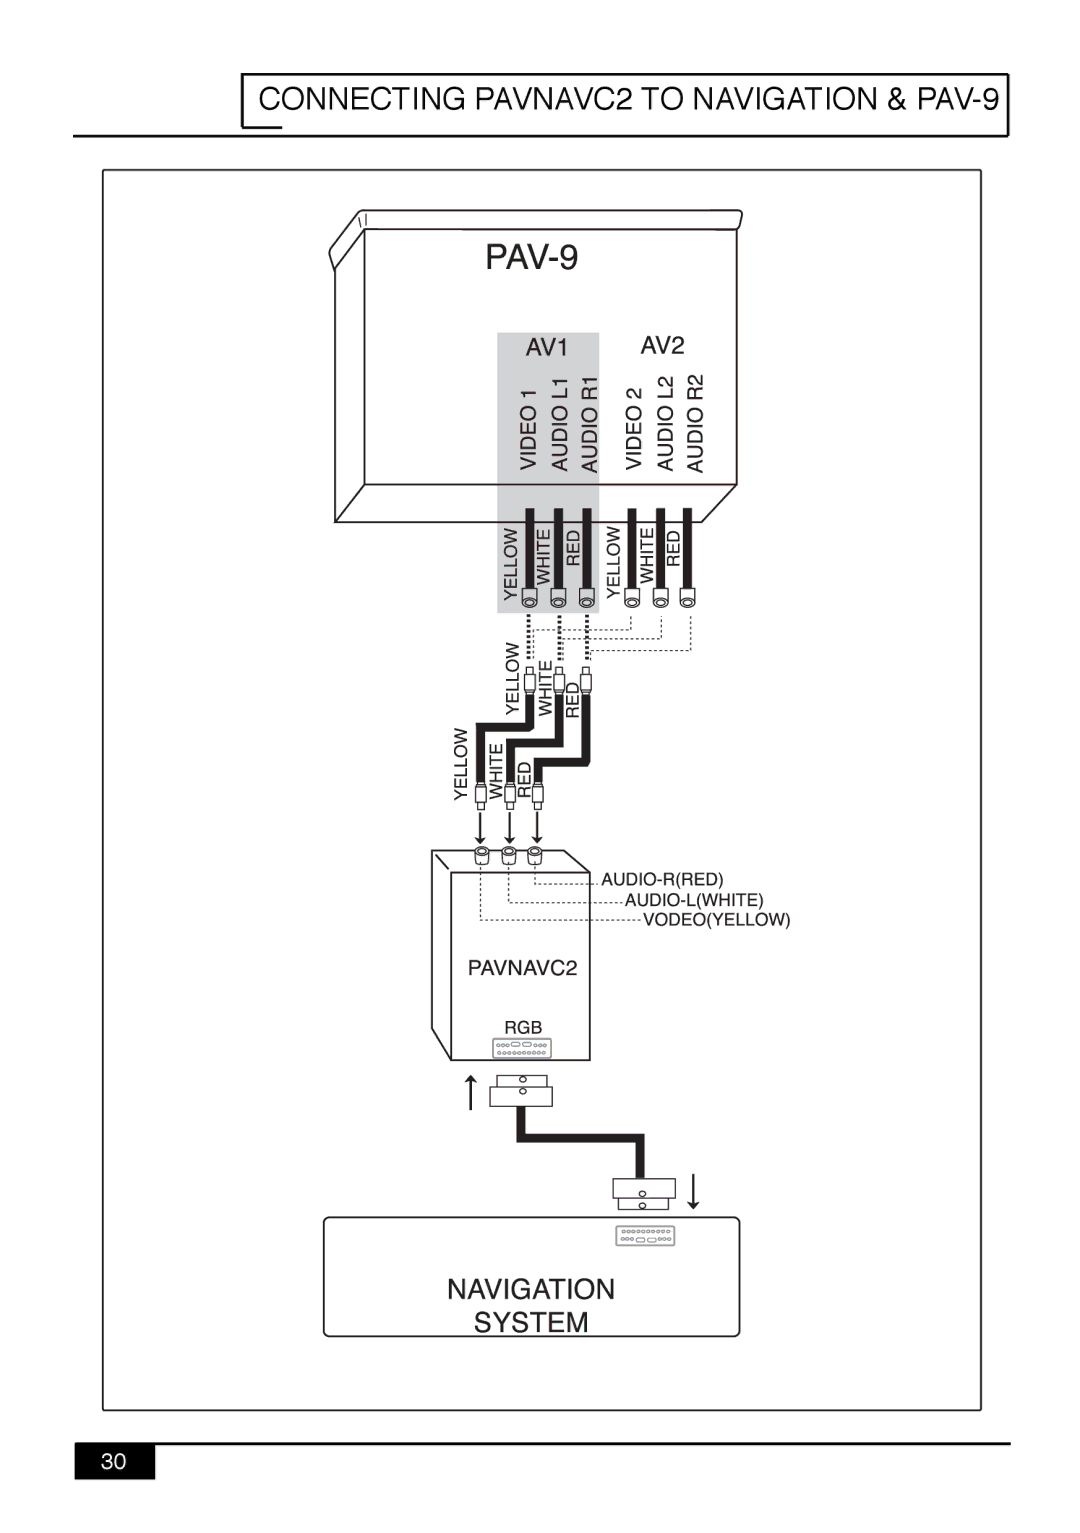
Connecting PAVNAVC2 to Navigation & PAV-9
Models:
PAV9
1
32
36
36
Download
36 pages
43.3 Kb
29
30
31
32
33
34
35
36
Specifications
Install
Password
Wiring Connection
Warranty
Reset
Adjusting the Tilt Posion
Manual Tuning
Setting the Navigation
Temperature
Page 32
Image 32
CONNECTING PAVNAVC2 TO NAVIGATION &
PAV-9
30
Page 31
Page 33
Page 32
Image 32
Page 31
Page 33
Contents
PAV-9
Page
Do not Disassemble or Alter
Do not Raise the Volume Excessively
Temperature
Introduction
Monitor
Remote Control
Remote Control Unit
Power on / OFF
Power on
Power OFF
Basic Operation
To Change Password
Adjusting the Tilt Posion
Closing the Monitor
Adjusting the Slide Position
Selecting Mode
Reset
Adjusting the TV/VIDEO Picture Mode Aspect
Normal Mode
Full Mode
Zoom Mode
Radio SUB Volume User Select Picture Radio Main
Manual Tuning
Radio Control
Manual Storing of Station
Auto Memory of Station
Radio Band
Treble
Bass
SUB Woofer
Watching the Navigation Picture
Setting the Navigation
Navigation
Setting the Camera
Wiring Connection
Camera
Watching the Back View Picture
Disc Changer Volume User Selector Picture OSD OFF
CD/DVD Changer Control
Track Number
Intro Scan
Repeat
Random
Direct CD/DVD Changer Control
Stop
Pause
Play
Volume Adjustment of Each Channel
Adjusting the Volume of Each Channel
Fine Adjustment for Center Frequency and TILT/SLIDE Position
Screen Control
Selecting COLOR/SOUND System
Volume Control on AV Mode
Volume User Selector Picture
Page
AV Input Face Plate of the Unit
Installation
Precautions
Basic Connections
Connecting PAVNAVC2 to Navigation & PAV-9
Connecting to CD Changer and TV Tuner BOX
Specifications
Month Limited Warranty
128-6892
Top
Page
Image
Contents