COUNTERTOP/DESKTOP INSTALLATION
Please take care that the AC Power cable is not connected at the AC outlet!
NOTE: Use caution to avoid damaging the LCD screen and the main unit when con- verting this unit from an
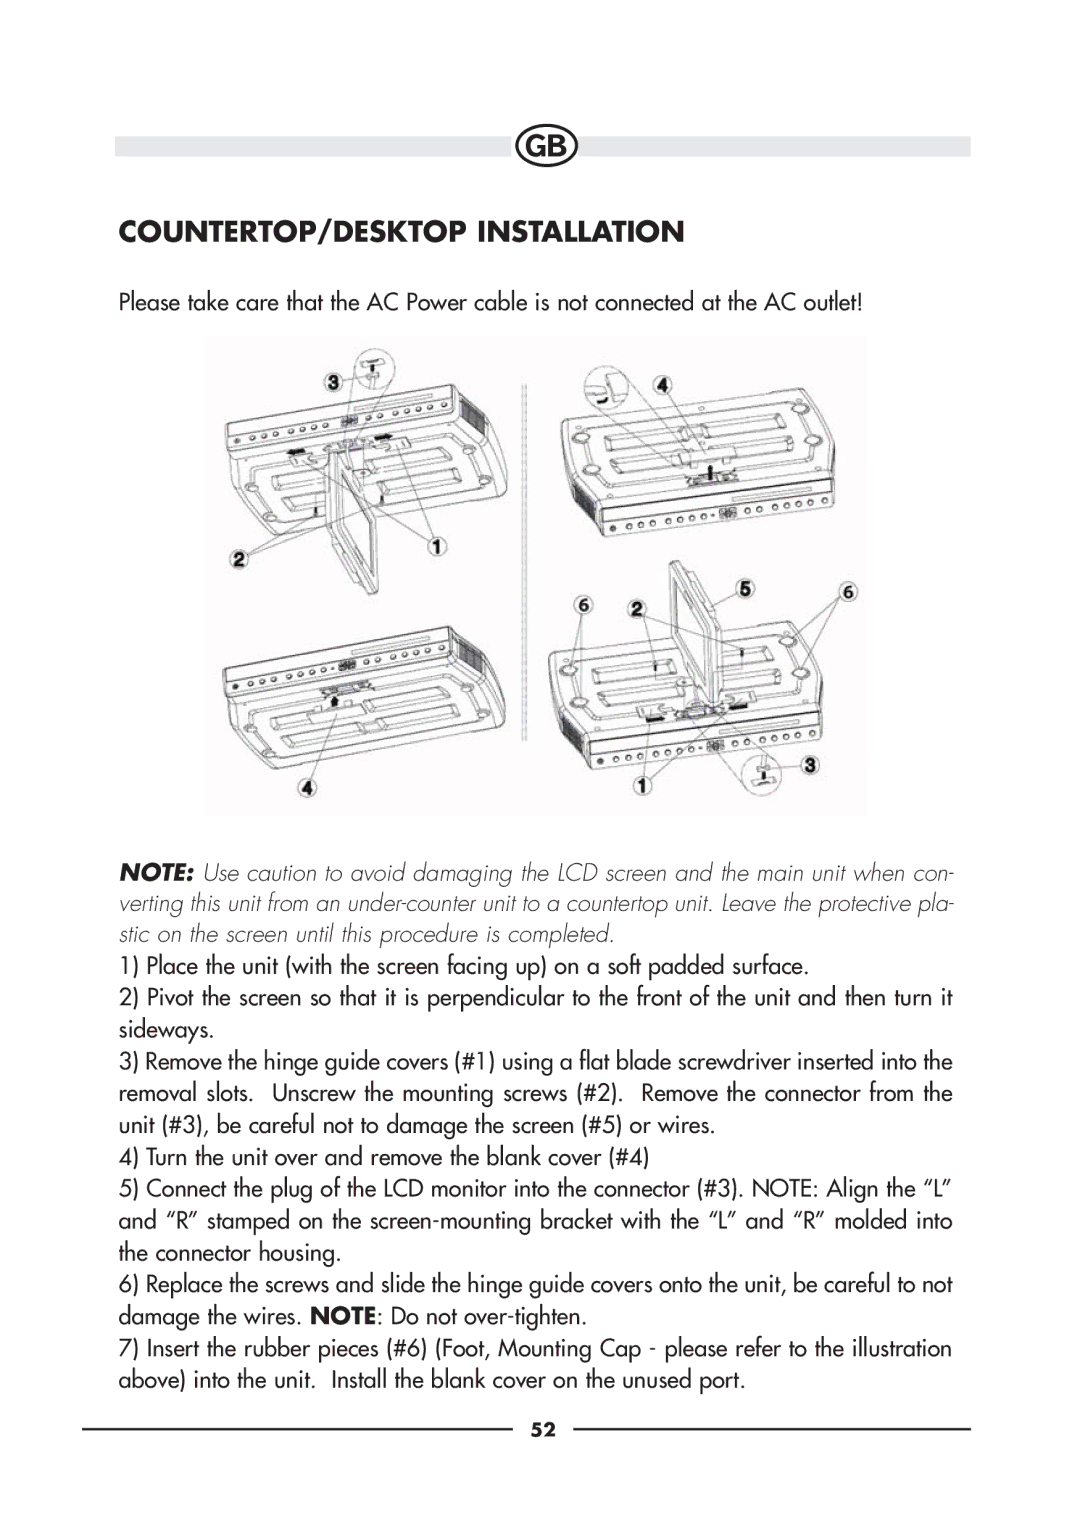
1)Place the unit (with the screen facing up) on a soft padded surface.
2)Pivot the screen so that it is perpendicular to the front of the unit and then turn it sideways.
3)Remove the hinge guide covers (#1) using a flat blade screwdriver inserted into the removal slots. Unscrew the mounting screws (#2). Remove the connector from the unit (#3), be careful not to damage the screen (#5) or wires.
4)Turn the unit over and remove the blank cover (#4)
5)Connect the plug of the LCD monitor into the connector (#3). NOTE: Align the “L” and “R” stamped on the
6)Replace the screws and slide the hinge guide covers onto the unit, be careful to not damage the wires. NOTE: Do not
7)Insert the rubber pieces (#6) (Foot, Mounting Cap - please refer to the illustration above) into the unit. Install the blank cover on the unused port.
52