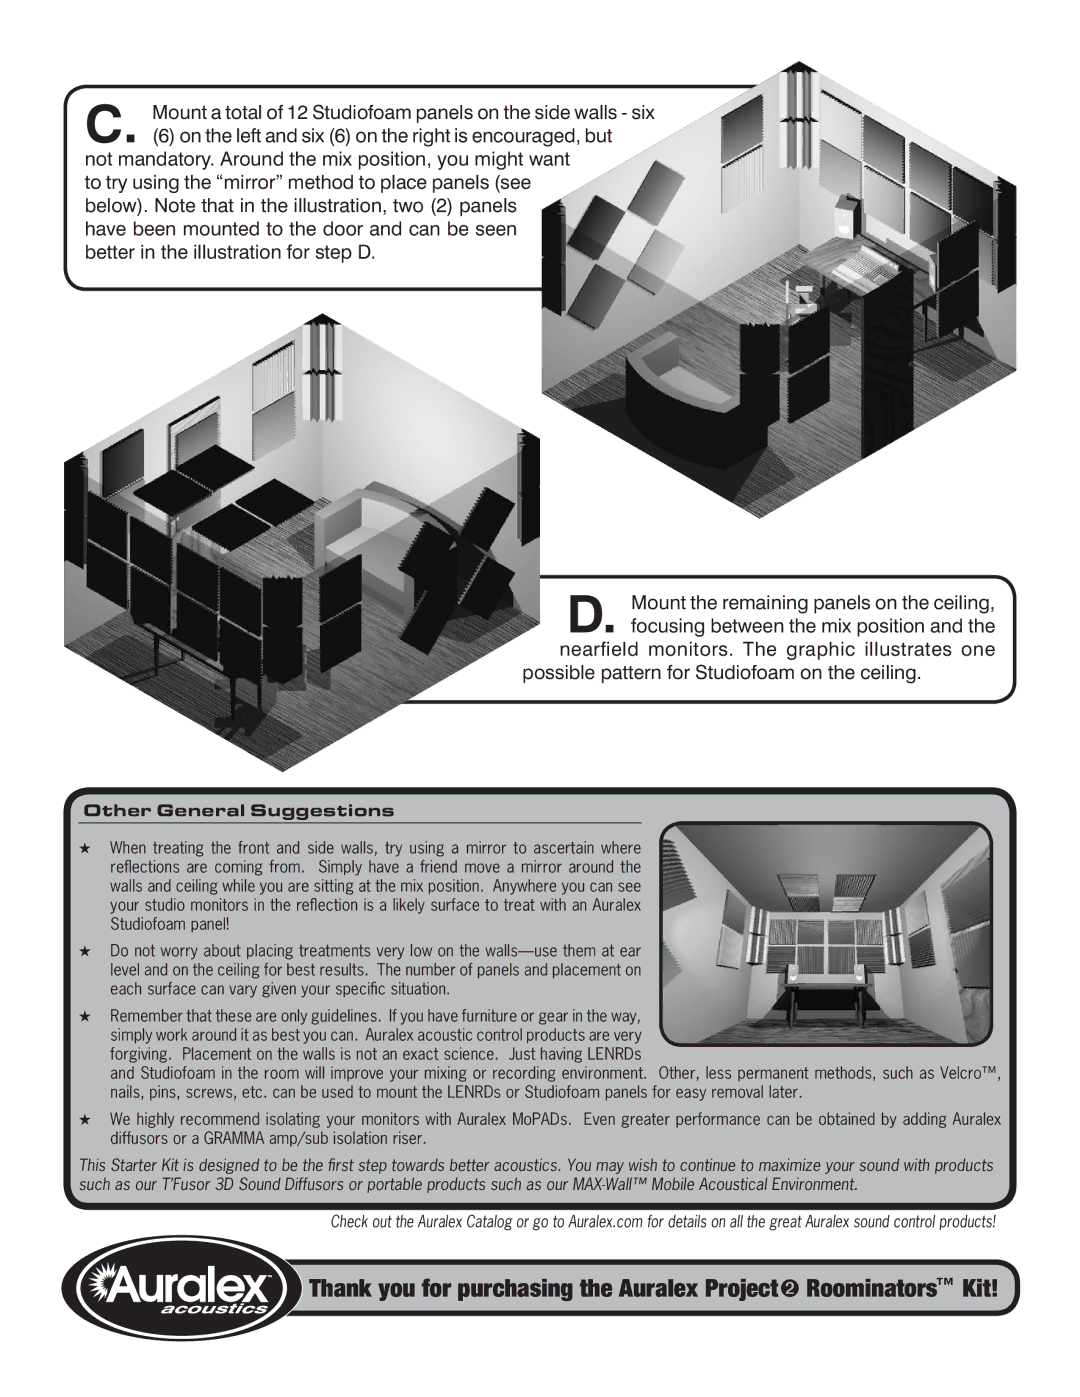
C. Mount a total of 12 Studiofoam panels on the side walls - six
(6) on the left and six (6) on the right is encouraged, but not mandatory. Around the mix position, you might want
to try using the “mirror” method to place panels (see below). Note that in the illustration, two (2) panels have been mounted to the door and can be seen better in the illustration for step D.
D. Mount the remaining panels on the ceiling, focusing between the mix position and the nearfield monitors. The graphic illustrates one
possible pattern for Studiofoam on the ceiling.
Other General Suggestions
When treating the front and side walls, try using a mirror to ascertain where reflections are coming from. Simply have a friend move a mirror around the walls and ceiling while you are sitting at the mix position. Anywhere you can see your studio monitors in the reflection is a likely surface to treat with an Auralex Studiofoam panel!
Do not worry about placing treatments very low on the
Remember that these are only guidelines. If you have furniture or gear in the way, simply work around it as best you can. Auralex acoustic control products are very forgiving. Placement on the walls is not an exact science. Just having LENRDs
and Studiofoam in the room will improve your mixing or recording environment. Other, less permanent methods, such as Velcro™, nails, pins, screws, etc. can be used to mount the LENRDs or Studiofoam panels for easy removal later.
We highly recommend isolating your monitors with Auralex MoPADs. Even greater performance can be obtained by adding Auralex diffusors or a GRAMMA amp/sub isolation riser.
This Starter Kit is designed to be the first step towards better acoustics. You may wish to continue to maximize your sound with products such as our T’Fusor 3D Sound Diffusors or portable products such as our
Check out the Auralex Catalog or go to Auralex.com for details on all the great Auralex sound control products!
Thank you for purchasing the Auralex Project Roominators™ Kit!
