
SFS-184 specifications
Auralex Acoustics SFS-184 is a high-performance acoustic treatment solution designed to enhance sound quality in various environments, such as recording studios, rehearsal spaces, home theaters, and multimedia rooms. This versatile product is part of Auralex's extensive range of acoustic treatments and is specifically engineered to tackle common sound issues like excessive reflections, unwanted echo, and low-frequency buildup.One of the standout features of the SFS-184 is its effective sound absorption capabilities. It is constructed from high-density, lightweight materials that excel at absorbing sound waves across a wide frequency range. This allows for clearer sound reproduction, making it an invaluable asset in any space where audio quality is paramount. The design fosters an optimized listening experience, ensuring that music, vocals, and dialogue are rendered with remarkable clarity.
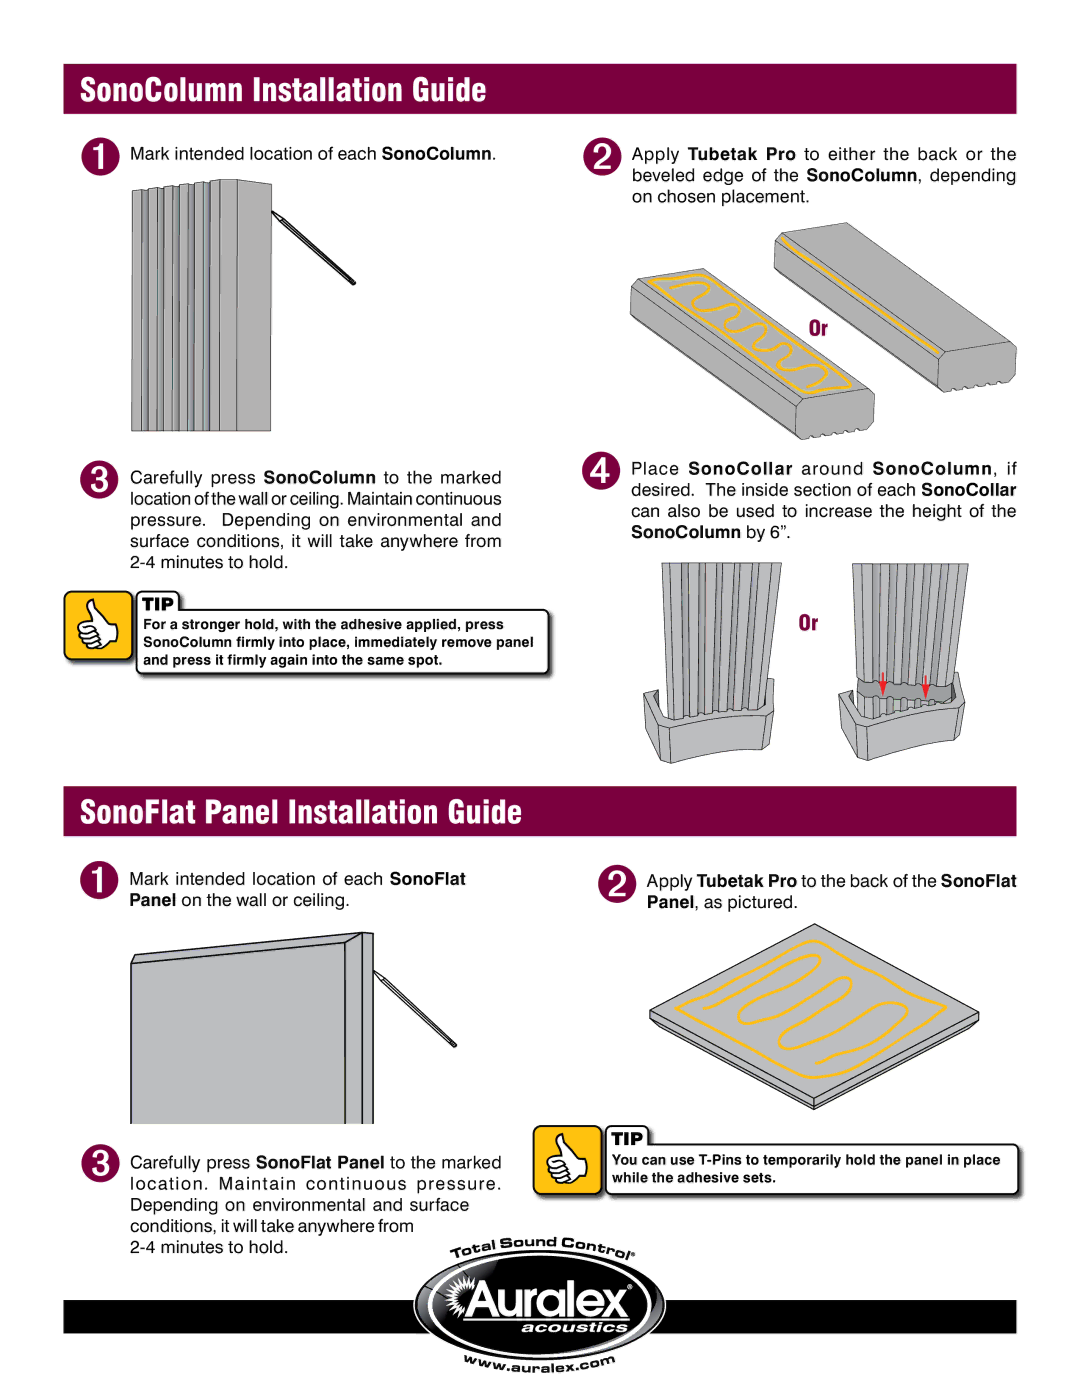
The SFS-184 panel is particularly noteworthy for its versatility. It can be easily installed in various configurations, whether mounted to walls or suspended from ceilings. This flexibility allows users to customize their acoustic treatment to meet specific needs and optimize the sound profile of their environment. Its sleek aesthetic and multiple color options also enable seamless integration into existing decor, enhancing both functionality and visual appeal.
In terms of technology, Auralex employs advanced testing and development processes to ensure that the SFS-184 meets high industry standards for performance. The use of proprietary materials contributes to its superior acoustic properties, and the panel is designed to minimize resonance and standing waves, which can often plague untreated spaces.
Durability is another key characteristic of the SFS-184, as it is made from materials that resist wear and tear over time. This ensures that the panels maintain their effectiveness and appearance, providing long-lasting acoustic treatment solutions. The product's commitment to eco-friendliness is also notable, as Auralex prioritizes sustainable manufacturing practices, making the SFS-184 a responsible choice for environmentally-conscious consumers.
In conclusion, Auralex Acoustics SFS-184 is a high-quality acoustic treatment option that effectively enhances sound quality through its advanced materials and technologies. Its blend of performance, versatility, and aesthetic appeal makes it an ideal choice for musicians, audio professionals, and anyone seeking to improve their acoustic environment. By choosing the SFS-184, users invest in a product that not only meets their sound treatment needs but also contributes to a more enjoyable audio experience.