18
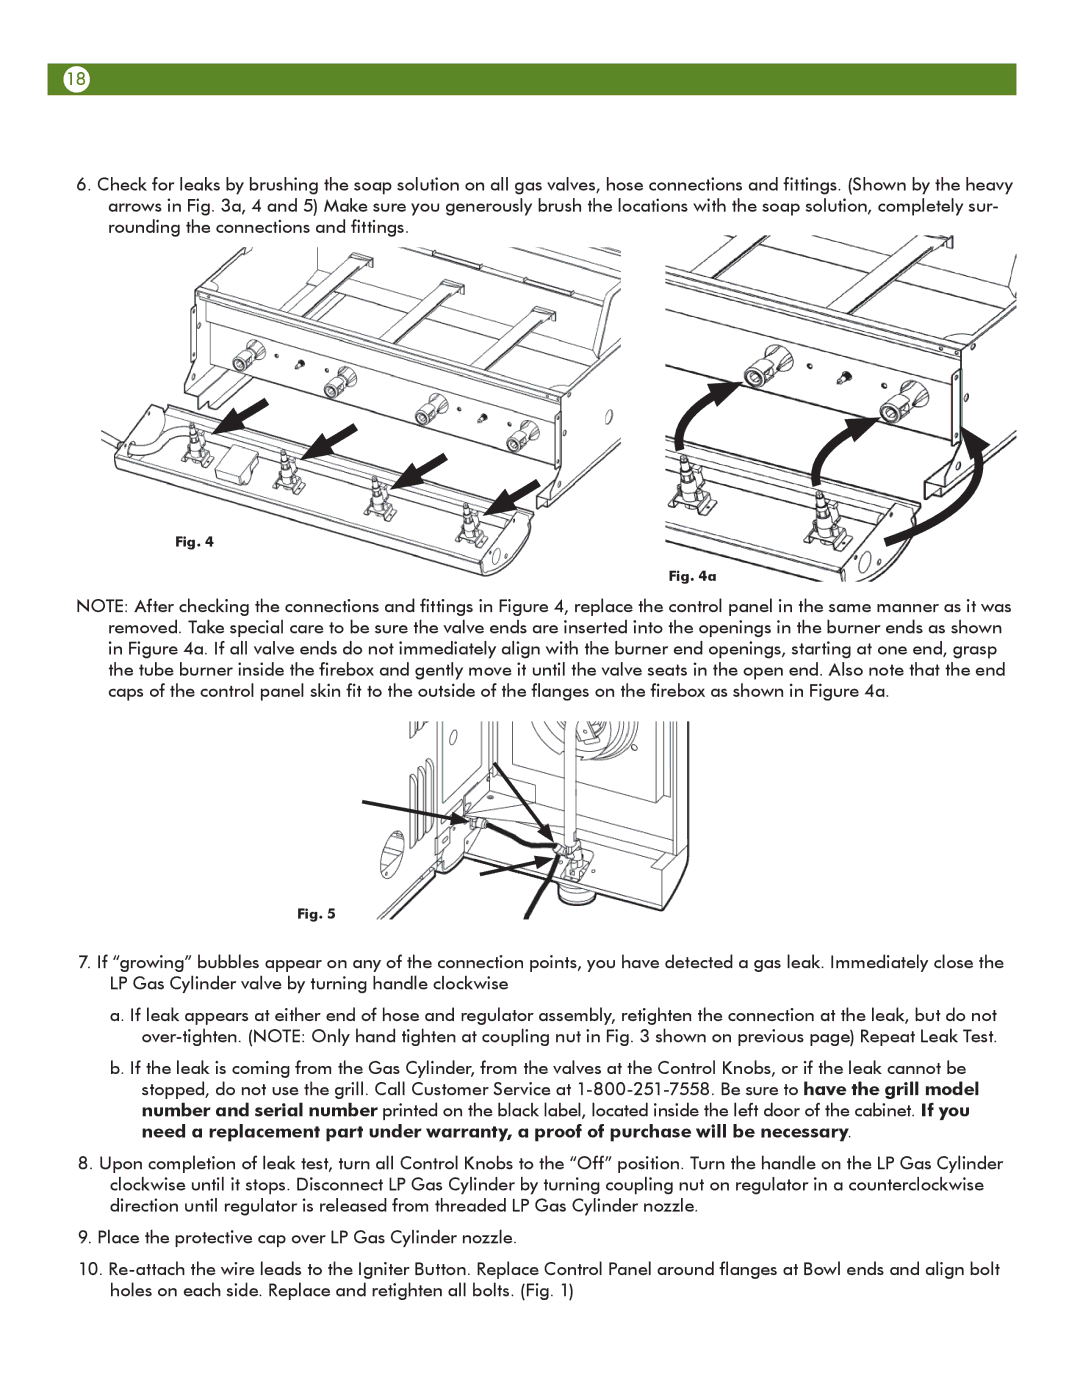
6.Check for leaks by brushing the soap solution on all gas valves, hose connections and fittings. (Shown by the heavy arrows in Fig. 3a, 4 and 5) Make sure you generously brush the locations with the soap solution, completely sur- rounding the connections and fittings.
Fig. 4
Fig. 4a
NOTE: After checking the connections and fittings in Figure 4, replace the control panel in the same manner as it was removed. Take special care to be sure the valve ends are inserted into the openings in the burner ends as shown in Figure 4a. If all valve ends do not immediately align with the burner end openings, starting at one end, grasp the tube burner inside the firebox and gently move it until the valve seats in the open end. Also note that the end caps of the control panel skin fit to the outside of the flanges on the firebox as shown in Figure 4a.
Fig. 5
7.If “growing” bubbles appear on any of the connection points, you have detected a gas leak. Immediately close the LP Gas Cylinder valve by turning handle clockwise
a.If leak appears at either end of hose and regulator assembly, retighten the connection at the leak, but do not
b.If the leak is coming from the Gas Cylinder, from the valves at the Control Knobs, or if the leak cannot be stopped, do not use the grill. Call Customer Service at
8.Upon completion of leak test, turn all Control Knobs to the “Off” position. Turn the handle on the LP Gas Cylinder clockwise until it stops. Disconnect LP Gas Cylinder by turning coupling nut on regulator in a counterclockwise direction until regulator is released from threaded LP Gas Cylinder nozzle.
9.Place the protective cap over LP Gas Cylinder nozzle.
10.